The Best Fluffy Pancakes recipe you will fall in love with. Full of tips and tricks to help you make the best pancakes.
Introduction
Looking for a protein-packed snack that’s healthy, vegan-friendly, and requires no oven? These No-Bake Chickpea Protein Bars are the ultimate solution. Made with creamy chickpeas, nut butter, rolled oats, and a touch of natural sweetener, these bars are perfect for post-workout fuel, busy mornings, or a grab-and-go afternoon snack.
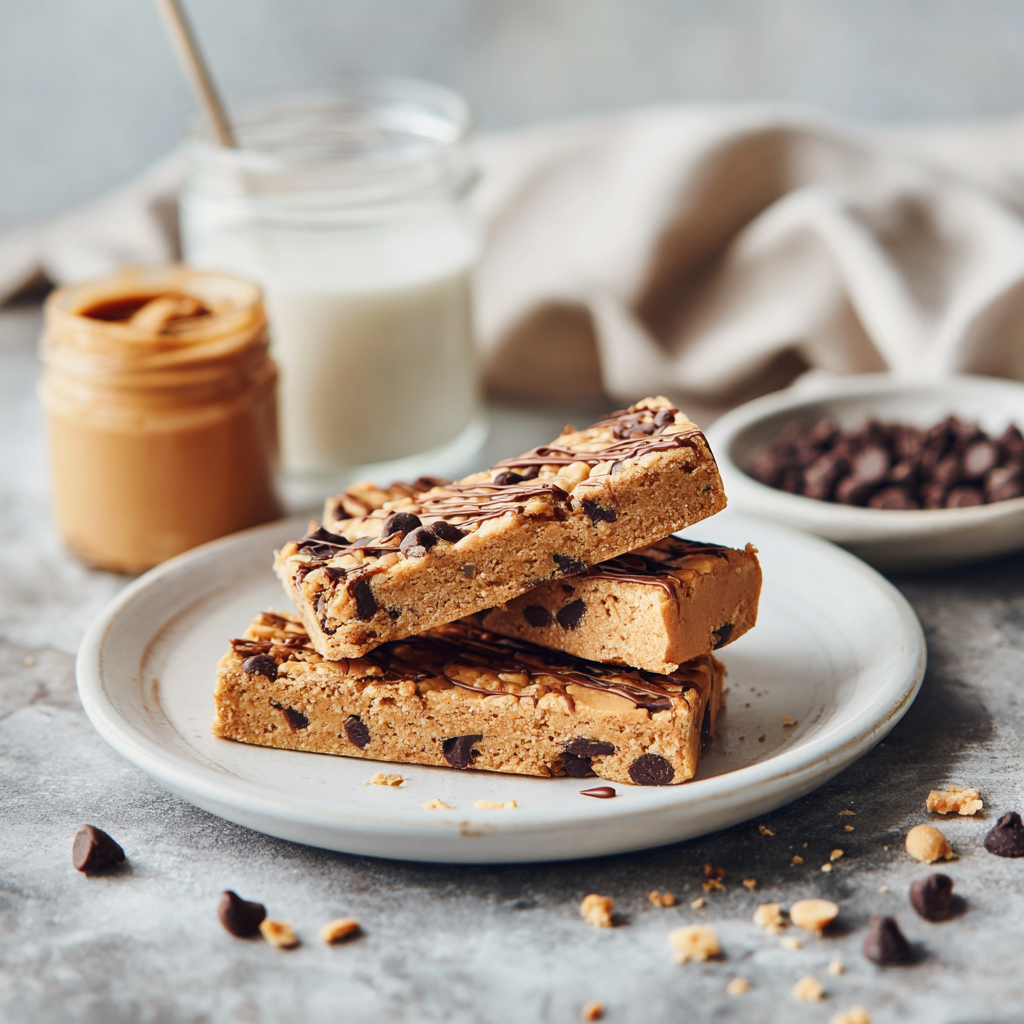
Chickpeas provide plant-based protein and fiber, while nut butter adds healthy fats and flavor. By skipping baking, you save time without sacrificing texture or taste. The optional chocolate chips or cacao drizzle adds a touch of indulgence while keeping these bars nutritious. Whether you’re meal prepping, following a vegan diet, or just need a quick energy boost, these bars are your new pantry staple.
Ingredients
- 1 can (15 oz) chickpeas, drained and rinsed
- 1 cup natural peanut butter (or almond butter)
- 1/4 cup honey or maple syrup
- 1/2 cup rolled oats
- 1/4 cup vegan protein powder (vanilla or chocolate)
- 1/4 cup mini chocolate chips (optional)
- 1 tsp vanilla extract
- 1/4 tsp salt
- Optional: 2 tbsp chia seeds, flaxseeds, or shredded coconut for extra texture

Instructions
- Prepare chickpeas: Drain and rinse canned chickpeas. Pat dry with a paper towel to remove excess moisture.
- Blend base ingredients: In a food processor, combine chickpeas, peanut butter, honey (or maple syrup), vanilla extract, and salt. Process until smooth and creamy.
- Mix in dry ingredients: Transfer mixture to a large mixing bowl. Fold in rolled oats, protein powder, and optional chocolate chips or seeds until evenly combined.
- Shape the bars: Line an 8×8-inch baking dish with parchment paper. Press mixture firmly into the dish in an even layer. Use the back of a spoon or spatula to smooth the top.
- Chill: Refrigerate for at least 1–2 hours until firm.
- Cut and serve: Lift the mixture out using the parchment paper. Cut into 8–12 bars, depending on desired size. Store in an airtight container in the fridge for up to 5 days.
- Optional: Drizzle melted chocolate or a thin layer of nut butter on top before chilling for an extra decadent touch.
Tips for the Perfect No-Bake Bars
- Consistency check: If mixture is too dry, add 1–2 tsp of water or additional nut butter. If too sticky, add a bit more oats or protein powder.
- Vegan option: Use maple syrup instead of honey to make completely vegan.
- Flavor variations: Add cinnamon, cocoa powder, or dried fruit for a unique twist.
- Storage: Bars can also be frozen for up to a month. Thaw in the fridge before eating.
- Protein boost: Increase protein content by adding an extra 1–2 tbsp of protein powder or hemp seeds.
Serving Suggestions
- Enjoy as a mid-morning or post-workout snack.
- Pair with a smoothie or a glass of almond milk for a complete mini-meal.
- Chop into smaller pieces for lunchbox-friendly snack bites.
- Sprinkle with shredded coconut or drizzle with dark chocolate for extra indulgence.

Fun Facts & Cultural Context
Chickpeas have been a dietary staple in Mediterranean, Middle Eastern, and South Asian cuisines for thousands of years. Known as garbanzo beans, they’re high in plant-based protein, fiber, and essential vitamins. Turning chickpeas into protein bars is a modern, functional twist that merges traditional nutrition with contemporary health trends.
No-bake bars have surged in popularity due to their convenience, minimal cleanup, and nutrient-dense profiles. Perfect for fitness enthusiasts, busy professionals, and families, these bars highlight the versatility of legumes beyond soups, salads, or hummus.
Variations
- Chocolate Peanut Butter: Add 2 tbsp cocoa powder and top with chocolate drizzle.
- Nut-Free Option: Swap peanut butter for sunflower seed butter or tahini.
- Fruit & Seed: Fold in dried cranberries, pumpkin seeds, or raisins for extra texture.
- Cinnamon Spice: Add 1 tsp cinnamon and 1/4 tsp nutmeg for a warm, cozy flavor.
Why This Recipe Works
- Plant-based protein: Chickpeas provide sustainable, vegan-friendly protein.
- Quick & easy: No baking, minimal prep, and ready in under 20 minutes.
- Versatile and customizable: Sweet, nutty, or chocolatey — you choose.
- Portable: Perfect for lunchboxes, road trips, or quick post-gym snacks.
Conclusion
The No-Bake Chickpea Protein Bars are a quick, nutritious, and satisfying snack that keeps you energized throughout the day. Creamy, slightly sweet, and high in protein, they prove that healthy snacks don’t have to be boring. With endless customization options, these bars are ideal for anyone looking to snack smarter, prep ahead, or simply enjoy a delicious, guilt-free treat.
No-Bake Chickpea Protein Bars
Healthy, high-protein, no-bake bars made from chickpeas, nut butter, oats, and optional chocolate chips for a quick energy snack.
Ingredients
Equipment
Method
- Drain and rinse chickpeas, pat dry.
- In a food processor, blend chickpeas, peanut butter, honey, vanilla, and salt until smooth.
- Transfer to a mixing bowl and fold in rolled oats, protein powder, and optional chocolate chips or seeds.
- Press mixture firmly into an 8×8-inch dish lined with parchment paper.
- Refrigerate 1–2 hours until firm.
- Lift mixture with parchment paper and cut into 8–12 bars.
- Optional: drizzle with melted chocolate or nut butter before chilling.
Notes
Bars keep in fridge for up to 5 days, or freeze for up to 1 month.