The Best Fluffy Pancakes recipe you will fall in love with. Full of tips and tricks to help you make the best pancakes.
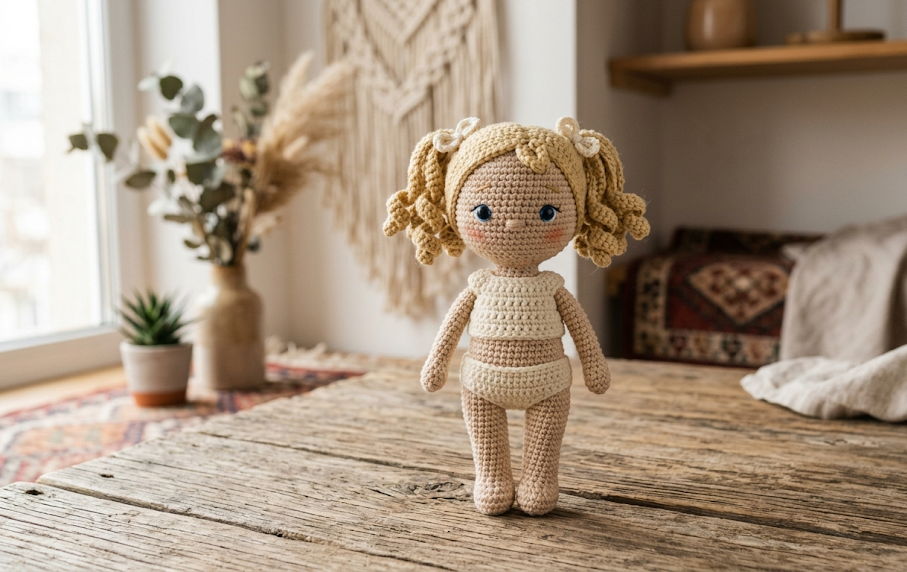
A complete free crochet pattern for a sweet amigurumi doll with curly pigtails, perfect for gifting or display
There is something truly magical about crocheting a doll from scratch. Watching a simple skein of yarn transform into a beautiful little girl with flowing curly pigtails, rosy cheeks, and tiny details is one of the most rewarding projects any crocheter can take on. This free amigurumi doll crochet pattern is designed for intermediate crocheters who are comfortable with the magic ring, working in the round, and basic shaping techniques. The finished doll stands approximately 28–32 cm (11–12.5 inches) tall and makes an absolutely gorgeous handmade gift for children or a beautiful decorative piece for nurseries, shelves, and gift baskets.
Whether this is your first amigurumi doll or you have made dozens, this pattern walks through every step with clear instructions, helpful tips, and creative variation ideas. Save it, pin it, and share it — and do not forget to tag your finished doll with #FoodiePlumCrochet so we can admire your beautiful work!
|
Difficulty
Intermediate
|
Time
8–12 Hours
|
Hook Size
2.5mm – 3.0mm
|
Yarn Weight
DK / Weight 3
|
Finished Size
28–32 cm / 11–12.5 in
|
Materials Needed
- Main yarn: DK weight or Light Worsted (Weight 3) in sandy beige / skin tone — approximately 150g
- Accent yarn: Cream or off-white DK weight yarn for the underpants — approximately 30g
- Hair yarn: Blonde or golden DK yarn for the pigtails and bangs — approximately 50g
- Crochet hook: 2.5mm or 3.0mm (adjust for tension)
- Safety eyes: 10mm–12mm blue safety eyes (2 pieces)
- Polyester fiberfill stuffing
- Yarn needle for seaming and weaving in ends
- Stitch markers
- Pink embroidery floss for blush cheeks
- Black embroidery floss for eyebrows and eyelashes
- Scissors
Abbreviations
- MR – Magic Ring
- sc – single crochet
- inc – increase (2 sc in same stitch)
- dec – invisible decrease (insert hook in front loops of next 2 stitches and sc together)
- sl st – slip stitch
- ch – chain
- BLO – back loop only
- FLO – front loop only
- st(s) – stitch(es)
- rnd – round
- rep – repeat
- ( ) – repeat instructions inside brackets the number of times indicated
Gauge
Approximately 5 sc x 5 rows = 2.5 cm (1 inch) using a 2.5mm hook with DK weight yarn. Tension should produce a tight fabric so stuffing does not show through.
Full Pattern Instructions
Head
The head is worked from the top down, stuffed firmly, and the face is added before closing.
- Rnd 1: MR, 6 sc into ring (6 sts)
- Rnd 2: inc in each st around (12 sts)
- Rnd 3: (sc 1, inc) x6 (18 sts)
- Rnd 4: (sc 2, inc) x6 (24 sts)
- Rnd 5: (sc 3, inc) x6 (30 sts)
- Rnd 6: (sc 4, inc) x6 (36 sts)
- Rnd 7: (sc 5, inc) x6 (42 sts)
- Rnd 8: (sc 6, inc) x6 (48 sts)
- Rnds 9–18: sc in each st around (48 sts) — 10 rounds even
- Rnd 19: (sc 6, dec) x6 (42 sts)
- Rnd 20: (sc 5, dec) x6 (36 sts)
Attach safety eyes between rounds 12 and 13, approximately 8–10 stitches apart. Embroider eyebrows and eyelashes with black floss. Add pink blush cheeks with embroidery floss or felt blush.
- Rnd 21: (sc 4, dec) x6 (30 sts)
- Rnd 22: (sc 3, dec) x6 (24 sts)
Begin stuffing firmly.
- Rnd 23: (sc 2, dec) x6 (18 sts)
- Rnd 24: (sc 1, dec) x6 (12 sts)
- Rnd 25: dec x6 (6 sts)
Fasten off, leaving a tail. Close the opening by weaving through the remaining 6 sts and pulling tight. Weave in ends.
Body
The body is worked from the top (neck) downward. Switch to cream yarn at round 13 for the underpants section.
- Rnd 1: MR, 6 sc (6 sts)
- Rnd 2: inc in each st (12 sts)
- Rnd 3: (sc 1, inc) x6 (18 sts)
- Rnd 4: (sc 2, inc) x6 (24 sts)
- Rnd 5: (sc 3, inc) x6 (30 sts)
- Rnds 6–12: sc in each st (30 sts) — 7 rounds even, skin tone yarn
- Switch to cream yarn:
- Rnds 13–18: sc in each st (30 sts) — 6 rounds even, cream yarn
- Rnd 19: (sc 3, dec) x6 (24 sts)
- Rnd 20: (sc 2, dec) x6 (18 sts)
Stuff body firmly before closing.
- Rnd 21: (sc 1, dec) x6 (12 sts)
- Rnd 22: dec x6 (6 sts)
Fasten off, leaving a long tail for attaching to the head.
Legs (Make 2)
Legs are worked from the foot upward. The foot sole is created separately for a flat, stable base.
- Rnd 1: MR, 6 sc (6 sts)
- Rnd 2: inc in each st (12 sts)
- Rnd 3: (sc 1, inc) x6 (18 sts)
- Rnds 4–6: sc in each st (18 sts) — foot shaping
- Rnd 7: (sc 4, dec) x3 (15 sts)
- Rnd 8: (sc 3, dec) x3 (12 sts)
- Rnds 9–28: sc in each st (12 sts) — 20 rounds for leg length
Stuff lightly. Fasten off, leaving a tail for attachment.
Arms (Make 2)
- Rnd 1: MR, 6 sc (6 sts)
- Rnd 2: inc in each st (12 sts)
- Rnd 3: (sc 1, inc) x6 (18 sts)
- Rnd 4: sc in each st (18 sts)
- Rnd 5: (sc 1, dec) x6 (12 sts)
- Rnds 6–22: sc in each st (12 sts) — arm length
Stuff lightly. Flatten the top opening and sc across to close (6 sts). Leave a tail for attachment.
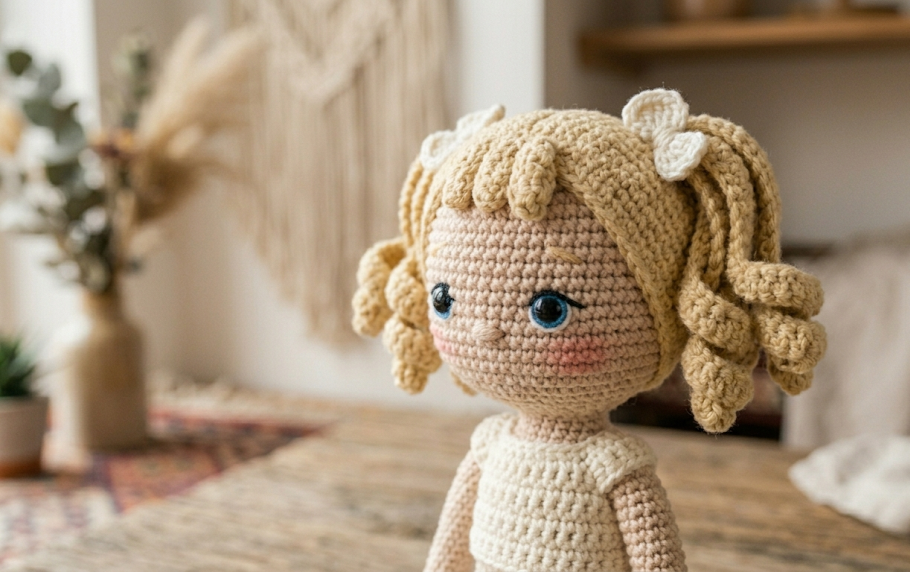
Hair – Bangs
Using blonde yarn, create straight fringe bangs by cutting lengths of yarn approximately 8–10 cm long. Fold in half and attach through the front loops of stitches across the forehead between rounds 4 and 6 of the head, covering the front of the head down to just above the eyes. Trim evenly to create a neat fringe.
Hair – Curly Pigtails (Make 2)
For the signature curly pigtails, chain 100 stitches. Then work 3 sc into each chain stitch back to the start. This creates a long, naturally coiling curl. Make two identical pieces. Fold each curl in half, coil slightly, and stitch securely to each side of the head at approximately round 8, positioning them high for a sweet pigtail look. Secure well and hide tails inside the head.
Assembly Steps
- Attach the head to the body by sewing firmly using the long tail from the body closure. Align the face forward and sew all the way around for stability. Knot securely.
- Attach the legs to the bottom of the body, positioning them at either side of the lower body. Sew firmly through several rounds for stability.
- Attach the arms to the upper sides of the body at approximately round 5–6 of the body. Sew through both layers of the flattened arm top for a secure connection.
- Add the hair — attach bangs first along the forehead, then secure the pigtail curls to each side of the head.
- Final face details — add the blush cheeks with pink embroidery floss using large satin stitches or small circles. Embroider thin eyebrows above the safety eyes with black floss.
- Weave in all remaining ends and give the doll a gentle steam with a light press to shape the yarn neatly.
Beginner Tips
- Always use a tight tension when crocheting amigurumi. Loose stitches allow stuffing to show through, which affects the final appearance.
- Stitch markers are essential. Place one at the beginning of each round to keep track of your position.
- For the invisible decrease, always work into the front loops only of the two stitches. This creates a much smoother, flatter decrease than a standard single crochet decrease.
- Stuff firmly as you go, especially for the head and body. Waiting until the piece is nearly closed makes it very difficult to get an even result.
- When attaching the safety eyes, place them further apart rather than closer together for a sweeter, more doll-like expression.
- The pigtail curls can be adjusted by adding fewer or more chain stitches — a chain of 60 gives a shorter, tighter curl, while a chain of 120 creates long, dramatic ringlets.
Creative Variations
- Dress version: Add a simple crocheted dress in your favourite color by working increases around the upper body after attaching the head, creating a skirt effect.
- Dark hair version: Use deep brown or black DK yarn for gothic or classic brunette dolls.
- Braids instead of curls: Instead of the curly chain technique, use a long chain and attach three strands of yarn then braid them for neat plaited pigtails.
- Outfit accessories: A tiny crocheted headband, bow, or hat adds a wonderful personalised touch.
- Different sizes: Use a 5mm hook with bulky yarn to create a larger cuddle doll approximately 45 cm tall — perfect as a baby shower gift.
Share Your Doll!
If this pattern helped you create a sweet little doll for someone you love, please share a photo on Pinterest and Instagram and tag it with #FoodiePlumCrochet. Seeing every unique version of this doll that makers create around the world is the most wonderful part of sharing free patterns. Happy crocheting!