
The Best Fluffy Pancakes recipe you will fall in love with. Full of tips and tricks to help you make the best pancakes.

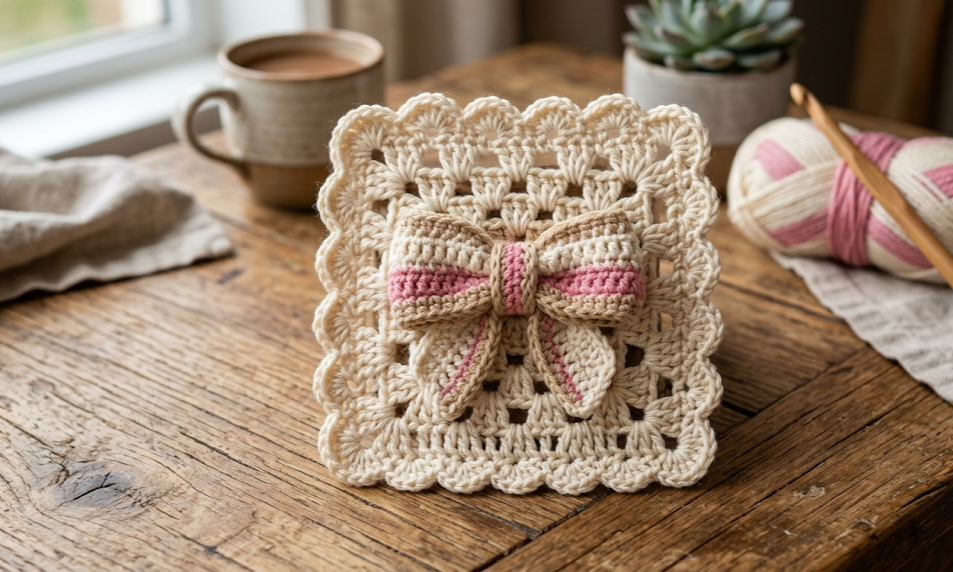
If you’ve ever loved the rhythmic simplicity of a granny square but wished it had a little more personality, this pattern is exactly what you’ve been looking for. The Bow Granny Square takes the timeless four-round granny square base — soft cream stitches blooming outward in cozy rounds — and tops it with a perky, dimensional bow worked separately and stitched on like a little gift waiting to be opened. The tan-beige center peeking out from behind the bow’s knot adds a warm, neutral contrast that keeps the whole piece looking elegant rather than overly sweet.
This square is perfect for crocheters who already know their way around basic granny square construction and are ready to add a layer of texture and dimension to their work. It’s an ideal motif for nursery blankets, garland banners, coasters, bag appliqués, or framed fiber art. Because it’s worked in worsted weight yarn, it comes together in a single relaxed afternoon, and the bow component is small enough that even leftover scraps of yarn can be put to good use. Whether you’re making one as a stand-alone gift topper or planning to stitch a dozen together into a blanket full of bows, this pattern walks you through every stitch so you can recreate it exactly as shown.
|
Difficulty
Intermediate
|
Time
~3 Hours
|
Hook Size
4mm (G/6)
|
Yarn Weight
Worsted (#4)
|
Finished Size
12 x 12 cm
|
Gauge
- 14 dc and 8 rows = 10cm x 10cm, worked with worsted weight (Medium #4) yarn and a 4mm (US G/6) hook
- First 2 rounds of the granny base = approximately 7cm in diameter
- Gauge is not critical for this motif, but matching it will keep your finished square close to 12cm x 12cm. Always crochet a small swatch first if you plan to join multiple squares together, since consistent sizing matters for seaming.
Materials List
- Worsted weight yarn (Medium #4) in Cream/Ivory — approximately 15g
- Worsted weight yarn in Soft Pink — approximately 10g
- Worsted weight yarn in Tan/Beige — approximately 5g
- 4mm (US G/6) crochet hook
- Tapestry/yarn needle
- Stitch marker
- Small scissors
Abbreviations Table
| Abbreviation | Meaning |
|---|---|
| ch | chain |
| sl st | slip stitch |
| sc | single crochet |
| dc | double crochet |
| dc2tog | double crochet 2 together (decrease) |
| sp | space |
| sk | skip |
| st(s) | stitch(es) |
| rep | repeat |
| picot | a small decorative bobble made by chaining a few stitches and slip stitching back into the base |
| MR | magic ring |
Pattern Instructions
Part 1: Granny Square Base
Technique note: A magic ring (MR) is an adjustable loop that lets you crochet your first round of stitches into it and then pull the center closed tightly afterward, avoiding the small hole a standard chain ring leaves behind.
Round 1 (Tan/Beige): Make a magic ring. Ch 3 (counts as first dc), 2 dc into ring, ch 2, [3 dc into ring, ch 2] 3 times. Join with a sl st to top of starting ch-3. Pull magic ring closed. (12 dc, 4 ch-2 sps)
Round 2 (Tan/Beige): Join in any ch-2 sp. Ch 3 (counts as first dc), 2 dc in same sp, ch 2, 3 dc in same sp (this completes the corner), ch 1. [In next ch-2 sp: 3 dc, ch 2, 3 dc; ch 1] 3 times. Join to top of starting ch-3. Fasten off tan. (24 dc, 4 ch-2 sps, 4 ch-1 sps)
Round 3 (Cream): Join cream yarn in any corner ch-2 sp. Ch 3, 2 dc, ch 2, 3 dc in same sp, ch 1, 3 dc in next ch-1 sp, ch 1. [In next corner ch-2 sp: 3 dc, ch 2, 3 dc; ch 1; 3 dc in next ch-1 sp, ch 1] 3 times. Join. (36 dc, 4 ch-2 sps, 8 ch-1 sps)
Round 4 (Cream): Join in any corner ch-2 sp. Ch 3, 2 dc, ch 2, 3 dc in same sp, ch 1, [3 dc in next ch-1 sp, ch 1] twice. [Corner: 3 dc, ch 2, 3 dc in next ch-2 sp, ch 1; (3 dc in next ch-1 sp, ch 1) twice] 3 times. Join. (48 dc, 4 ch-2 sps, 12 ch-1 sps)
Round 5 — Picot Edge (Cream): Join in any corner ch-2 sp. Ch 1, sc in same sp. Sc in each dc and ch-1 sp along the side, working a picot (ch 3, sl st into first ch of the ch-3, then continue) after every 3rd sc. At each corner: sc, picot, sc into the ch-2 sp to keep the corner sharp. Repeat around all 4 sides. Join with sl st to first sc and fasten off. (approx. 64 sc + 16 picots)
Part 2: The Bow
Bow Loops (make 2, in Pink):
Row 1: Ch 9. Dc in 4th ch from hook and in each ch across, turn. (7 dc)
Rows 2–4: Ch 3 (counts as first dc), dc in each dc across, turn. (7 dc)
Fasten off, leaving a 20cm tail for sewing.
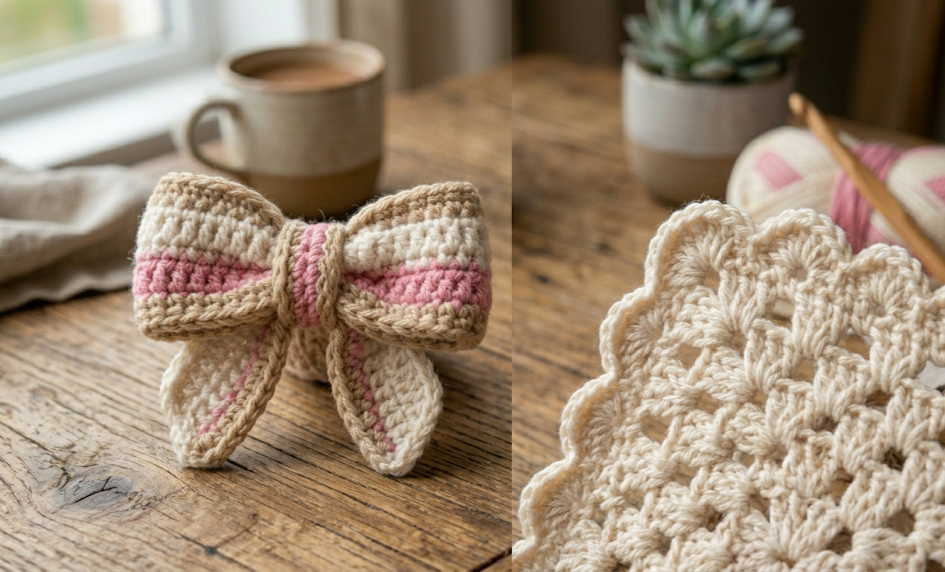
Fold each rectangle in half so the short ends meet, forming a flattened loop (like a small flag folded into a tube). Pinch the folded edge at the center to create the classic “bow wing” shape.
Bow Center Knot (in Tan/Beige):
Row 1: Ch 6. Sc in 2nd ch from hook and in each ch across, turn. (5 sc)
Row 2: Ch 1, sc in each st across, turn. (5 sc)
Fasten off, leaving a 25cm tail.
Assembly Steps
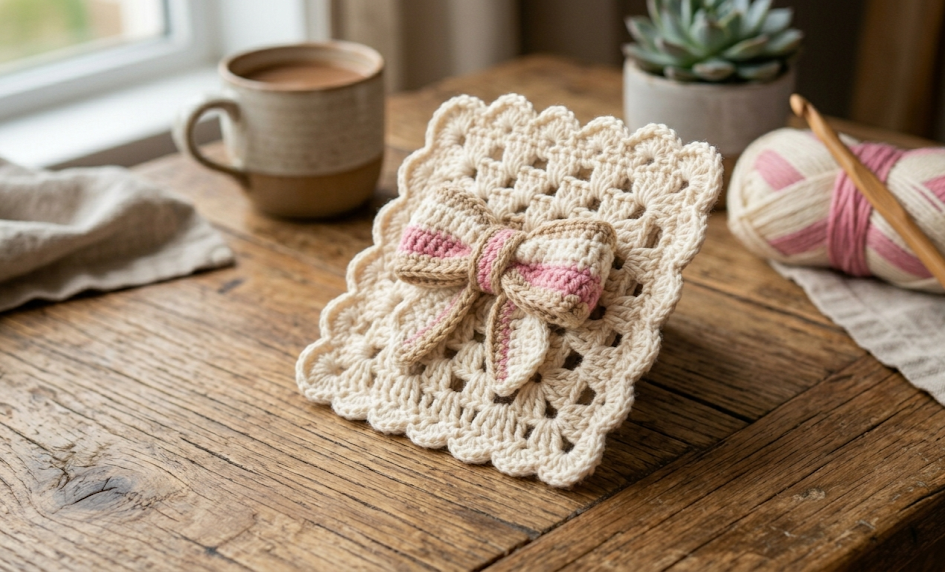
- Place the two pinched pink loops side-by-side so they mirror each other, forming a horizontal bow shape roughly 6cm wide.
- Wrap the tan-beige strip tightly around the pinched centers of both loops, 2–3 times around, to cinch them together into the bow knot. Sew the wrapped ends together at the back using the tail and a tapestry needle, then trim and tuck the excess yarn inside the wrap.
- Position the finished bow centered over the magic ring of Round 1 on your granny square, so the knot sits exactly over the tan center stitches.
- Using a strand of matching yarn, tack the bow down at 4–6 points around its base and at the knot, stitching through both the bow and the square’s surface to secure it flat without flattening its dimension.
- Weave in all remaining ends on both the bow and the square base using a tapestry needle, running each tail through several stitches before trimming.
- Lightly steam-block the finished square on a flat surface if the edges are curling, pinning the corners to a 12cm x 12cm square and allowing it to dry fully before unpinning.
Beginner/Intermediate Tips
- When changing colors between Rounds 2 and 3, drop the old color and pull the new color through the last loop of your final stitch — this keeps the color change clean and avoids a visible knot on the front.
- Keep tension even on the bow loop rows; loose stitches here make the bow look floppy instead of structured. Aim for snug, consistent dc stitches.
- If your bow knot wrap looks too thin, add one more wrap of the tan yarn before sewing it down — extra bulk in the knot reads better at typical viewing distance than a thin strip.
- Use a stitch marker in the first stitch of each round so you never lose track of where your round begins, especially through the busier corner increases in Rounds 3 and 4.
- Block your square before attaching the bow — a flat, even base makes it much easier to center and pin the bow accurately.
Variations
- Pastel Rainbow Bows: Make a set of squares using a different bow color for each one (lavender, mint, butter yellow) while keeping the same cream base for a cohesive blanket with playful pops of color.
- Mini Coaster Size: Work the same pattern with a 3.5mm hook and DK weight yarn to shrink the finished motif down to coaster size, perfect for a bow-themed table setting.
- Monochrome Elegance: Crochet the entire square — base and bow — in varying shades of the same color family for a sophisticated, tonal look that suits a nursery or bridal shower gift.
- Hanging Garland: Skip the larger granny base and crochet just the bow component on its own, then string a row of bows together with ribbon for a sweet nursery or party garland.
- Holiday Edition: Swap the pink and tan for red and gold to turn this into a festive Christmas ornament or gift-topper appliqué.
Save This Pattern
If you loved this dimensional twist on a classic motif, save this pin so you can find it again next time you’re ready to stitch up a batch of these sweet bow squares! Tag your finished projects with #FoodiePlumCrochet so we can see your beautiful bows come to life.



