
The Best Fluffy Pancakes recipe you will fall in love with. Full of tips and tricks to help you make the best pancakes.

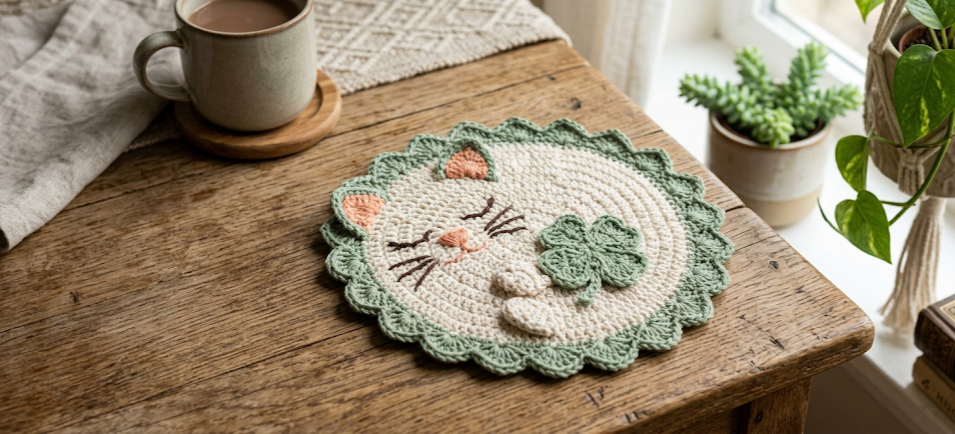
There’s something irresistibly sweet about a curled-up cat — paws tucked, eyes closed, completely at peace. This Sleepy Kitten & Clover Crochet Coaster captures exactly that feeling, wrapped in a soft sage-green scalloped border that makes it feel like a little garden frame around your favorite napping feline. Tucked beneath her paws is a four-leaf clover, making this piece a natural fit for St. Patrick’s Day decor, spring table settings, or a cozy year-round coaster for your morning coffee.
This pattern is ideal for the crocheter who loves small, detailed projects with a big payoff. It combines a few different techniques — a curled body worked in a spiral, simple embroidered facial features, a layered clover appliqué, and a textured leaf-stitch border — into one compact, giftable design. Because it finishes at around 11–12 cm across, it works beautifully as a coaster, a mug rug, a hanging ornament, or even stitched onto a tote bag or pillow as an appliqué.
Whether you’re making one for your own kitchen table or a whole set for a craft fair, this project comes together in an afternoon and uses just a small amount of yarn in two or three colors. Let’s get into the details.
|
Difficulty
Intermediate
|
Time
2–3 Hours
|
Hook Size
3.5mm (E/4)
|
Yarn Weight
Worsted (#4)
|
Finished Size
~11–12 cm
|
Gauge
Gauge is not critical for this project since it’s a flat, shaped piece rather than a garment, but matching gauge will keep your finished size consistent with the pattern.
- Gauge: 18 sc x 20 rows = 10cm x 10cm square (worked in single crochet with worsted weight yarn)
- Hook used: 3.5mm (E/4 US)
- Yarn weight used: Worsted weight (Yarn Weight #4), cotton or cotton-blend recommended for stitch definition
If your swatch comes out larger than 10cm, go down a hook size. If smaller, go up a hook size.
Materials List
- White yarn (Color A): approx. 25g worsted weight cotton yarn, for the cat’s body, head, and tail
- Sage/light green yarn (Color B): approx. 20g worsted weight cotton yarn, for the scalloped border and clover leaves
- Peach yarn (Color C): small amount (under 5g) for the ears and nose
- Dark green embroidery thread or thin yarn: small amount, for whisker and eye embroidery
- 3.5mm (E/4) crochet hook
- Yarn needle (for weaving in ends and embroidery)
- Stitch markers (at least 2)
- Scissors
- Polyester fiberfill or cardboard circle (optional): if you want a slightly padded or stiffened coaster back
- Fabric glue (optional): for securing the clover appliqué in place before stitching
Abbreviations Table
| Abbreviation | Meaning |
|---|---|
| ch | chain |
| sc | single crochet |
| hdc | half double crochet |
| dc | double crochet |
| tr | treble crochet |
| sl st | slip stitch |
| st(s) | stitch(es) |
| rnd(s) | round(s) |
| inc | increase (2 sc in same stitch) |
| dec | decrease (sc2tog – single crochet 2 stitches together) |
| MR | magic ring |
| BLO | back loop only |
| FLO | front loop only |
| sp | space |
| rep | repeat |
| ( ) | stitch count at end of round/row |
Technique notes:
- Magic ring (MR): Wrap yarn around your finger to form a ring, insert hook through the ring, and crochet your first round of stitches into it. Pull the tail to close the ring tight once the round is complete. This avoids a hole at the center of round pieces.
- BLO (back loop only): Insert your hook under only the back loop of the stitch, leaving the front loop unworked. This creates a ridged texture line, often used to define edges like ears.
- sc2tog (decrease): Insert hook into next stitch and pull up a loop, then without finishing, insert hook into the following stitch and pull up a second loop. Yarn over and pull through all three loops on the hook. This invisibly reduces your stitch count by one.
Pattern Instructions
Part 1: Cat Body & Tail (Color A – White)
The body is worked as one continuous spiral disc, starting at the center of the curled tail and spiraling outward to form the curled shape.
Rnd 1: MR, ch 1 (does not count as st), 6 sc into ring. Pull tail to close. (6)
Rnd 2: Inc in each st around. (12)
Rnd 3: Sc 1, inc in next st rep around. (18)
Rnd 4: Sc 2, inc in next st rep around. (24)
Rnd 5: Sc 3, inc in next st rep around. (30)
Rnd 6: Sc 4, inc in next st rep around. (36)
Rnd 7: Sc 5, inc in next st rep around. (42)
Rnd 8–9: Sc in each st around (no increases — this forms the curve of the back). (42)
At this point, place a stitch marker at the point where you’ll begin shaping the head. The head is built as a separate raised section attached to one side of the disc.
Part 2: Head (Color A – White)
Worked separately, then sewn onto the body disc near the edge.
Rnd 1: MR, 6 sc into ring. (6)
Rnd 2: Inc in each st around. (12)
Rnd 3: Sc 1, inc in next st rep around. (18)
Rnd 4: Sc 2, inc in next st rep around. (24)
Rnd 5–7: Sc in each st around. (24)
Rnd 8: Sc 2, dec rep around. (18)
Rnd 9: Sc 1, dec rep around. (12)
Stuff lightly with a small pinch of fiberfill for a slightly domed head shape, then sl st to close and fasten off, leaving a long tail for sewing.
Part 3: Ears (Color A with Color C accent) — make 2
Rnd 1: With Color A, MR, 6 sc into ring. (6)
Rnd 2: Inc in each st around. (12)
Fasten off Color A. Join Color C (peach) and work:
Rnd 3 (BLO): Working in BLO only, sc in each st around. (12)
Fasten off, leaving a tail for sewing. Fold the ear slightly inward at the base to create a cupped shape before attaching.
Part 4: Clover (Color B – Sage Green) — make 4 leaves, 1 stem
Each leaf (make 4):
Rnd 1: Ch 2, work 5 dc into 2nd ch from hook, sl st to first dc to join, forming a small heart-shaped petal. (5)
Fasten off each leaf leaving a short tail.
Stem: Ch 8, sl st in 2nd ch from hook and in each ch across. (7)
Assembly of clover: Arrange the 4 leaf petals in a cross/X formation. Using a yarn needle and the tails, stitch the centers of all 4 petals together, then attach the stem so it extends from the same center point, curving gently to one side.
Part 5: Scalloped Leaf Border (Color B – Sage Green)
Worked directly into the outer edge of the body disc from Part 1, into the stitches of Rnd 9.
Rnd 1 (foundation): Join Color B with a sl st in any st along the outer edge of the body. Ch 1, sc evenly around the entire outer edge, adjusting stitch count as needed so you have a multiple of 6. Sl st to join. (Stitch count will vary — adjust to a multiple of 6, e.g. 42 or 48)
Rnd 2 (scallop/leaf round): Skip 1 st, work (sc, hdc, 3 dc, hdc, sc) into next st, skip 1 st, sl st in next st — rep around. Each repeat creates one pointed leaf-shaped scallop. Continue until you reach the starting point, then sl st to join and fasten off.
This creates the ruffled, leaf-like petals seen around the edge of the finished piece.
Assembly Steps
- Attach the head: Position the head about 1cm in from the outer edge of the body disc, on the side opposite the tail’s curl. Pin in place, then whip-stitch around the base using the long tail from the head piece, stuffing a small pinch more fiberfill in just before closing the last 3-4 stitches.
- Attach the ears: Space the two ears about 1.5cm apart at the top of the head. Sew the flat base of each ear to the head using small whip stitches, angling them slightly outward and forward.
- Embroider the face: Using dark green embroidery thread, stitch two closed, curved lines (like gentle “U” shapes) for the closed eyes, positioned about 1cm below the ears and 1.5cm apart. Add 3 straight stitch whiskers on each side of the face, radiating outward from a point just below and beside the nose.
- Attach the nose: Cut a tiny scrap of Color C (peach) yarn and use a few small stitches to form a small triangular or oval nose shape at the center-front of the face, just below the eyes.
- Attach the clover: Position the assembled clover so it sits just under the chin/paw area of the cat, about where the front paws would tuck in. Glue lightly in place first if desired, then secure permanently with a few small stitches through the center of the clover into the body fabric.
- Attach the leaf border: If you haven’t already worked the border directly onto the body (Part 5), sew the scalloped border piece around the entire outer edge of the disc, easing it gently so it lies flat without puckering or stretching the center disc.
- Weave in all ends using a yarn needle, running each tail through several stitches on the wrong side before trimming.
- Optional stiffening: For use as an actual coaster, cut a circle of cardboard or felt slightly smaller than the finished piece and slip it between two layers, or apply a light coat of fabric stiffener to the back and let dry flat.
Beginner/Intermediate Tips
- When spiraling the body disc (Part 1), use a stitch marker on the first stitch of each round so you don’t lose track of where rounds begin — spiral pieces are easy to drift off-count in.
- Keep tension even but not tight on the scalloped border round; if it’s too tight, the edge will cup inward instead of lying flat and ruffled.
- When embroidering the closed eyes, use a contrasting thread that’s pulled snug but not tight — too tight will pucker the white yarn and distort the face shape.
- Block the finished body disc lightly with a warm iron and a damp cloth (or a light steam) before attaching the border, especially if your spiral isn’t lying perfectly flat.
- For the clover, work all 4 petals at the same gauge tension so they sit evenly when joined — uneven petals will make the clover look lopsided.
Variations
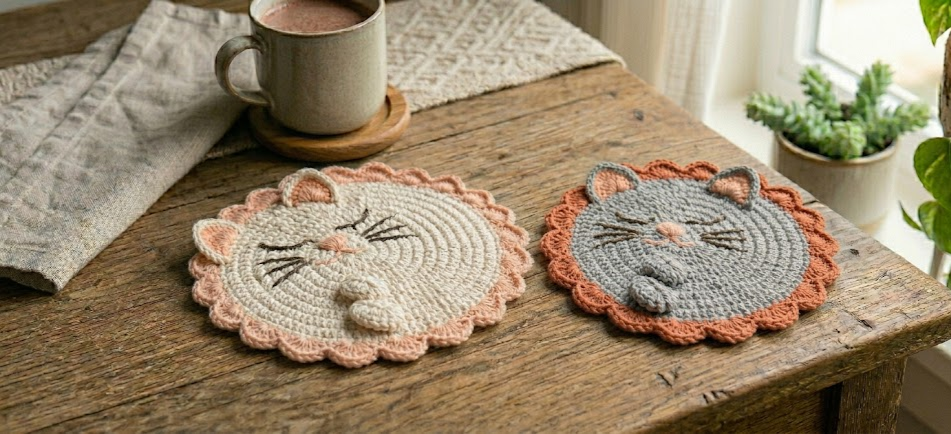
- Color swap: Make the cat in gray, black-and-white tabby colors, or orange tabby yarn instead of white for a different breed look.
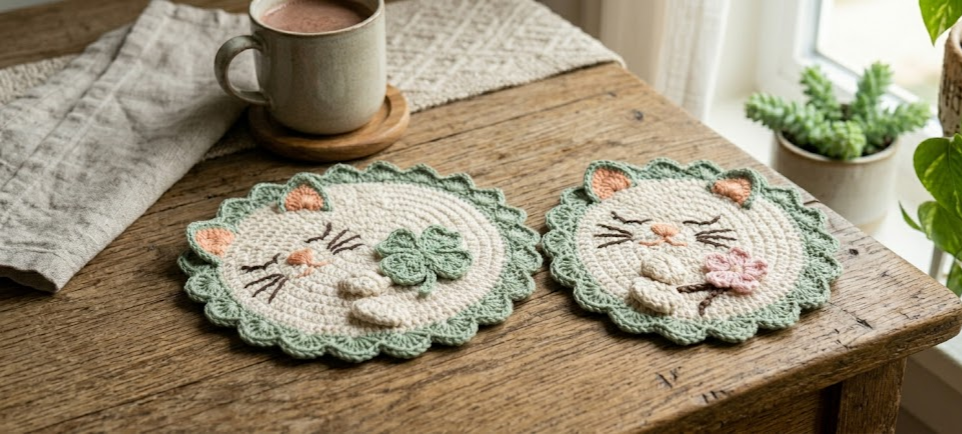
- Seasonal border swap: Replace the clover with a tiny crocheted flower or heart for a non-holiday, year-round version.
- Size up: Use a bulky weight yarn and 5mm hook to double the size and turn this into a small pillow or wall hanging instead of a coaster.
- Ornament version: Skip the coaster stiffening, add a small loop of chain at the top of the border, and turn it into a hanging ornament for a St. Patrick’s Day garland or door wreath.
- Coaster set: Make four in a row, each with a different color clover (or swap clovers for tiny shamrocks, hearts, or stars) for a full matching coaster set.
Save This Pattern
If this sleepy kitten and clover coaster made you smile, save this pin so you can come back to it next time you’re ready to stitch! Tag your finished piece and share your version — we love seeing your makes. #FoodiePlumCrochet



