
The Best Fluffy Pancakes recipe you will fall in love with. Full of tips and tricks to help you make the best pancakes.

Intro
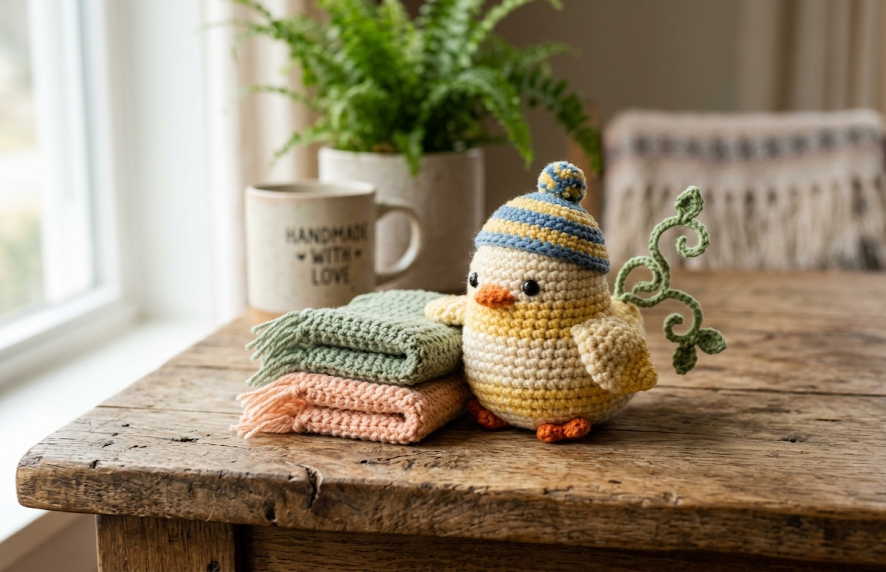
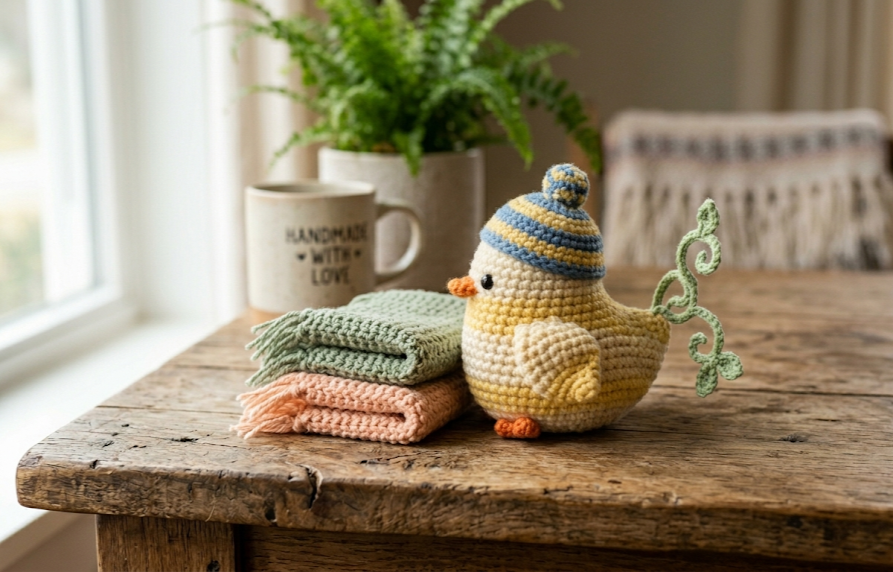
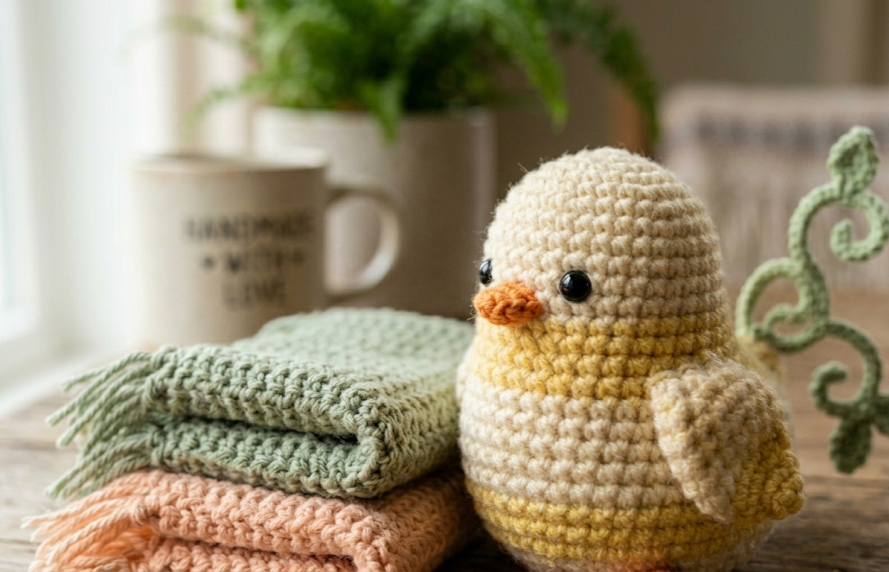
There’s something irresistibly charming about a plump little chick curled up as if it just settled in for an afternoon nap. This crochet cottage chick comes complete with its own tiny crocheted cap perched on its head, two folded mini “blankets” in soft sage green and peach tucked under its chin, and a sweet curling tendril accent on its back that looks like a little leaf caught in the breeze. With its rounded, oversized body, tiny bead eyes, and a small orange beak and feet, this amigurumi has an instantly huggable, storybook quality.
This pattern is perfect for crocheters who love cute, low-stress amigurumi projects that come together in a single cozy evening. It’s an ideal gift for a baby shower, a sweet addition to a spring or Easter display, a desk companion for a coworker, or a handmade treasure for a child’s basket of soft toys. Because the body is worked in one continuous piece with simple increases and decreases, this project is friendly for confident beginners while still being satisfying for intermediate makers who want to play with color and fun accessory details like the cap and folded blankets.
By the end of this pattern, you’ll have a soft, weighted, palm-sized chick that sits beautifully on a shelf, in a basket, or nestled into a bowl with other amigurumi friends.
|
Difficulty
Beginner-Friendly
|
Time
3–4 Hours
|
Hook Size
2.5mm
|
Yarn Weight
DK (Light Worsted)
|
Finished Size
~9cm tall
|
Gauge
- 17 stitches x 18 rows = 10cm x 10cm square in single crochet (sc), worked in continuous spiral rounds
- Hook used: 2.5mm (US B/1)
- Yarn used: DK weight (light worsted, #3) cotton-acrylic blend
- Gauge is approximate for amigurumi — slight variations won’t affect the finished look, but a tighter gauge is recommended so stuffing doesn’t show through stitches
Materials List
- DK weight yarn (cotton-acrylic blend) in:
- Cream/off-white — approx. 35g (main body)
- Soft yellow — approx. 8g (cap)
- Sage green — approx. 5g (mini blanket + tendril leaf)
- Peach/blush — approx. 5g (mini blanket)
- Orange — approx. 4g (beak and feet)
- 2.5mm crochet hook
- Polyester fiberfill stuffing
- 2 small black safety eyes or 6mm black beads (for sewn-on eyes)
- Stitch marker (or small safety pin)
- Yarn needle for sewing and weaving in ends
- Small amount of craft wire (24-gauge), optional, for the curling tendril accent
- Scissors
Abbreviations Table
| Abbreviation | Meaning |
|---|---|
| ch | chain |
| st(s) | stitch(es) |
| sc | single crochet |
| inc | increase (2 sc in same stitch) |
| dec | invisible decrease (see technique note below) |
| sl st | slip stitch |
| MR | magic ring (see technique note below) |
| BLO | back loop only (see technique note below) |
| rnd(s) | round(s) |
| [ ] | repeat instructions inside brackets the stated number of times |
| ( ) | total stitch count at end of round/row |
Pattern Instructions
Part 1: Body (worked bottom-up in continuous spiral, do not join unless noted)
Technique note — Magic Ring (MR): A magic ring lets you start a round with a tight, adjustable loop instead of chaining and joining, which avoids a hole at the center. Wrap yarn around two fingers, insert hook through the loop, pull up a loop, then work your first round of stitches into the ring before pulling the tail to close it snugly.
- Rnd 1: MR, 6 sc into ring (6)
- Rnd 2: inc in each st around (12)
- Rnd 3: [sc 1, inc] repeat around (18)
- Rnd 4: [sc 2, inc] repeat around (24)
- Rnd 5: [sc 3, inc] repeat around (30)
- Rnd 6: [sc 4, inc] repeat around (36)
- Rnd 7: [sc 5, inc] repeat around (42)
- Rnds 8–14: sc around, no increases (42) — work 7 rounds even; this builds the rounded belly
- Rnd 15: [sc 5, dec] repeat around (36)
Technique note — Invisible Decrease (dec): Insert your hook into the front loop only of the next stitch, then the front loop only of the following stitch, and pull through both loops, then complete as a regular single crochet. This keeps decreases nearly invisible compared to a standard sc2tog.
- Rnd 16: [sc 4, dec] repeat around (30)
- Rnd 17: sc around (30) — begin stuffing the body firmly now, adding more as you go
- Rnd 18: [sc 3, dec] repeat around (24)
- Rnd 19: [sc 2, dec] repeat around (18)
- Rnd 20: [sc 1, dec] repeat around (12)
- Rnd 21: [dec] repeat around (6)
- Finish stuffing firmly, then fasten off and close the remaining 6 sts using the yarn needle, weaving through the front loops and pulling tight.
Part 2: Wings (make 2)
- Rnd 1: MR, 5 sc into ring (5)
- Rnd 2: sc around (5)
- Rnd 3: inc, sc 4 (6)
- Rnds 4–5: sc around (6)
- Fasten off, leaving a long tail for sewing. Do not stuff — wings stay flat and are sewn directly onto the sides of the body, angled slightly downward, about one-third of the way up from the base.
Part 3: Beak
- Rnd 1: MR, 5 sc into ring (5)
- Rnd 2: dec, sc 3 (4)
- Fasten off, leaving a tail. Stuff very lightly with a tiny pinch of fiberfill, then flatten gently into a small triangular shape before sewing onto the face.
Part 4: Feet (make 2)
- Rnd 1: with orange yarn, ch 2, work 5 sc into 2nd chain from hook (5)
- Rnd 2: inc in each st around (10)
Technique note: Working into the 2nd chain from the hook avoids a tight, puckered base and gives the foot a flatter starting edge.
- Rnd 3: sc around (10)
- Fasten off, leaving a tail. Flatten each foot slightly and sew to the base of the body so the chick can sit upright, spacing the feet about 2cm apart.
Part 5: Mini Cap
- Rnd 1: with yellow yarn, MR, 6 sc into ring (6)
- Rnd 2: inc in each st around (12)
- Rnd 3: [sc 1, inc] repeat around (18)
- Rnd 4: sc around (18)
- Rnd 5: working in BLO only, sc around (18)
Technique note — Back Loop Only (BLO): Insert your hook only under the back loop of each stitch instead of both loops. This creates a visible ridge line, which forms a neat folded brim edge on the cap.
- Rnd 6: sc around, working into both loops as normal again (18)
- Rnd 7: sc around (18)
- Fasten off. The BLO round creates a natural turning ridge so the bottom rounds fold outward slightly like a brim. Do not stuff; the cap should sit loosely on the head like a beret. Sew lightly in place at 3–4 points around the rim so it doesn’t slide off.
Part 6: Folded Mini Blankets (make 1 in sage green, 1 in peach)
- Ch 13
- Row 1: starting in 2nd ch from hook, sc across (12)
Technique note — second side of chain: Since this piece is worked flat in rows rather than in the round, you only need the first row above; there’s no need to work back down the opposite side of the starting chain for this particular accessory.
- Rows 2–8: ch 1, turn, sc across (12) — repeat for 8 rows total to create a small rectangle
- Fasten off, leaving a long tail.
To create the folded look: fold the rectangle in half lengthwise so it becomes a long narrow strip, then fold that strip over itself 2–3 more times accordion-style until you have a small stacked rectangle roughly 3cm x 2cm. Tack the folds together invisibly with a few small stitches through all layers using the leftover tail, keeping the stitches hidden in the valleys of the folds.
Part 7: Curling Tendril Accent
- With sage green yarn, ch 16
- Row 1: starting in 2nd ch from hook, sc across (15)
- Fasten off, leaving long tails at both ends.
If using wire: cut a 14cm length of 24-gauge craft wire, fold it in half, and lay it along the center of the crocheted strip before working your single crochet row, encasing the wire as you stitch (alternatively, thread the strip onto the wire afterward by weaving the wire through the back loops with a yarn needle). Once encased, twist and coil the wired strip into a loose spiral or curling vine shape. Add a small simple 5-petal leaf shape in sage green at one end if desired, made by chaining 4, slip stitching back into the first chain to form a tiny loop, and repeating 4 more times around a center point.
Assembly Steps
- Sew the two wings to either side of the body, about 1.5cm above the base, angled slightly downward and slightly forward.
- Sew the beak to the center-front of the head, positioning it about 2cm above the body’s widest point.
- Using black beads or safety eyes, place the eyes on either side of the beak, about 1cm above and 1.5cm to either side, pressing in evenly so the chick has a sweet, slightly surprised expression.
- Sew the two feet to the underside of the body, spaced about 2cm apart, so the chick sits flat and stable.
- Place the mini cap on top of the head, tilted very slightly to one side for personality, and tack in place at 3–4 points around the brim.
- Stack the folded peach blanket directly underneath the folded sage green blanket, then sew both together as a single unit to the front-left side of the body, just beneath the beak and overlapping slightly with the lower edge of the head.
- Insert the curling tendril/leaf accent into the back of the body, about 1cm deep into a small gap made with your hook between two stitches, securing with a few small stitches and a dab of fabric glue if needed for extra hold. Curl it gently into its final coiled shape once attached.
- Weave in all remaining yarn tails securely and trim.
Beginner/Intermediate Tips
- Stuff the body in small pinches as you work the later rounds rather than all at once at the end — this prevents lumpy, uneven shaping in such a rounded silhouette.
- Use a stitch marker on round 1 and move it up each round so you never lose track of where a round begins, especially important on this pattern’s many increase/decrease rounds.
- When working the BLO round on the cap, go slowly — it’s easy to slip back into working both loops out of habit. Pause and check your hook placement on the first couple of stitches.
- If your folded mini blankets look bulky, use fewer accordion folds (2 instead of 3) for a flatter, more delicate stack.
- A locking stitch marker works better than a safety pin for tracking decrease rounds, since the marker won’t accidentally catch loops of yarn.
Variations
- Color Swap: Make the body in soft gray or pale blue yarn for a “baby chick in winter” version, paired with a knitted-look cap in cream.
- Size Up: Use a worsted weight yarn and 4mm hook to nearly double the finished size for a chunkier shelf-sitter version.
- Seasonal Display: Swap the cap for a tiny crocheted flower crown and use pastel rainbow yarn for the folded blankets to create a spring-themed centerpiece piece.
- No-Cap Style: Skip the cap entirely and instead add a small fabric bow or extra curling tendril for a simpler, quicker make that’s great for last-minute gifts.
- Holiday Edition: Crochet the cap in red and white stripes and swap the green tendril for a tiny holly leaf and berry accent for a Christmas-themed chick.
Save This Pattern
If you love cozy, characterful amigurumi like this little chick, save this pattern to your Pinterest board so you can come back to it any time you’re ready to pick up your hook. Pin it now and tag your finished makes with #FoodiePlumCrochet — we love seeing your version come to life!



