
The Best Fluffy Pancakes recipe you will fall in love with. Full of tips and tricks to help you make the best pancakes.

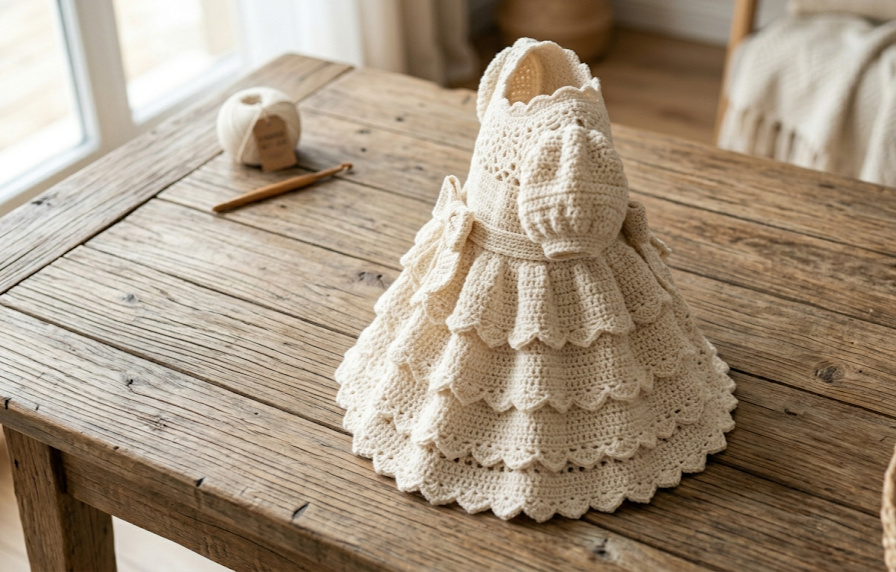
There’s something timeless about a hand-crocheted baby dress. It’s the kind of piece that gets photographed at every milestone, passed down to a younger cousin, and tucked away in a memory box decades later. This Heirloom Lace Baby Dress brings together a delicate floral lace yoke, a soft bubble-textured bodice, a flowing scalloped skirt, and a sweet crochet bow sash — all worked in a soft ivory yarn that gives it that vintage, “family heirloom” feel from the very first stitch.
This pattern is designed for confident beginners who already know basic stitches and want to try their first garment, as well as intermediate crocheters looking for a relaxing weekend project. It works up faster than you’d think thanks to a top-down construction, and every round is fully written out with stitch counts so you’ll never lose track of where you are.
Whether you’re making this for a christening, a birthday photo shoot, a baby shower gift, or simply because you love working with beautiful yarn, this dress is a project you’ll be proud to finish — and one that’s truly built to be treasured.
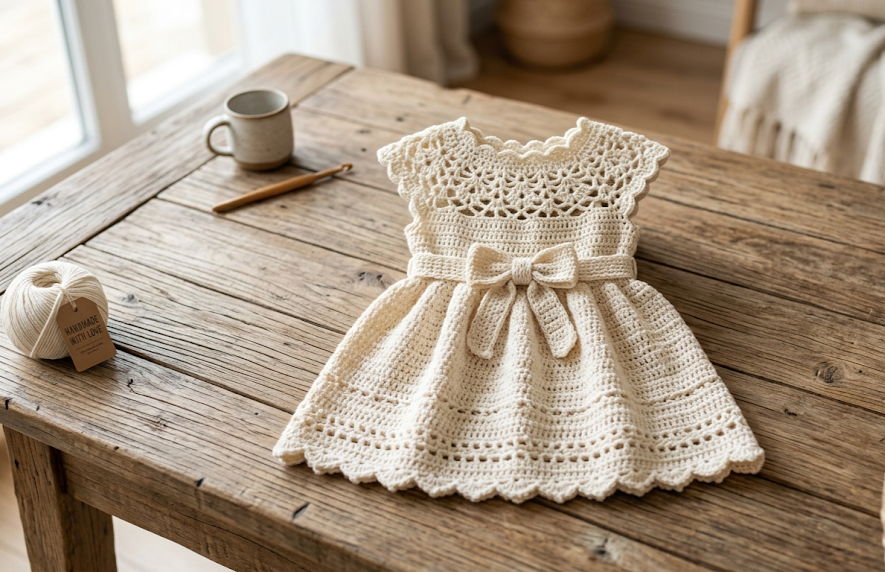
|
Difficulty
Intermediate
|
Time
8–10 hours
|
Hook Size
3.5mm (E/4)
|
Yarn Weight
DK (Light Worsted)
|
Finished Size
6–12 Months
|
Gauge
- 18 stitches and 20 rows = 10cm x 10cm in single crochet (sc), using a 3.5mm (E/4 US) hook
- Gauge swatch: chain 20, work 20 rows in single crochet, measure the center 10cm x 10cm square
- Yarn weight used: DK (light worsted, weight 3)
- Always crochet a gauge swatch before starting — sizing depends on accurate gauge, especially around the yoke and armholes
Materials List
- Yarn: DK weight cotton-blend yarn (100g = approx. 230m), in Ivory/Ecru — approx. 2.5 skeins (250–280g) for the 6–12 month size
- Hook: 3.5mm (US E/4) crochet hook
- Notions:
- Stitch markers (at least 4)
- Tapestry/yarn needle for weaving in ends
- 2 small buttons (1.5cm) for back closure
- Sewing needle and matching thread (to attach buttons)
- Measuring tape
Abbreviations Table
| Abbreviation | Meaning |
|---|---|
| ch | chain |
| sl st | slip stitch |
| sc | single crochet |
| hdc | half double crochet |
| dc | double crochet |
| tr | treble crochet |
| ch-sp | chain space |
| sk | skip |
| st(s) | stitch(es) |
| rep | repeat |
| rnd(s) | round(s) |
| BLO | back loop only |
| sp | space |
| ( ) | stitch count at end of round/row |
| [ ] | instructions to repeat |
Pattern Instructions
Sizing note: Instructions are written for size 6–12 months. The dress is worked top-down in one piece to the underarms, then split for front and back, and finally the skirt is worked in joined rounds.
Part 1: Yoke (Floral Lace Section)
Technique note – Magic Ring: A magic ring (adjustable loop) lets you crochet your starting stitches into a loop and then pull it closed tightly, leaving no hole at the center. To make one, wrap yarn around two fingers, insert hook through the loop, pull up a loop, then chain 1 to lock it before working your first round of stitches into the ring.
Rnd 1: Make a magic ring. Ch 3 (counts as first dc), work 11 dc into ring. Pull ring closed, join with sl st to top of ch-3. (12 dc)
Rnd 2: Ch 3 (counts as dc), dc in same st, dc in next st, 2 dc in next st rep from * around, join with sl st to top of ch-3. (18 dc)
Rnd 3 (Petals Round): Ch 1, sk next st, (sc, 3 dc, sc) in next st — this forms one petal, sk next st rep from * around, join with sl st to first sc. (6 petals)
Rnd 4: Working behind the petals into the skipped sts of Rnd 2, ch 3, dc in same skipped st, 2 dc in next skipped st rep from * around, join with sl st to top of ch-3. (36 dc)
Rnd 5: Ch 3, dc in same st, dc in next st, 2 dc in next st, dc in next 2 sts rep from * around, join. (48 dc)
Rnd 6 (Eyelet Round): Ch 3, ch 1, sk 1 st, dc in next st rep from * around, join with sl st to top of ch-3. (48 dc, 24 ch-sps)
Rnd 7: Ch 3, dc in each dc and in each ch-sp around (working dc into every stitch and every chain space), join. (72 dc)
Rnd 8 (Increase Round): Ch 3, dc in same st, dc in next 2 sts, 2 dc in next st, dc in next 2 sts rep from * around, join. (96 dc)
Rnd 9: Ch 3, dc in each st around, join. (96 dc) — this completes the yoke.
Part 2: Dividing for Sleeves and Body
Setup Row: Ch 1 to begin working in rows from here (back opening starts now). Sc in first 16 sts (this is half of back), ch 2 and sk next 12 sts (sleeve), sc in next 36 sts (front), ch 2 and sk next 12 sts (sleeve), sc in last 20 sts (other half of back). Turn. (72 sc + 4 ch-sps, sleeves set aside)
Technique note: Skipping the sleeve stitches and chaining over the gap creates the armhole opening. The skipped stitches will form the top of the sleeve if you choose to add sleeves separately (see Variations), or remain as open cap sleeves as written.
Row 1: Ch 1, sc in each st and each ch around, join to first sc to begin working in rounds again. (76 sc)
Part 3: Bodice (Bubble Texture)
Rnd 1: Ch 1, sc in next st, FPdc (front post dc) in next st rep from * around, join. (76 sts)
Technique note – FPdc: Yarn over, insert hook from front to back to front around the post of the stitch (not into the top), then complete as a normal dc. This creates a raised “bubble” texture line.
Rnds 2–6: Repeat Rnd 1 four more times (5 bubble rounds total), join at end of each round. (76 sts each round)
Rnd 7 (Decrease for waist): Ch 1, sc in next 8 sts, sc2tog rep from * around, join. (68 sts)
Technique note – sc2tog: Insert hook in next st, pull up a loop, insert hook in following st, pull up a loop, yarn over and pull through all 3 loops on hook. This invisibly decreases two stitches into one.
Part 4: Skirt (Scalloped Lace)
Rnd 1 (Flare Round): Ch 3, dc in same st, dc in next st, 2 dc in next st rep from * around, join. (102 dc)
Rnd 2: Ch 3, dc in each st around, join. (102 dc)
Rnd 3 (Shell Round): Ch 1, sk 2 sts, 5 dc in next st (this is one shell), sk 2 sts, sc in next st rep from * around, join with sl st to first sc. (17 shells, 17 sc)
Rnd 4: Ch 1, sc in first dc of shell, ch 2, sk 1 dc, sc in next dc, ch 2, sk 1 dc, sc in last dc of shell, sc in next sc rep from * around, join. (Stitch count varies by shell spacing — approx. 85 sts total)
Rnd 5 (Repeat Shell): Ch 1, sk first ch-sp, 5 dc in center sc between shells, sk next ch-sp, sc in next sc rep from * around, join. (17 shells, 17 sc)
Rnds 6–11: Repeat Rnds 4 and 5 alternately three more times (6 rounds total), allowing the skirt to lengthen. Stitch count per shell round stays at 17 shells/17 sc throughout — only the overall length grows.
Rnd 12 (Scalloped Edge): Ch 1, sc in first dc of shell, 3 hdc in next dc, 3 hdc in next dc, sc in last dc of shell, sl st in next sc rep from * around, fasten off. (Final scalloped hem — no further counting needed, this is the finishing round)
Part 5: Back Opening and Button Band
Row 1: With right side facing, join yarn at top right back edge. Sc evenly down the back opening edge, working approximately 1 sc per row. (Count will match your row total along the back opening — work evenly so the band lies flat)
Row 2 (Buttonhole row, right side only): Sc in first 4 sts, ch 2, sk 2 sts, sc in next 6 sts, ch 2, sk 2 sts, sc to end. (Matches Row 1 count, with 2 buttonhole gaps)
Repeat the same band on the left back edge without buttonholes (plain sc row) to form the button-side band.
Part 6: Crochet Bow Sash
Bow Body (make 1):
Row 1: Ch 22, sc in 2nd ch from hook and each ch across, turn. (21 sc)
Rows 2–14: Ch 1, sc in each st across, turn. (21 sc each row)
Fasten off, leaving a 30cm tail.
Bow Center Wrap (make 1):
Row 1: Ch 8, sc in 2nd ch from hook and each ch across, turn. (7 sc)
Rows 2–4: Ch 1, sc in each st across, turn. (7 sc each row)
Fasten off, leaving a 20cm tail.
Bow Ties (make 2):
Row 1: Ch 6, sc in 2nd ch from hook and each ch across, turn. (5 sc)
Rows 2–40: Ch 1, sc in each st across, turn. (5 sc each row — work until tie measures approx. 35cm, adjust row count as needed)
Fasten off.

Assembly Steps
- Weave in all ends on the yoke, bodice, and skirt pieces before assembly, using a tapestry needle and working ends in for at least 5cm along the back of stitches.
- Sew buttons onto the left back band, lining each one up with a buttonhole gap from Part 5, approximately 3cm apart.
- Block the skirt by lightly steaming or wet-blocking the scalloped edge flat, pinning each scallop point out for 1–2 hours to set the lace pattern before final assembly.
- Fold the bow body rectangle in half widthwise (so it measures roughly 11cm x 13cm folded) and sew the short ends together to form a loop, seam at the center back.
- Pinch the bow loop at its center to create the classic bow shape, then wrap the small Bow Center Wrap piece around the pinched middle, overlapping the ends by 1cm at the back and sewing them together.
- Attach the bow ties by sewing one end of each tie strip to the back of the bow center, positioning them so they hang evenly when the bow is centered.
- Position the finished bow at the front center of the waist, roughly 2cm above the waist decrease round (Part 3, Rnd 7), and sew or tie in place through the back of the bodice.
- Try the dress on a doll or against a flat surface to check the back opening lies flat, then do a final steam-block of the entire dress, smoothing the bubble bodice texture and lace yoke gently.
Beginner/Intermediate Tips
- When working the magic ring in Part 1, pull the tail snug before working your first stitch round — if you wait until after, the center hole won’t close all the way.
- The petal round (Part 1, Rnd 3) is the trickiest part of the yoke. Go slowly and count your skipped stitches carefully; it’s easy to skip one extra by accident, which throws off the eyelet round that follows.
- For the FPdc bubble texture in Part 3, keep your tension slightly looser than usual — front post stitches naturally pull tighter and can make the bodice stiff if worked too snug.
- When working the shell stitch skirt, place a stitch marker in the center stitch of every third shell as you go. It makes it much easier to keep your shell count consistent across 6+ repeated rounds.
- If your gauge runs tighter or looser than the pattern, measure the yoke after Rnd 9 (Part 1) before continuing — it should measure approximately 17cm across. Adjust hook size up or down half a millimeter if it’s off by more than 1cm.
Variations
- Blush Pink Heirloom: Work the entire dress in a soft dusty rose DK yarn instead of ivory, and swap the bow for a contrasting cream sash for a two-tone look.
- Long-Sleeve Winter Version: Instead of leaving the armholes open as cap sleeves, pick up stitches around each armhole and work 8–10 rounds of sc downward to create fitted long sleeves, finishing with a sc edge.
- Mini Version for Reborn/Preemie Dolls: Scale the pattern down by working with a 2.75mm hook and fingering weight yarn, which shrinks the finished dress to roughly 60% of the original size.
- Flower Crown Set: Add a matching headband using the same floral motif from Part 1, Rnds 1–3, sewn onto a simple sc band sized to fit baby’s head.
- Sage Green Garden Party Dress: Swap ivory for a soft sage green yarn and replace the bow sash with a crochet flower trio at the waist instead, using the same petal technique from the yoke.
Save This Pattern
If you’re planning to make this Heirloom Lace Baby Dress, save this pattern now so you don’t lose it — and tag your finished project so the whole community can see it! Pin it for later under #FoodiePlumCrochet so it’s ready whenever you grab your hook and yarn.



