
The Best Fluffy Pancakes recipe you will fall in love with. Full of tips and tricks to help you make the best pancakes.

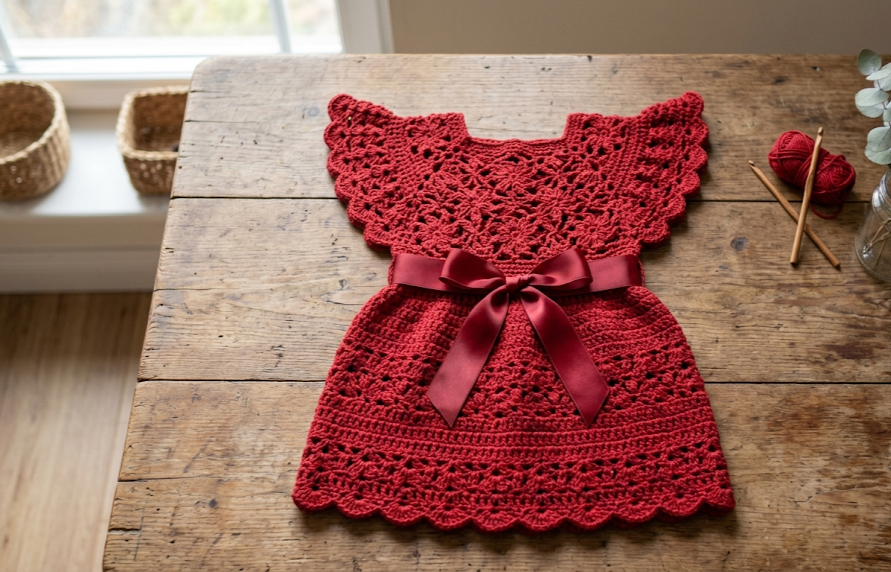
If you’ve been searching for the perfect handmade party dress to crochet for a special little girl in your life, this Scalloped Rose Lace Party Dress is about to become your new favorite project. With its delicate floral lace bodice, flirty flutter sleeves, and a romantic satin ribbon bow at the waist, this dress strikes the perfect balance between heirloom-quality detail and approachable, beginner-friendly construction.
This pattern is designed for a child’s size 4–5 (chest approximately 56–58cm), making it ideal for birthday parties, holiday photos, flower girl outfits, or simply a beautiful handmade gift that will be treasured for years. The bodice features an openwork rose motif panel that catches the light beautifully, while the skirt flows into soft, lacy circles that move with every twirl. A grosgrain or satin ribbon cinches the waist and ties into a bow, adding the final polished touch.
Worked entirely in a soft, machine-washable cotton-acrylic blend yarn in a rich cherry red, this dress is sturdy enough for everyday play yet elegant enough for the fanciest occasion. Whether you’re an intermediate crocheter looking for a rewarding new challenge or a confident beginner ready to level up your skills, this pattern walks you through every stitch, every round, and every assembly step — no guesswork required.
Grab your hook, a few skeins of red yarn, and a length of ribbon, and let’s get started on a dress that’s guaranteed to turn heads.
|
Difficulty
Intermediate
|
Time
10–12 Hours
|
Hook Size
3.5mm (E/4)
|
Yarn Weight
DK (Light #3)
|
Finished Size
Child Size 4–5
|
Gauge
Before you begin, it’s essential to crochet a gauge swatch. Gauge affects the finished size of the entire dress, so taking a few extra minutes here will save you from sizing surprises later.
- Gauge: 18 stitches and 20 rows = 10cm x 10cm square, worked in single crochet (sc)
- Hook used for gauge swatch: 3.5mm (E/4 US)
- Yarn weight used: DK weight (#3 light) cotton-acrylic blend
To check your gauge, chain 20, work a 10cm square in single crochet, and measure. If your square is smaller than 10cm, switch to a larger hook. If it’s larger than 10cm, switch to a smaller hook. Adjust until your swatch matches.
Materials List
- Yarn: DK weight (#3 light) cotton-acrylic blend yarn
- Cherry red — approximately 350g (4–5 skeins of 70–100g each, depending on brand)
- Hook: 3.5mm (E/4 US) crochet hook
- Notions:
- Tapestry/yarn needle for weaving in ends
- Stitch markers (at least 4)
- 1 meter of 1.5cm wide satin or grosgrain ribbon, cherry red
- 1 decorative pearl or button bead (for bow center, optional)
- Sewing needle and matching thread (for attaching ribbon and bead)
- Scissors
Abbreviations Table
| Abbreviation | Meaning |
|---|---|
| ch | chain |
| st(s) | stitch(es) |
| sc | single crochet |
| hdc | half double crochet |
| dc | double crochet |
| tr | treble crochet |
| sl st | slip stitch |
| sk | skip |
| sp | space |
| rep | repeat |
| rnd(s) | round(s) |
| row(s) | row(s) |
| BLO | back loop only |
| MR | magic ring |
| YO | yarn over |
| picot | a small decorative loop made by chaining a few stitches and slip stitching back into the base stitch |
| inc | increase (2 sts worked into 1 st) |
| dec | decrease (2 sts worked together as 1 st) |
| (…) | stitch count at end of round/row |
Technique Note — Magic Ring (MR): A magic ring is an adjustable loop made by wrapping yarn around your fingers, working your starting stitches into the loop, then pulling the tail to close the center hole completely, leaving no gap.
Technique Note — Back Loop Only (BLO): Instead of working under both loops of a stitch, insert your hook under only the back loop (the loop farthest from you). This creates a ridge and is used here to define the waistline.
Pattern Instructions
PART 1: Bodice (worked top-down in one piece, then divided for sleeves)
Round 1 (Neckline): Starting at the neckline, ch 60, join with sl st to form a ring, being careful not to twist the chain. Ch 1 (does not count as a stitch throughout). (60 sts)
Round 2: Sc in each st around. (60)
Round 3: *Sc 4, inc 1; rep from * around. (75)
Round 4: Sc in each st around. (75)
Round 5 (Rose Lace Panel Set-Up): *Sk 2 sts, work (dc, ch 2, dc) into next st, sk 2 sts, sc 1; rep from * around. (This creates the open “rose” V-shapes; stitch count stays consistent with shell pattern — 15 shell repeats) (75)
Round 6: *Sc 1, 5 dc into ch-2 sp of shell below, sc 1, sk 1; rep from * around. (90)
Round 7: Sc in each st around. (90)
Round 8 (Underarm Division): Sc 20 (left back), ch 3 (underarm gap), sk next 5 sts, sc 35 (front), ch 3 (underarm gap), sk next 5 sts, sc 20 (right back, joining to first st of round). (78 — 70 sc + 8 ch sts)
Rounds 9–14 (Bodice Body): Sc in each st and ch around (work sc into each chain of underarm gaps). (78)
Round 15 (Waistline BLO Ridge): Sc BLO in each st around. (78) This ridge marks where the ribbon will sit.
Round 16: Sc in each st around. (78)
Fasten off, weave in end at underarm seam.
PART 2: Sleeves (worked separately, 2 needed)
Round 1: Join yarn in center of underarm ch-3 gap from bodice. Sc 5 into the gap, then sc evenly around armhole opening picking up approximately 25 sts from bodice edge. (30 sts total)
Round 2: Sc in each st around. (30)
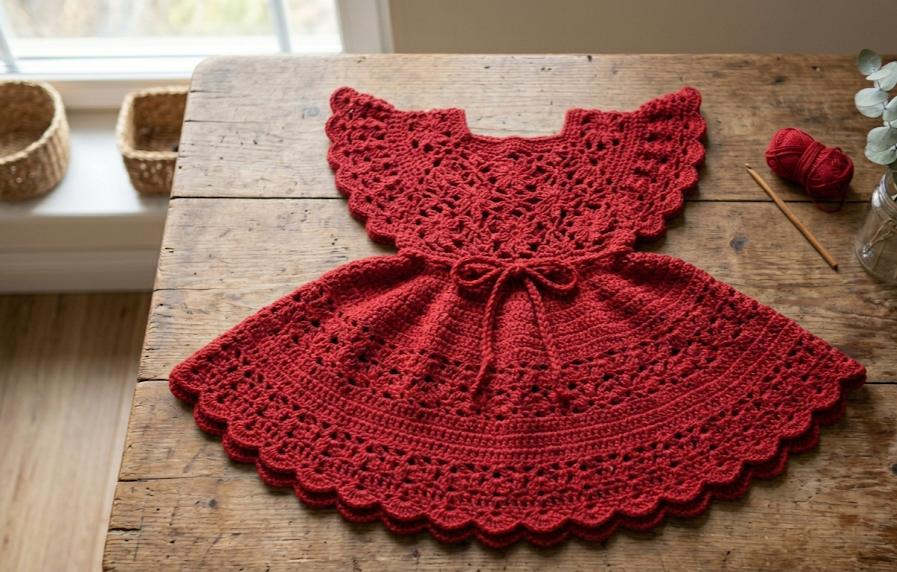
Round 3 (Flutter Edge): *Sk 1 st, work 5 dc into next st (shell), sk 1 st, sl st into next st; rep from * around. (This creates the scalloped flutter ruffle — 10 shell repeats)
Fasten off, weave in ends. Repeat for second sleeve.
PART 3: Skirt (worked downward from bodice round 16)
Round 1: Join yarn to any st on bodice Round 16. *Sc 1, inc 1; rep from * around. (117)
Round 2: Sc in each st around. (117)
Round 3: *Sc 2, inc 1; rep from * around. (156)
Rounds 4–6: Sc in each st around. (156)
Round 7 (Lace Transition): *Sk 1, dc 3 into next st, sk 1, sc 1; rep from * around. (39 shell repeats, 195 sts total)
Rounds 8–10: Working into the shell pattern, *sc 1 into sc, ch 1, dc 3 into ch-1 sp of shell below, ch 1, sk to next sc; rep from * around, maintaining lace pattern. (195)
Round 11 (Length Increase Round): *Sc 4, inc 1; rep from * around. (234)
Rounds 12–16: Continue lace shell pattern as established in Round 7, maintaining stitch count. (234)
Round 17 (Hem Scallop Border): *Sk 2, work (dc, ch 1, dc, ch 1, dc) into next st, sk 2, sl st into next st; rep from * around. (This creates the decorative scalloped hem edge — 39 scallop repeats)
Round 18 (Picot Trim): Sl st into next dc, ch 3, sl st back into same dc to form picot, sl st into ch-1 sp, sl st into next dc, ch 3, sl st back into same dc to form picot; rep around to finish each scallop with two picots.
Fasten off, weave in all ends securely.
Assembly Steps
- With the bodice and skirt already joined as one continuous piece (skirt worked directly from bodice Round 16), there is no separate seam to sew between bodice and skirt.
- Attach both sleeves into the underarm openings left in Bodice Round 8, sewing any small gaps closed with a tapestry needle and matching yarn.
- Weave in all loose ends from rounds, especially at the underarm joins and skirt color/round transitions.
- Cut your 1 meter length of ribbon. Thread it through the BLO ridge row (Bodice Round 15) by weaving the ribbon over-under through each back-loop ridge stitch around the entire waist.
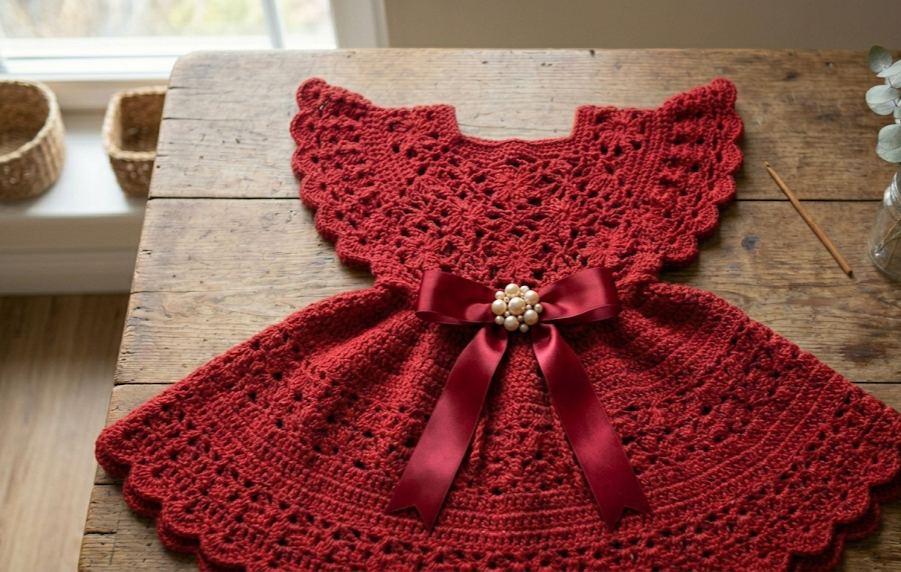
- Center the ribbon at the front waist and tie into a bow, leaving tails approximately 10–12cm long on each side.
- Hand-sew the decorative pearl or button bead to the center knot of the bow using sewing thread, stitching through several times to secure it firmly.
- Steam-block the finished dress lightly by hovering a steamer 5cm above the lace skirt rounds (do not touch iron directly to yarn) to help the shells and scallops lie flat and open.
- Lay flat to dry fully before dressing the child, to preserve the blocked shape of the lace.
Beginner/Intermediate Tips
- When working the rose lace panel (Round 5–6), use a stitch marker on the first stitch of each round so you don’t lose track of your shell repeats — it’s easy to drift off pattern in openwork rounds.
- If your underarm gaps (Round 8) feel tight when joining the sleeves, it’s okay to sc one extra stitch into the chain space; just adjust your sleeve round 1 count to match.
- For the BLO waistline ridge (Round 15), go slowly — only catch the back loop, not both loops, or the ridge won’t be defined enough to weave your ribbon through later.
- Block your skirt lace rounds (7–17) before assembly if possible; pre-blocking individual pieces makes ribbon-weaving and bow placement much easier than working with an unblocked, curled hem.
- If you’re newer to shell stitches, practice the 5-dc shell from Sleeve Round 3 on a scrap swatch first — getting consistent shell height takes a few tries.
Variations
- Color Block Version: Work the bodice rose lace panel in white and the skirt in red for a striking two-tone holiday look.
- Mini Size for Dolls: Reduce all starting chains by roughly 40% and switch to a 2.75mm hook with fingering weight yarn to create a matching doll-sized dress for 18-inch dolls.
- Flower Girl Ivory Edition: Crochet the entire dress in ivory or cream DK yarn and swap the red ribbon for a soft blush or gold satin sash for weddings.
- Layered Tutu Skirt: Instead of a single skirt layer, crochet two shorter lace skirt layers (stopping the first at Round 10 and adding a second full skirt from the waistline) for extra volume and a fuller, princess-style silhouette.
- Long-Sleeve Winter Adaptation: Extend the sleeve pattern with 8–10cm of straight sc rounds before the flutter shell edge to create three-quarter or full-length sleeves for cooler weather wear.
Save This Pattern!
This Scalloped Rose Lace Party Dress is the kind of project that turns heads at every party — and it’s worth saving so you can come back to it again and again. Pin this now so you don’t lose it in your feed, and tag your finished dress with #FoodiePlumCrochet so we can see your gorgeous creation!



