
The Best Fluffy Pancakes recipe you will fall in love with. Full of tips and tricks to help you make the best pancakes.

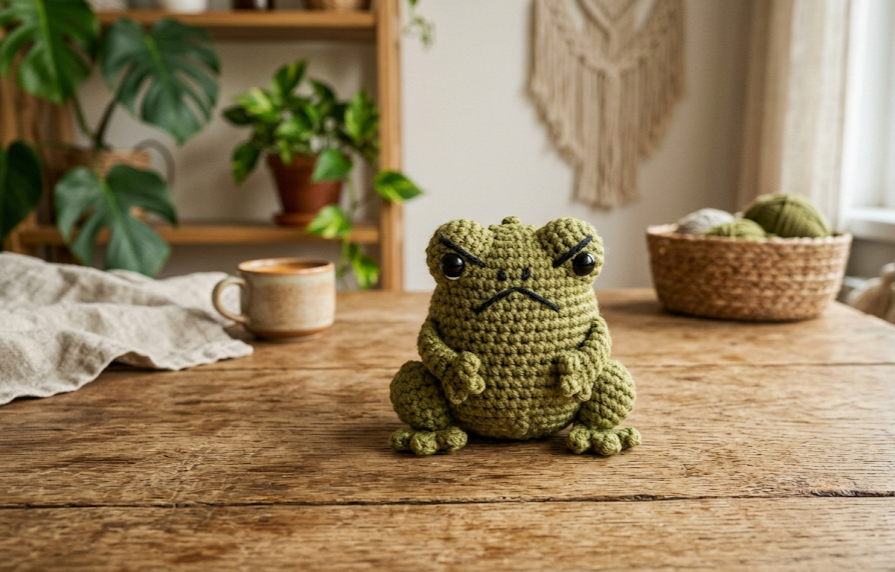
If you’ve ever wanted a tiny crocheted companion with just the right amount of attitude, this Angry Mini Frog amigurumi pattern is exactly what you need. These pocket-sized frogs have become wildly popular for their grumpy, furrowed-brow expressions that somehow manage to be both hilarious and endearing at the same time. Each frog measures only about 5cm (2 inches) tall, making them perfect for desk décor, keychains, plant pot buddies, or a sweet handmade gift for the friend who appreciates a little sass in their softies.
This pattern is written for confident beginners who already know the basic amigurumi stitches, and it’s a wonderful next-step project if you’ve made a round amigurumi ball before but haven’t tackled face shaping yet. The whole project works up in a single evening, and because it uses such a small amount of yarn, it’s also a fantastic way to use up scraps from your stash. Make one in moss green, one in rusty terracotta, and one in soft taupe, and you’ll have a whole little family of disgruntled amphibians glaring at you from your craft shelf — in the best way possible.
The construction is straightforward: a rounded body worked in continuous rounds, a flattened bottom for stability, two small bulging eye mounds, and a hand-embroidered face that gives each frog its individual grumpy personality. No wire or armature is needed for this pattern since the frog sits flat and doesn’t require posing, which makes it an especially low-stress, beginner-friendly build.
|
Difficulty
Beginner-Intermediate
|
Time
2–3 Hours
|
Hook Size
2.5mm
|
Yarn Weight
Sport/DK
|
Finished Size
~5cm Tall
|
Gauge
- 6 single crochet (sc) stitches x 6 rows = 2.5cm (1 inch) square
- Hook used for gauge swatch: 2.5mm
- Yarn used for gauge swatch: Sport/DK weight cotton-acrylic blend
Gauge in amigurumi is less about exact sizing and more about tightness — a tight gauge prevents the stuffing from peeking through the stitches. If your stitches look loose or you can see stuffing through the fabric, drop down half a hook size.
Materials List
- Sport/DK weight yarn, approximately 8g in Olive Green (main color, Color A)
- Small scrap of Black yarn or black embroidery floss (for face embroidery)
- 2.5mm crochet hook
- Pair of 6mm black safety eyes (or embroider eyes with black yarn if making for a small child)
- Polyester fiberfill stuffing
- Yarn needle (blunt tip, for sewing and embroidery)
- Stitch marker (locking type recommended for marking round starts)
- Small fabric scissors
Abbreviations Table
| Abbreviation | Meaning |
|---|---|
| ch | chain |
| sc | single crochet |
| inc | increase (2 sc in same stitch) |
| dec | invisible decrease (see technique note below) |
| st(s) | stitch(es) |
| rnd | round |
| MR | magic ring (see technique note below) |
| BLO | back loop only (see technique note below) |
| sl st | slip stitch |
| ( ) | stitch count at end of round |
Pattern Instructions
Part 1: Body (worked in continuous rounds, do not join unless stated)
Technique note — Magic Ring (MR): A magic ring lets you start your amigurumi with a tight, adjustable center hole instead of a gap. Loop your yarn around two fingers, pull a loop through, and crochet your first round of stitches into that loop, then pull the tail to close it snugly before continuing.
Rnd 1: MR, 6 sc into ring (6)
Rnd 2: Inc in each st around (12)
Rnd 3: Sc 1, inc repeat around (18)
Rnd 4: Sc 2, inc repeat around (24)
Rnd 5: Sc 3, inc repeat around (30)
Rnd 6–9: Sc in each st around, no increases (30) — repeat this round 4 times total
Rnd 10: Sc 3, dec repeat around (24)
Technique note — Invisible decrease (dec): Insert your hook into the front loop only of the next stitch, then the front loop only of the following stitch, and pull through both loops together. This creates a smoother, less visible decrease than a standard sc2tog.
Rnd 11: Sc 2, dec repeat around (18)
Stuff the body firmly at this point, while you still have easy access to the opening.
Rnd 12: Sc 1, dec repeat around (12)
Rnd 13: Dec around (6)
Fasten off, leaving a 15cm tail. Use the tail and yarn needle to weave through the front loops of the remaining 6 stitches, pull tight to close the hole, and weave the end inside the body.
Part 2: Bottom Flattening
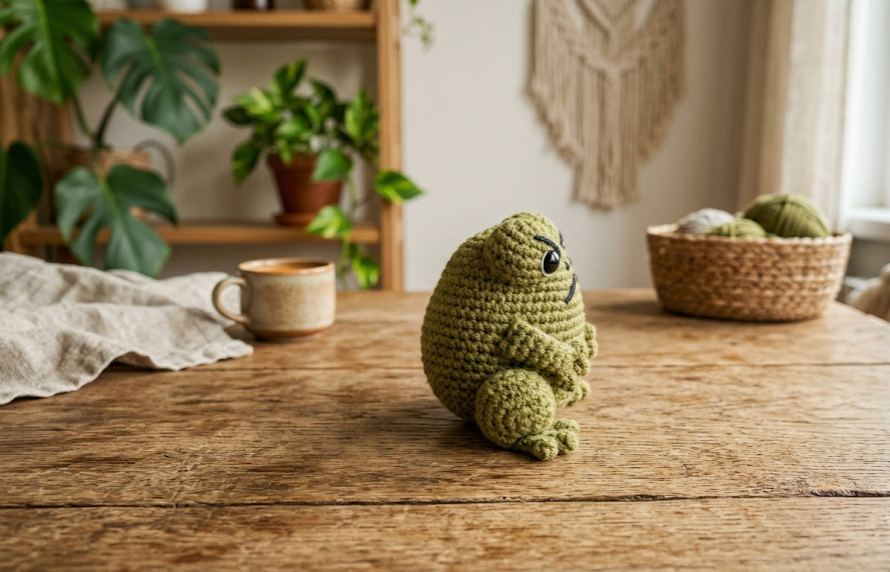
Because these frogs sit upright on a flat surface, the base needs to be slightly flattened rather than left as a rounded ball.
- Before fully closing Rnd 1’s tail, pinch the very bottom of the body between your fingers and add a few small stitches across the flattened base using the starting tail, securing both layers together. This keeps the frog from rolling.
- Trim and weave in the tail securely inside the stuffing.
Part 3: Eye Mounds (make 2)
Rnd 1: MR, 5 sc into ring (5)
Rnd 2: Inc in each st around (10)
Fasten off, leaving a 10cm tail for sewing. Do not stuff — these are sewn on flat-ish to create the bulging brow effect, with a tiny pinch of stuffing tucked underneath if you’d like extra dimension.
Part 4: Face Assembly
- Position the two eye mounds side by side on the upper third of the body, about 0.5cm apart from each other, and pin or hold in place to check positioning before sewing.
- Sew each eye mound down around its full edge using the tail and a whip stitch, leaving the top-center area free if you want to tuck in a touch more stuffing for extra puffiness.
- Insert one safety eye into the center of each eye mound, securing the backing washer firmly on the inside of the body. If working with embroidered eyes instead of safety eyes, stitch a small black French knot in the center of each mound instead.
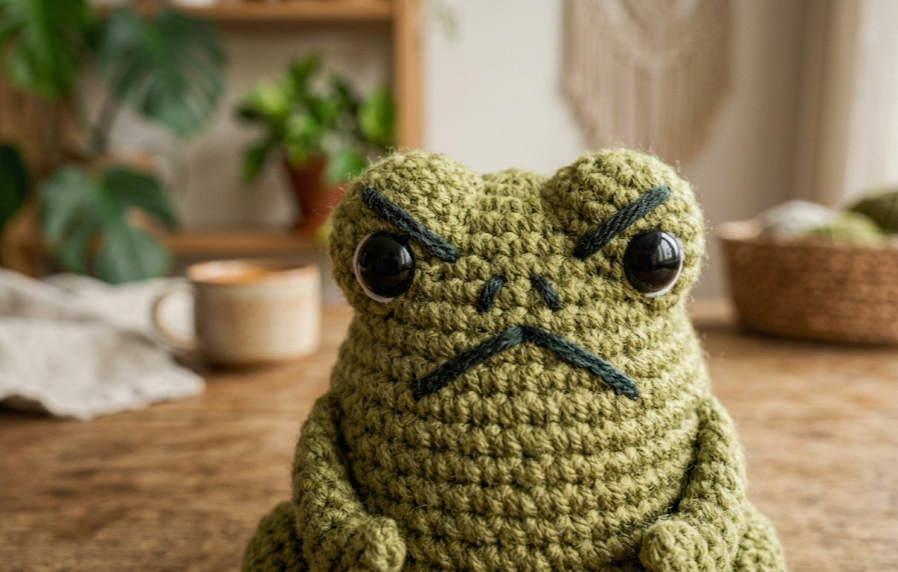
- Using black yarn or embroidery floss and your yarn needle, embroider a single angled line of straight stitches above each eye mound, slanting inward toward the center, to create the signature furrowed angry eyebrows.
- Below the eyes, embroider a downward-curving mouth using 3–4 short straight stitches that dip in the center, creating a frown shape. Add two small upward stitches at the corners of the mouth if you want a slightly more pronounced scowl.
Assembly Steps
- Confirm the body is firmly stuffed and the base sits flat before attaching any face features — a soft or lopsided body will throw off the entire expression.
- Center the two eye mounds on the upper third of the head, spaced approximately 0.5cm apart, and check that they sit at the same height before sewing both down permanently.
- Insert and secure safety eyes through the center of each mound, making sure the backing is snug against the inside body wall so the eyes don’t wobble.
- Embroider eyebrows first, then the mouth — the eyebrow angle is what sells the “angry” expression, so keep both sides symmetrical by eyeballing the slant against the opposite eye mound before stitching.
- Weave in all remaining loose ends using a yarn needle, running each tail through several stitches inside the body before trimming.
Beginner/Intermediate Tips
- Because the eye mounds sit so close together, baste them in place with a couple of loose stitches first and step back to check the expression before committing to a permanent whip stitch — it’s much easier to fix at this stage.
- Keep your tension tight throughout the body rounds; mini amigurumi shows gaps much more obviously than larger projects because there’s so little fabric to hide imperfections in.
- When embroidering the eyebrows, work both sides in the same direction (for example, both slanting down toward the nose) rather than mirroring them outward, since outward slants tend to read as “surprised” instead of “angry.”
- If your invisible decreases are leaving small visible holes, try going down half a hook size for just the decrease rounds, or simply stitch the gap closed with the tail end during your final weave-in.
Variations
- Lily Pad Display: Crochet a flat green circle (5 rounds of sc, no shaping needed beyond standard increases) and seat your finished frog on top for an adorable display base.
- Rainbow Frog Family: Make a set of six in different solid colors — mustard yellow, dusty pink, sky blue, lavender, brick red, and cream — to create a colorful collection rather than the earth-tone original.
- Keychain Version: Attach a small metal keychain ring to the top of the head during the final stuffing stage before closing Rnd 13, turning your frog into a wearable accessory.
- Giant Size Edition: Recreate the same pattern using a chunky weight yarn and a 6mm hook to produce an oversized 15–18cm version perfect as a chunky throw pillow or shelf decoration.
Save This Pattern
If you loved these grumpy little frogs as much as we did making them, save this pin so you can come back to it any time you need a quick, satisfying project! Tag your finished frogs and share your favorite colorway — we’d love to see your version. #FoodiePlumCrochet



