
The Best Fluffy Pancakes recipe you will fall in love with. Full of tips and tricks to help you make the best pancakes.

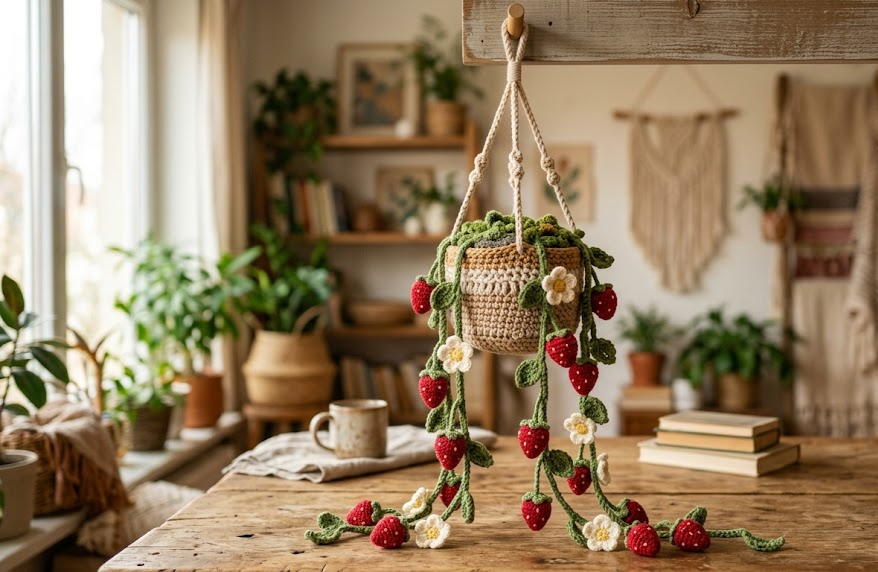
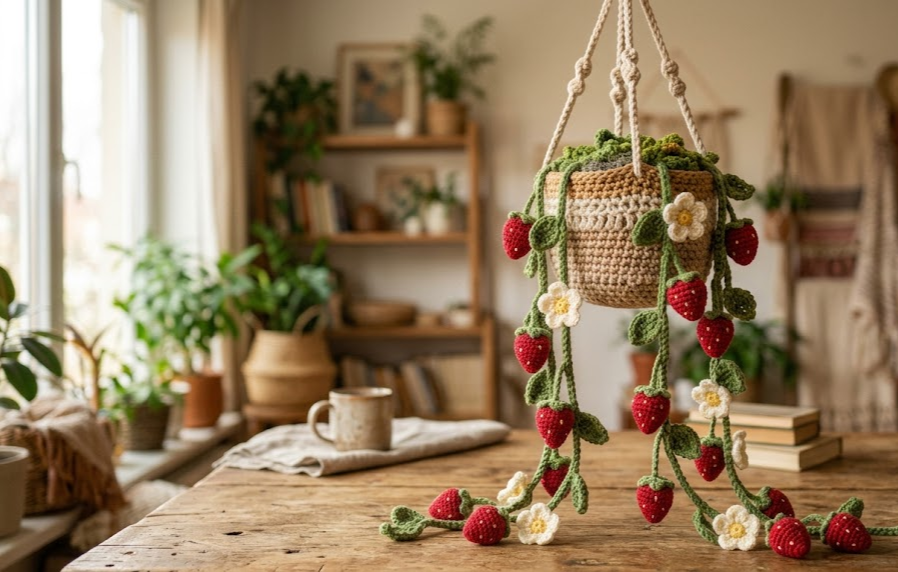
There’s something irresistibly charming about a crochet houseplant that never wilts, never needs watering, and stays perfectly ripe all year round. This hanging crochet strawberry plant combines the cozy texture of yarn with the whimsical joy of a trailing strawberry vine, tumbling down from a soft, oatmeal-colored woven pot. Plump red berries dangle on delicate green vines, framed by clusters of leafy foliage and dainty white flowers with sunny yellow centers.
This pattern is perfect for crocheters who love amigurumi-style projects but want something a little more decorative and display-worthy. It makes a gorgeous addition to a kitchen wall, a nursery, a boho-styled reading nook, or as a thoughtful handmade gift for anyone who loves plants but lacks a green thumb. Because every piece is crocheted individually and then assembled, this project is fantastic for using up scraps of sport and fingering weight yarn in your stash while practicing several small-scale amigurumi techniques.
Rated intermediate, this pattern is ideal for crocheters who are comfortable with magic rings, basic increases and decreases, and simple assembly with a yarn needle. Total crafting time runs approximately 15 to 18 hours, depending on how many strawberries and leaves you choose to add.
|
Difficulty
Intermediate
|
Time
15–18 Hours
|
Hook Size
2.5mm
|
Yarn Weight
Sport / Fingering
|
Finished Size
~45–50cm
|
Gauge
20 stitches x 22 rows = 10cm x 10cm (4in x 4in) in single crochet
Hook used: 2.5mm
Yarn used: Sport weight (pot, leaves, vines), fingering weight (strawberries, flowers)
Always crochet a small gauge swatch before starting. Because amigurumi pieces rely on tight, dense stitching to prevent stuffing from showing through, aim for a slightly smaller hook than the yarn label recommends if your gauge swatch looks loose or gappy.
Materials List
- Sport weight yarn in tan/oatmeal — 50g (pot exterior)
- Sport weight yarn in moss green — 40g (leaves and vines)
- Fingering weight yarn in cherry red — 25g (strawberries)
- Fingering weight yarn in ivory/white — 10g (flowers)
- Small amount of yellow fingering weight yarn (flower centers)
- Small amount of dark brown or black yarn (strawberry seed embroidery)
- 2.5mm crochet hook
- 2.0mm crochet hook (for small flowers and berries)
- Polyester fiberfill stuffing
- 20-gauge floral wire, cut into 8–10 pieces approximately 25–35cm long (for vines and stems)
- Wire cutters
- Yarn needle (tapestry needle)
- Stitch markers
- Twisted cord or macrame cord, approximately 60cm (for hanging loop)
- Wooden bead or ring, 2cm diameter (optional, for hanger)
- Craft glue (optional, for securing wire ends)
Abbreviations Table
| Abbreviation | Meaning |
|---|---|
| ch | chain |
| sc | single crochet |
| hdc | half double crochet |
| dc | double crochet |
| sl st | slip stitch |
| st(s) | stitch(es) |
| inc | increase (2 sc in same stitch) |
| dec | invisible decrease |
| MR | magic ring |
| BLO | back loop only |
| rnd | round |
| rep | repeat |
| ( ) | stitch count at end of round/row |
Technique notes:
- Magic ring (MR): Wrap yarn around your fingers to form a loop, insert hook and pull up a loop, then crochet your first round of stitches into the ring before pulling the tail to close it tightly. This avoids a hole at the center of round pieces.
- Invisible decrease (dec): Insert hook into the front loop only of the next two stitches, yarn over, and pull through both loops, then complete as a normal single crochet. This creates a smoother, less bulky decrease than a standard sc2tog.
- Back loop only (BLO): Insert your hook only under the back loop of the stitch, leaving the front loop unworked. This creates a visible ridge line, useful for shaping the pot rim.
Pattern Instructions
Part 1: The Pot
Using tan yarn and 2.5mm hook:
Rnd 1: MR, 6 sc into ring (6)
Rnd 2: inc in each st around (12)
Rnd 3: sc, inc rep around (18)
Rnd 4: sc 2, inc rep around (24)
Rnd 5: sc 3, inc rep around (30)
Rnd 6: sc 4, inc rep around (36)
Rnds 7–8: sc around, no increases (36)
Rnd 9 (BLO rnd): sc in BLO around, this creates the base-to-side fold line (36)
Rnds 10–18: sc around (36) — this builds the straight sides of the pot, approximately 8cm tall
Rnd 19: sc around, working through both loops to close the rim (36)
Fasten off, leaving a long tail for sewing. Stuff the pot firmly, leaving the top 2cm unstuffed so vines and stems can be inserted later.
Part 2: Strawberries (make 8–10)
Using cherry red yarn and 2.0mm hook:
Rnd 1: MR, 6 sc into ring (6)
Rnd 2: inc in each st around (12)
Rnd 3: sc, inc rep around (18)
Rnd 4: sc around (18)
Rnd 5: sc 1, dec rep around (12)
Rnd 6: dec rep around (6)
Stuff firmly. Fasten off, leaving a long tail to sew the berry onto its vine. Using dark brown or black yarn, embroider small straight stitches scattered across the surface to represent seeds.
Part 3: Strawberry Cap (make 8–10)
Using green yarn and 2.0mm hook:
Rnd 1: MR, 5 sc into ring, do not join, work in continuous rounds (5)
Rnd 2: ch 3, sl st into 2nd ch from hook and next ch to form a small leaf point, sl st into same base stitch, rep around all 5 stitches to form a 5-pointed calyx (5 points)
Fasten off, leaving a short tail. Sew the cap onto the pointed top of each strawberry, tucking the tail through to secure.
Part 4: Vines & Stems (make 8–10)
Cut floral wire into 25–35cm lengths, varying the length for a natural cascading look.
Using green yarn and 2.5mm hook, chain a length equal to the wire piece plus 2cm.
Row 1: Insert hook into 2nd ch from hook, sc across. Technique note: to work along a chain, always work into the top loop only of each chain stitch, moving away from your working yarn. (length varies)
Lay the wire along the wrong side of the crocheted strip. Fold the strip in half lengthwise around the wire and slip stitch the long edge closed, encasing the wire completely inside the tube. Leave 1.5cm of bare wire exposed at one end — this will be inserted into the pot.
Part 5: Leaves (make 20–25)
Using green yarn and 2.0mm hook:
Row 1: ch 8, sc in 2nd ch from hook, hdc in next 2 ch, dc in next 2 ch, hdc in next ch, sc in last ch (7)
Row 2: working down the opposite side of the starting chain, sc in each ch across (7)
Fasten off, leaving a short tail for sewing. This creates a simple pointed leaf shape. Vary a few leaves to be slightly smaller by starting with ch 6 for visual variety.
Part 6: Flowers (make 4–5)
Using ivory yarn and 2.0mm hook:
Rnd 1: MR, ch 2, dc, ch 1, sl st into ring rep 4 more times for 5 petals total (5 petals)
Fasten off. With yellow yarn, embroider 5–6 small French knots or straight stitches into the center of the flower to form the flower’s center.
Assembly Steps
- Insert the bare wire end of each vine approximately 1.5–2cm deep into the top opening of the stuffed pot, spacing them evenly around the circumference, roughly 1–1.5cm apart.
- Secure each wire in place with a small dot of craft glue where it meets the pot opening, then close the remaining opening of the pot around the wires with a whip stitch using the tan tail.
- Bend the wire vines into gentle cascading curves, allowing 3–4 vines to drape shorter (15–20cm) near the top and 4–5 vines to trail longer (25–35cm) toward the bottom for a layered look.
- Sew 2–3 leaves along the length of each vine, spacing them 3–4cm apart, alternating sides for a natural growth pattern.
- Sew one strawberry (with its cap already attached) to the end of most vines, allowing 2–3 vines to end in just a leaf cluster instead for variety.
- Cluster 8–10 additional leaves and attach them around the top rim of the pot to hide the base of the vines and create a full, leafy crown.
- Sew the 4–5 flowers evenly among the top leaf cluster, tucking them between leaves at varying heights.
- Fold the twisted cord in half and sew both ends to opposite sides of the pot rim, roughly 1cm below the top edge, creating a hanging loop approximately 25–30cm long. Thread a wooden bead onto the folded top of the cord if desired, and knot below it to hold its position.

Beginner/Intermediate Tips
- Work your magic rings tightly and double-check by tugging the tail before continuing — a loose center hole is the most common amigurumi mistake.
- Encasing wire inside the crocheted vine tube can feel fiddly; use a stitch marker to hold the folded edges together every few centimeters as you slip stitch, rather than trying to close the whole seam at once.
- When bending the wire vines after assembly, shape them gradually with your fingers rather than sharp folds, since kinked wire can poke through the yarn tube over time.
- Stuff the pot in small pinches rather than one large clump to avoid lumpy, uneven sides.
- If your invisible decreases still look bulky, try decreasing one round earlier than instructed for a smoother pointed tip on the strawberries.
Variations
- Color swap: Use golden yellow yarn instead of red for a “lemon vine” version, or purple for a grape-inspired hanging plant.
- Size option: Reduce the pot to 24 sts total and use only 5–6 shorter vines for a mini desk-sized version.
- Display style: Skip the hanging cord and instead glue a wooden dowel across the back to create a wall-mounted shelf-sitter version.
- Seasonal twist: Add a few crocheted white “snowberries” and swap green yarn for a frostier sage tone to create a winter-themed hanging plant.
Save This Pattern
Loved this hanging strawberry plant? Save this pin now so you don’t lose it, and tag your finished project with #FoodiePlumCrochet — we’d love to see your version!



