
The Best Fluffy Pancakes recipe you will fall in love with. Full of tips and tricks to help you make the best pancakes.

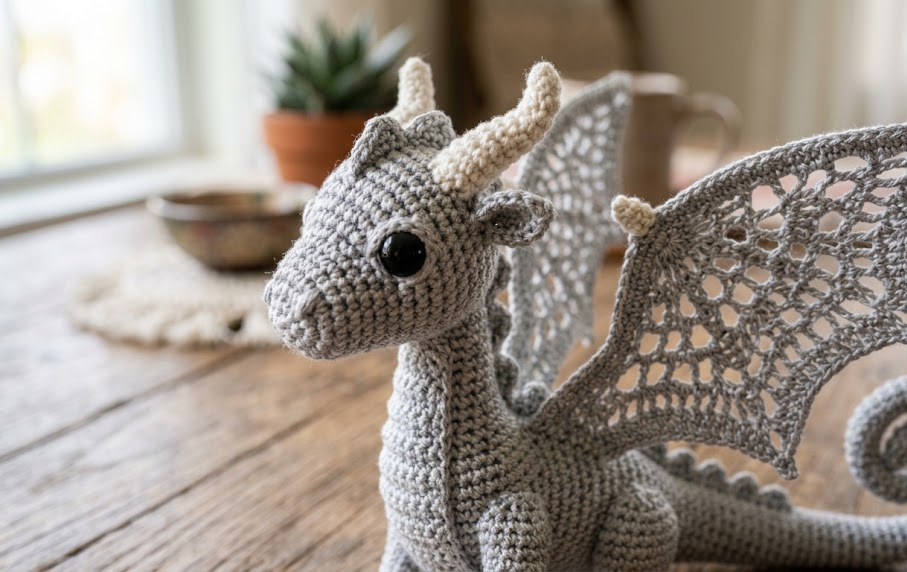
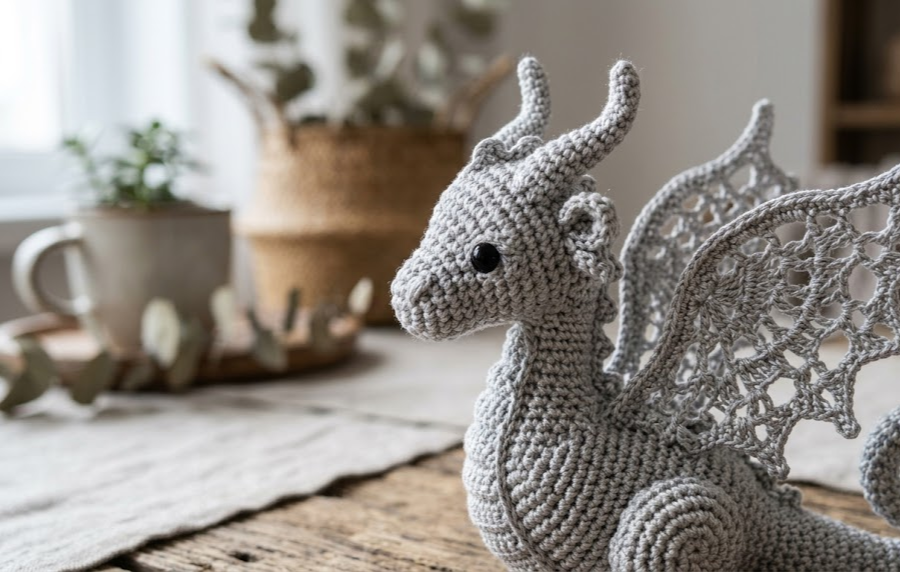
There’s something magical about turning a ball of yarn into a tiny creature that looks like it flew straight out of a storybook. This crochet dragon ornament is soft, silvery, and full of personality, with delicately curled wings, a spiraled tail, and a pose that looks ready to take flight off your shelf. It’s the kind of project that makes people stop and ask, “Wait, you made that?”
This pattern is perfect for crocheters who already know their way around single crochet, magic rings, and basic increases and decreases, and who are ready to try something a little more textured and dimensional. The dragon works up in a warm gray sport-weight yarn, giving it a soft, almost stone-like shimmer that suits both a nursery shelf and a fantasy-themed gift. Whether you display it as a year-round decorative piece, hang it as an ornament, or gift it to a dragon-obsessed friend, this little guy is guaranteed to be a conversation starter.
The wings are the star of the show here. Instead of a plain solid shape, they’re worked in an open, lacy style that lets light filter through the “membrane,” mimicking the translucent look of a real dragon wing. Don’t worry if lace crochet feels unfamiliar — every stitch and round is written out fully below, so you can follow along step-by-step with no guesswork.

|
Difficulty
Intermediate
|
Time
6–8 Hours
|
Hook Size
3.0mm (C/2)
|
Yarn Weight
Sport / DK
|
Finished Size
15cm x 10cm
|
Gauge
- 20 stitches x 22 rows = 10cm x 10cm in single crochet
- Hook used: 3.0mm (US C/2)
- Yarn used: Sport weight (#3 Light), silver-gray
Gauge is not critical for this project since it’s a decorative amigurumi rather than a wearable, but working a quick swatch helps you match the finished size shown and keeps your stitches tight enough to hide the stuffing.
Materials List
- Sport weight yarn (#3 Light) in silver-gray — approximately 80g / 175m
- Small amount of white or cream sport-weight yarn for horns (optional contrast)
- 3.0mm (US C/2) crochet hook
- Polyester fiberfill stuffing
- 2 x 6mm black safety eyes (or small black beads/embroidery thread for eyes)
- Stitch marker
- Yarn needle for weaving in ends and sewing pieces together
- Small piece of florist wire or pipe cleaner (for wing spine and tail support, optional but recommended)
- Fabric glue (optional, to secure safety eye backs)
- Scissors
Abbreviations Table
| Abbreviation | Meaning |
|---|---|
| ch | chain |
| sc | single crochet |
| hdc | half double crochet |
| dc | double crochet |
| sl st | slip stitch |
| inc | increase (2 sc in same stitch) |
| dec | invisible decrease |
| BLO | back loop only |
| st(s) | stitch(es) |
| rnd(s) | round(s) |
| MR | magic ring |
| ( ) | stitch count at end of round/row |
Technique Notes:
- Magic ring (MR): A method of starting a round without a hole in the center. Wrap yarn around your fingers, hook through the loop, and crochet your first round of stitches into it, then pull the tail to close the ring tightly.
- Invisible decrease (dec): Insert your hook into the front loop only of the next two stitches, yarn over, and pull through both, then complete as a normal single crochet. This keeps decreases smooth and nearly invisible on the surface.
- Back loop only (BLO): Instead of working under both loops of a stitch, insert your hook only under the back loop. This creates a subtle ridge line, often used to define a joint or segment.
Pattern Instructions
Head
Rnd 1: MR, 6 sc (6)
Rnd 2: inc in each st around (12)
Rnd 3: (sc, inc) x6 (18)
Rnd 4: (sc2, inc) x6 (24)
Rnd 5: (sc3, inc) x6 (30)
Rnds 6–10: sc around (30)
Rnd 11: (sc3, dec) x6 (24)
Rnd 12: sc around, insert safety eyes between rnds 9–10, spaced 6 sts apart (24)
Rnd 13: (sc2, dec) x6 (18)
Rnd 14: (sc1, dec) x6 (12)
Stuff firmly before closing.
Rnd 15: dec x6 (6)
Fasten off, leaving a long tail for sewing to body.
Horns (make 2)
Rnd 1: MR, 4 sc (4)
Rnds 2–4: sc around (4)
Fasten off, leaving a tail for attaching to head above the eyes.
Body
Rnd 1: MR, 6 sc (6)
Rnd 2: inc around (12)
Rnd 3: (sc1, inc) x6 (18)
Rnd 4: (sc2, inc) x6 (24)
Rnds 5–8: sc around (24)
Rnd 9: (sc2, dec) x6 (18)
Rnds 10–12: sc around (18)
Stuff as you go, adding more before closing.
Rnd 13: (sc1, dec) x6 (12)
Rnd 14: dec x6 (6)
Fasten off, weave tail through last 6 sts and pull to close.
Legs (make 4)
Rnd 1: MR, 6 sc (6)
Rnd 2: inc around (12)
Rnds 3–5: sc around (12)
Rnd 6: (sc1, dec) x4 (8)
Rnds 7–8: sc around (8)
Stuff lightly. Fasten off, leaving tail for attaching to body.
Tail
Ch 4, sl st into first ch to form ring.
Rnd 1: 8 sc into ring (8)
Rnds 2–14: sc around (8), stuffing lightly as you go and curling the tube gently into a spiral shape as you work
Rnd 15: dec x4 (4)
Fasten off. If desired, insert a short length of florist wire before stuffing the last few rounds so the spiral holds its curl.
Wings (make 2)
The wings are worked flat, starting with a chain “spine” then building lace sections off it.
Ch 16.
Row 1: Starting in 2nd ch from hook, sc across (15)
Row 2 (spine): ch 20, turn — this becomes the top wing spine. Working back down the chain: sc in each of next 5 ch, then (ch 3, skip 2, sc in next ch) 4 times to form the open lace mesh, ending with sc in last 2 ch (approx 15 sts along spine)
Row 3: Along the base row, work (dc, ch 2, dc) into each lace loop from Row 2 to create the fanned membrane look
Fasten off, leaving a tail. Weave in loose ends, keeping the lace structure open. For added structure, run a short piece of wire along the spine chain before weaving in ends.
Technique note: this lace shaping only needs to look consistent, not perfectly uniform — dragon wings are naturally asymmetrical, so small variations add to the charm.
Assembly Steps
- Stuff and close the head, body, tail, and all four legs as instructed above.
- Sew the head to the top of the body, angling it slightly upward, using the long tail and a whipstitch.
- Attach the two horns just above and behind the eyes, angling them backward, about 1cm apart.
- Sew the four legs to the underside of the body: front legs about 2cm behind the head, back legs about 2cm in front of the tail, spaced 3cm apart from left to right.
- Attach the tail to the back end of the body, curling it to the side or underneath in a spiral for a natural resting pose.
- Position the wings on the back, just behind the head/shoulder area, angling them slightly outward and upward. Sew firmly along the spine chain, leaving the lace sections free.
- Weave in all remaining ends and fluff the stuffing gently through the body to smooth any lumps.
- Optional: add a small loop of yarn or thread at the top of the back for hanging as an ornament.
Beginner/Intermediate Tips
- Stuff firmly but not tightly — overstuffing can distort the invisible decreases and make the head or body look lumpy rather than round.
- When working the wing lace rows, count your loops as you go; it’s easy to lose track in open mesh work.
- If your tail won’t hold its curl, a short piece of florist wire inside does the trick without adding much bulk.
- Use stitch markers on every round of the head and body — with this many increase/decrease rounds, it’s easy to lose your round marker.
- Pin pieces in place with removable stitch markers before sewing so you can check the pose before committing.
Variations
- Color Swap: Try this dragon in deep emerald green or dusty lavender for a completely different personality.
- Mini Size: Use fingering weight yarn and a 2.0mm hook to make a tiny pocket-sized version, perfect for a keychain.
- No-Wing Version: Skip the wings entirely for a simpler “baby dragon” variation, great for true beginners.
- Ornament Display: Add a decorative ribbon loop and jingle bell for a holiday tree ornament version.
- Shelf Sitter Style: Add tiny felt flame details near the mouth and mount on a wooden base for a display piece.
Save this pattern now so you don’t lose it, and tag your finished dragon with #FoodiePlumCrochet — I’d love to see your version take flight!



