
The Best Fluffy Pancakes recipe you will fall in love with. Full of tips and tricks to help you make the best pancakes.

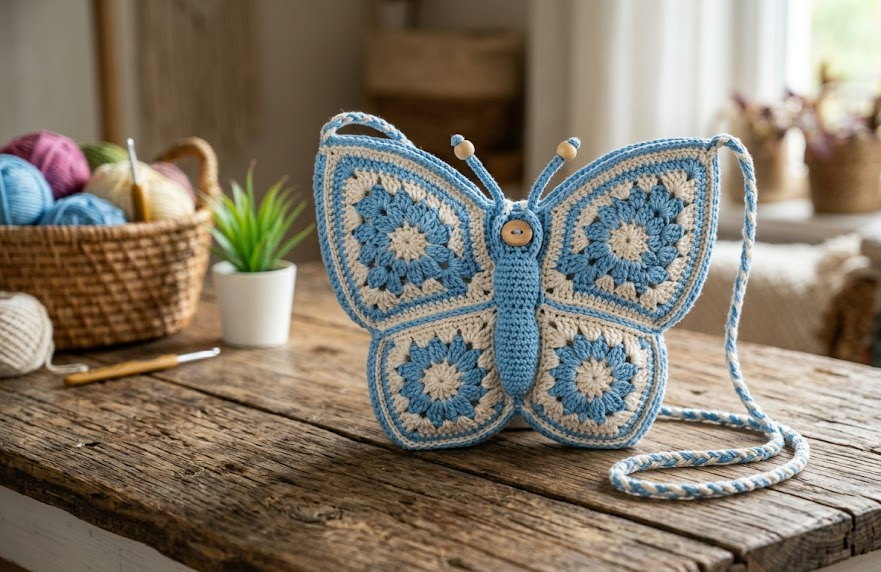
There is something quietly joyful about carrying a piece of handmade art on your shoulder, and this crochet butterfly bag delivers exactly that. Shaped like a pair of open wings, worked in soft sky blue with delicate ivory granny-square detailing, this bag is equal parts accessory and conversation piece. It is roomy enough for a phone, keys, and lip balm, light enough to wear all day, and striking enough that strangers will ask where you bought it — and you get to say you made it yourself.
This pattern is a wonderful project for crocheters who already know their way around basic stitches and granny squares and are ready to try shaping, colorwork, and simple construction techniques. It is not a beginner’s first project, but it is very achievable for an advancing beginner who is willing to take it slow, especially through the wing-shaping rows. The finished bag makes a gorgeous gift, a boho market accessory, or a festival-season staple that pairs beautifully with flowy dresses and denim alike.
Whether you are drawn to the cottagecore aesthetic, love nature-inspired accessories, or simply want a unique handmade bag that no one else will have, this butterfly bag pattern gives you a satisfying weekend-to-week-long project with a genuinely impressive result.
|
Difficulty
Intermediate
|
Time
8–10 hours
|
Hook Size
4mm (US G/6)
|
Yarn Weight
Worsted (#4)
|
Finished Size
20cm x 14cm
|
Gauge
- 16 stitches x 18 rows = 10cm x 10cm (4in x 4in) in single crochet
- Hook used: 4mm (US G/6)
- Yarn used: Worsted weight (Aran / #4) cotton yarn
- Always crochet a small gauge swatch before starting. If your swatch is smaller than 10cm, size up your hook. If it’s larger, size down. Matching gauge keeps your wings symmetrical and your strap the correct length.
Materials List
- Worsted weight (Aran / #4) cotton yarn in Sky Blue — approx. 150g (main wing color and strap)
- Worsted weight cotton yarn in Ivory/Cream — approx. 80g (granny-square centers, trim, and edging)
- Small amount of worsted cotton in Soft Gold (optional accent for granny-square centers)
- 4mm (US G/6) crochet hook
- 3.5mm crochet hook (for tighter edging rounds, optional)
- Yarn needle for weaving in ends and seaming
- Stitch markers (at least 4)
- Fabric or felt lining, cut to bag shape (optional, for structure and durability)
- Sewing needle and matching thread (if adding lining)
- Swivel clasp or D-rings (2), for attaching the strap (optional, if making a detachable strap)
- Fiberfill or batting, small amount (optional, for lightly padding the body between front and back layers)
Abbreviations Table
| Abbreviation | Meaning |
|---|---|
| ch | chain |
| sl st | slip stitch |
| sc | single crochet |
| hdc | half double crochet |
| dc | double crochet |
| tr | treble crochet |
| st(s) | stitch(es) |
| rnd(s) | round(s) |
| row(s) | row(s) |
| sp | space |
| rep | repeat |
| BLO | back loop only |
| MR | magic ring |
| inc | increase (2 sts in same st) |
| dec | decrease (2 sts worked together as 1) |
| yo | yarn over |
| (…) | stitch count at end of round/row |
Pattern Instructions
Part 1: Granny Square Wing Motifs (make 4 — 2 large, 2 small)
You will make four granny squares total: two larger ones for the top wings and two smaller ones for the bottom wings. All four start the same way.
Large Wing Motif (make 2):
Round 1: With Gold (or Ivory), make a magic ring (MR — wrap yarn around your fingers into a loop, work your first stitches into the loop, then pull the tail to close it snugly). Ch 3 (counts as first dc), work 2 dc into ring, [ch 2, 3 dc into ring] 3 times, ch 2, join with sl st to top of starting ch-3. (12 dc, 4 ch-2 sps)
Round 2: Join Ivory in any ch-2 corner space. Ch 3 (counts as first dc), (2 dc, ch 2, 3 dc) in same sp, *ch 1, skip next 3 sts, (3 dc, ch 2, 3 dc) in next ch-2 sp; rep from * around, ch 1, join with sl st to top of ch-3. (24 dc, 4 corner ch-2 sps, 4 side ch-1 sps)
Round 3: Join Sky Blue in any ch-2 corner space. Ch 3, (2 dc, ch 2, 3 dc) in same sp, *ch 1, 3 dc in next ch-1 sp, ch 1, (3 dc, ch 2, 3 dc) in next corner sp; rep from * around, join. Fasten off. (36 dc, 4 corner ch-2 sps, 8 side ch-1 sps)
Small Wing Motif (make 2): Repeat Rounds 1–2 only (skip Round 3), using Gold for Round 1 and Ivory for Round 2, then switch to Sky Blue and work one more round exactly as Round 3 above but stop after the second corner (this creates a rounded, smaller half-motif). Fasten off, leaving a long tail for seaming.
Part 2: Shaping the Wings
Lay your two large motifs and two small motifs in a butterfly formation: large motifs at the top, small motifs at the bottom, angled inward so the inner corners nearly touch.
Joining Row: With Sky Blue and a yarn needle, whip stitch the inner edge of each large motif to the inner edge of the small motif directly below it, leaving the outer 3 corners of each square unattached. This creates the classic “pinched-wing” silhouette. Repeat for the second wing pair.
You now have two wing panels (left wing and right wing), each made of one large + one small granny square joined together.
Part 3: Bag Body Front Panel
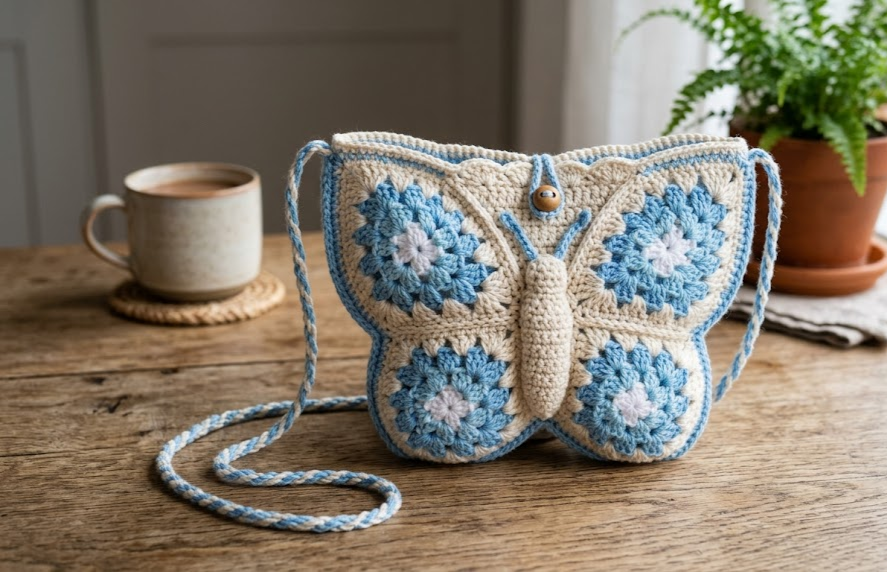
Row 1: With Sky Blue, ch 3, then working across the top straight edges of both wing panels, sc evenly across, joining the two wing panels together at the body center as you go: sc 18 across left wing top edge, sc 2 into the center join, sc 18 across right wing top edge. (38 sc)
Row 2: Ch 1, turn. Sc in each st across. (38 sc)
Row 3: Ch 1, turn. Sc dec, sc across to last 2 sts, sc dec (this is your invisible decrease — insert hook into next 2 sts as if to sc, yo, pull through both loops as one stitch, reducing your stitch count by one each side). (36 sc)
Rows 4–7: Repeat Row 3. (32, 28, 24, 20 sc)
Fasten off. This shaped section becomes the body/handle base connecting the two wings and gives the bag its structure at the top.
Part 4: Bag Back Panel
Work a simple back panel to close the bag:
Row 1: With Sky Blue, ch 33, sc in 2nd ch from hook and each ch across. (32 sc)
Rows 2–20: Ch 1, turn, sc in each st across. (32 sc each row)
Fasten off. This panel should measure approximately 18cm wide x 20cm tall, matching the outer edge measurement of your joined wing panels.
Part 5: Edging
With Ivory and a 3.5mm hook, work one round of sc evenly around the entire outer edge of the front wing panel, working 3 sc into each outer point for a smooth curve. Join with sl st. Fasten off.
Repeat for the back panel’s side and bottom edges only (leave the top open).
Part 6: Strap
Foundation: With Sky Blue, ch 13.
Row 1: Sc in 2nd ch from hook and each ch across. (12 sc)
Rows 2–140 (or until strap reaches approx. 90cm, adjust to your preferred length): Ch 1, turn, sc in each st across. (12 sc each row)
Edging: Work 1 round of sl st evenly around the entire strap for a neat, non-curling finish.
Assembly Steps
- Lay the front butterfly panel face-down and the back panel face-down on top of it, wrong sides together.
- Pin the two layers together around the bottom curve and both side edges, leaving the top 18cm open for the bag opening.
- Using Sky Blue and a yarn needle, whip stitch the front and back panels together around the pinned edges, working through both layers.
- If adding a fabric lining, cut two panels 1cm larger than your crochet panels, sew them together leaving the top open, then slip the lining inside the bag and hand-stitch it to the inside top edge.
- If lightly padding the body, tuck a thin, even layer of fiberfill between the front and back panels before you finish the final few centimeters of whip stitching, keeping it flat rather than stuffed.
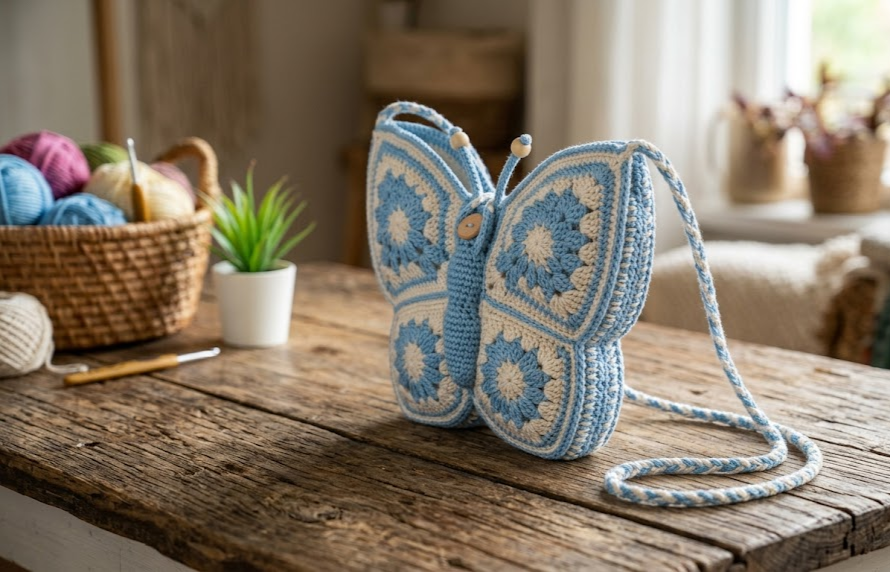
- Attach the strap: fold each end of the strap over by 2cm and stitch securely to the inside top corners of the bag, approximately 3cm in from each side seam. If using swivel clasps, sew a D-ring to each strap end instead and clip the strap on.
- Weave in all remaining ends using a yarn needle, running each tail through at least 5cm of stitching before trimming.
- Steam-block the finished bag lightly (hover a steam iron 3cm above the surface, do not press directly) to even out the granny-square motifs and help the wings lie flat.
Beginner/Intermediate Tips
- When joining new colors in the granny squares, always join in a corner ch-2 space, never mid-round, so your color changes stay hidden in the seam allowance.
- The invisible decrease used in Part 3 is more forgiving than a standard sc2tog for keeping your top edge smooth — practice it on a scrap swatch first if it’s new to you.
- Keep your tension slightly tighter than usual on the edging rounds; a looser edge will make the wings look floppy instead of crisp.
- Pin your wing panels to a foam board or towel before whip stitching them together so the butterfly shape stays symmetrical while you work.
- If your granny squares are coming out slightly different sizes, block them to identical measurements before joining rather than trying to fix the difference during seaming.
Variations
- Sunset Butterfly: Swap sky blue for a rust-and-gold color story for a warm, autumnal version of the same bag.
- Mini Coin Purse: Make only the small wing motifs and a shortened body/strap for a tiny going-out bag.
- Wall Hanging Butterfly: Skip the back panel and strap entirely, stiffen the front wing panel with fabric starch, and mount it on a small dowel for a boho butterfly wall decoration.
- Two-Tone Monochrome: Use two shades of the same color family (e.g., dusty rose and blush) instead of contrasting tones for a softer, more subtle look.
- Beaded Antennae Charm: Add a small twisted-cord or beaded charm to the top center seam to mimic butterfly antennae for extra whimsy.
Pinterest CTA
Save this pattern now so you always have it on hand for your next boho crochet project — tag your finished butterfly bag with #FoodiePlumCrochet so we can see it!



