
The Best Fluffy Pancakes recipe you will fall in love with. Full of tips and tricks to help you make the best pancakes.

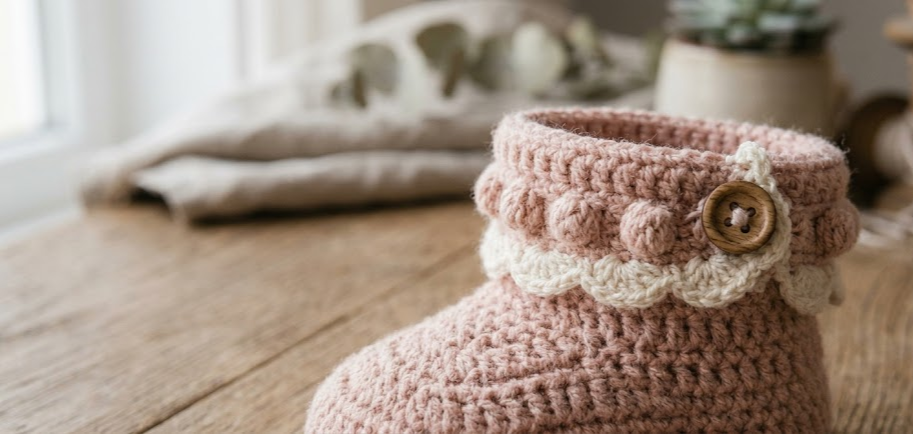
There is something about a pair of handmade baby booties that store-bought shoes simply can’t match. These blush pink booties, finished with a scalloped cuff and rows of soft white bobble “buttons,” are the kind of project that turns a skein of yarn into a keepsake. They’re soft enough for everyday wear, pretty enough for photos, and small enough to finish in an evening.
This pattern is written for confident beginners who are ready to try their first bobble stitches, or for intermediate crocheters who want a quick, satisfying project. The booties are worked in two main pieces per foot — a simple sole-and-body section, and a decorative scalloped cuff — then joined together with a row of bobble stitches that doubles as both closure and decoration. No sewing machine, no fussy notions, just a hook, some yarn, and a couple of quiet hours.
Whether you’re making these for a baby shower gift, a nursery photo prop, or your own little one’s first pair of “shoes,” this pattern walks through every stitch so you can crochet it from start to finish using only what’s written here.

|
Difficulty
Intermediate
|
Time
3–4 Hours
|
Hook Size
3.5mm (E-4)
|
Yarn Weight
DK / Light Worsted
|
Finished Size
0–3 Months
|
Gauge
- 20 sts x 24 rows = 10cm x 10cm (4in x 4in) in single crochet
- Hook used: 3.5mm (US E-4)
- Yarn used: DK / Light Worsted weight (#3)
Gauge is not critical for booties the way it is for garments, but if your swatch comes out noticeably looser or tighter than this, adjust your hook up or down half a millimeter to keep the finished size accurate.
Materials List
- DK weight yarn in Blush Pink — approximately 40g (90m) for one pair
- DK weight yarn in White — approximately 10g (25m) for the bobble trim
- 3.5mm (US E-4) crochet hook
- Yarn needle for weaving in ends and seaming
- Stitch marker (or a small scrap of contrasting yarn)
- Scissors
- Optional: two 30cm lengths of thin ribbon or crochet chain ties, if you’d like a tie-closure version
Abbreviations Table
| Abbreviation | Meaning |
|---|---|
| ch | chain |
| sl st | slip stitch |
| sc | single crochet |
| hdc | half double crochet |
| dc | double crochet |
| MR | magic ring |
| inc | increase (2 sts in same st) |
| dec | invisible decrease |
| BLO | back loop only |
| bobble | bobble/popcorn stitch (worked as described below) |
| st(s) | stitch(es) |
| rnd(s) | round(s) |
| sk | skip |
Technique notes (first appearance):
- Magic Ring (MR): a loop made by wrapping yarn around your fingers before working the first round into it, then pulling the tail to close the center hole tightly — this avoids a gap at the toe.
- BLO (back loop only): insert your hook only under the back loop of the stitch, leaving the front loop free; this creates a visible ridge that shapes the heel.
- Invisible decrease (dec): insert hook into the front loop of the next two stitches only, yarn over, and pull through both, then complete as a normal sc — this keeps decreases smooth and nearly invisible.
- Bobble stitch: yarn over, insert hook into stitch, pull up a loop, yarn over, pull through 2 loops (2 loops left on hook) — repeat this 4 more times into the same stitch (6 loops on hook total), then yarn over and pull through all 6 loops at once, followed by a small chain-1 to close it snugly.
Pattern Instructions
Part 1: Sole (make 2)
Using Blush Pink and 3.5mm hook.
- Rnd 1: MR, ch 1, 6 sc into ring. (6 sts)
- Rnd 2: inc in each st around. (12 sts)
- Rnd 3: sc, inc repeat around. (18 sts)
- Rnd 4: sc 6, inc 3 times, sc 6, inc 3 times. (24 sts)
- Rnd 5: sc around, working evenly. (24 sts)
Fasten off. This oval forms the base of the bootie.
Part 2: Body/Upper (worked directly onto sole)
- Rnd 1: join Blush Pink in any st, sc in each st around through both loops. (24 sts)
- Rnd 2–4: sc in each st around. (24 sts each round)
- Rnd 5: BLO sc around — this ridge marks where the heel will fold. (24 sts)
- Rnd 6: sc 2, dec repeat around. (18 sts)
- Rnd 7–9: sc in each st around, working straight up to form the ankle. (18 sts each round)
Fasten off, leaving a 15cm tail for seaming later.
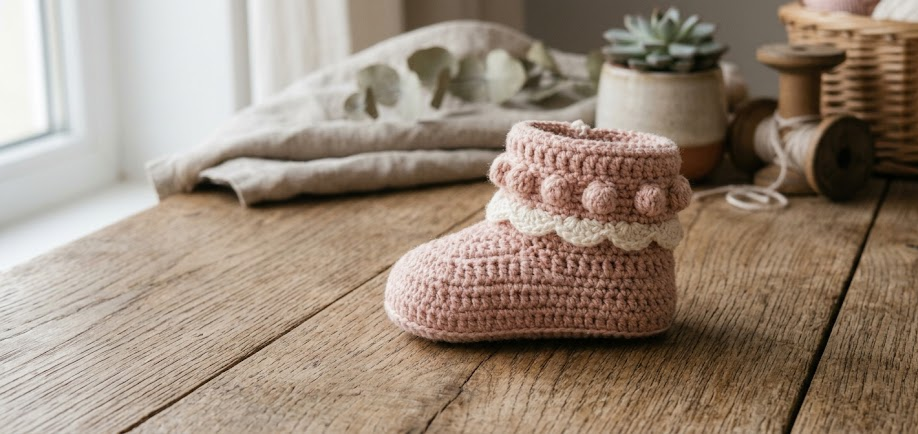
Part 3: Scalloped Cuff (make 2, worked flat then joined into a round)
Using Blush Pink and 3.5mm hook.
- Row 1: ch 19, dc in 4th ch from hook and each ch across. (17 sts)
- Row 2: ch 3 (counts as first dc), sk 1 st, 5 dc in next st, sk 1 st, sl st in next st repeat across to form scallops. (approx. 6 scallops)
Fasten off. Join the short ends of the cuff strip with a sl st to form a ring, then set aside.
Part 4: White Bobble Trim
- With White yarn, join at the base of the cuff ring.
- Rnd 1: work 1 bobble stitch (see technique note above) evenly spaced every 3 sts around the lower edge of the cuff, joining with a sl st to close the round. (approx. 8–10 bobbles depending on cuff circumference)
Fasten off and weave in ends.
Assembly Steps
- Fold the body of the bootie at the BLO ridge row (Rnd 5) to shape the heel; the ridge should sit at the back of the foot.
- Using the yarn tail from the body, whip stitch the back heel seam closed for about 1.5cm, from the top edge downward.
- Place the cuff ring over the top of the ankle so the bobble trim faces downward and sits just above the ankle opening.
- Pin or clip the cuff in place, matching the cuff seam to the bootie’s back heel seam.
- Using Blush Pink yarn and a yarn needle, sew the top edge of the cuff to the top edge of the bootie body with small whip stitches, spacing stitches about 0.5cm apart for a secure, even join.
- Weave in all remaining ends on the wrong side.
- If adding ties, attach a 30cm ribbon or crochet chain to each side of the cuff opening at the front, so the bootie can be tied snugly around a baby’s ankle.
- Repeat all steps for the second bootie, checking that both cuffs face the same direction for a matching pair.
Beginner/Intermediate Tips
- Pull your magic ring tail tight before starting Rnd 2 of the sole — a loose center is the most common flaw in toe-up crochet booties.
- When working the BLO round, go slowly the first time; it’s easy to accidentally catch both loops out of habit.
- Bobble stitches tighten up your tension quickly, so relax your grip on the hook slightly during Part 4 to avoid the trim curling inward.
- If your booties come out looser than expected, drop to a 3.25mm hook rather than changing yarn — it’s a faster fix.
- Block the finished booties lightly by steaming (never soaking DK acrylic-blend yarns) to help the scalloped cuff lie flat.
Variations
- Color-block version: work the body in a contrasting color from the cuff for a more graphic, modern look.
- Newborn mini size: work one fewer round in Part 2 and use a 3mm hook for a snugger newborn fit.
- Bow instead of bobbles: skip Part 4 and instead attach a small crochet bow to the front of the cuff.
- Gender-neutral palette: swap blush pink for oatmeal or sage green, keeping the white bobble trim for contrast.
- Display-only mini pair: work the pattern at half scale with fingering weight yarn and a 2.5mm hook to create a shelf-sized keepsake pair rather than wearable booties.
Save this pattern now so you don’t lose it — pin it to your crochet board and tag your finished booties with #FoodiePlumCrochet so we can see your version!



