
The Best Fluffy Pancakes recipe you will fall in love with. Full of tips and tricks to help you make the best pancakes.

Nothing says handmade heirloom quite like a poncho shaped like a butterfly. This Butterfly Baby Poncho combines soft sage green, warm terracotta orange, and gentle dusty blue into a single crocheted square that folds effortlessly into a wearable poncho for your little one. Whether you’re making it for a baby shower gift, a cake-smash photo session, or simply a cozy layer for cool mornings, this pattern turns simple granny-square techniques into a piece that looks like it came straight out of a boutique nursery shop.
This project is perfect for the crocheter who has mastered basic granny squares and is ready to add surface crochet detailing, a scalloped picot border, and hand-tied tassels to their skill set. The finished poncho is soft, breathable, and made entirely from DK weight yarn, so it layers beautifully over onesies and rompers without adding bulk. Babies aged 3 to 12 months will fit comfortably, and the drape of the poncho makes it easy to get on and off over the head.
Below you’ll find the full gauge, materials, abbreviations, and step-by-step pattern instructions so you can crochet this piece from start to finish using nothing but what’s written here.

|
Difficulty
Intermediate
|
Time
7–9 Hours
|
Hook Size
4.0mm (G/6)
|
Yarn Weight
DK (Light Worsted)
|
Finished Size
38cm x 38cm
|
Gauge
- 18 sts x 20 rows = 10cm x 10cm (4in x 4in) in single crochet (sc)
- Granny rounds 1–4 = 10cm x 10cm (4in x 4in) square
- Hook used for gauge: 4.0mm (US G/6)
- Yarn used for gauge: DK weight (light worsted, #3)
Always crochet a gauge swatch before beginning. If your square measures smaller than 10cm, go up a hook size. If it measures larger, go down a hook size. Gauge affects the finished size and yarn amounts needed.
Materials List
- Sage Green DK yarn — approximately 100g (2 skeins of 50g/125m each)
- Terracotta Orange DK yarn — approximately 80g (2 skeins of 50g/125m each)
- Cream DK yarn — approximately 120g (3 skeins of 50g/125m each, includes border and tassels)
- Dusty Blue DK yarn — approximately 20g (1 skein of 50g/125m, for surface detail)
- 4.0mm (US G/6) crochet hook
- Yarn needle
- Scissors
- Stitch marker
- Piece of cardboard or a tassel maker, 8cm wide (for tassels)
Abbreviations Table
| Abbreviation | Meaning |
|---|---|
| ch | chain |
| sl st | slip stitch |
| sc | single crochet |
| dc | double crochet |
| tr | treble crochet |
| MR | magic ring |
| BLO | back loop only |
| sk | skip |
| sp(s) | space(s) |
| st(s) | stitch(es) |
| rep | repeat |
| RS | right side |
| WS | wrong side |
| FO | fasten off |
| YO | yarn over |
| picot | ch3, sl st into first ch of the 3 to form a small bump |
Pattern Instructions
Part 1: Center Body (Sage Green, Rounds 1–2)
Technique note — Magic Ring (MR): A magic ring lets you crochet your first round of stitches into an adjustable loop, then pull the tail to close the center hole completely, leaving no gap.
Round 1 (Sage): Make a MR. Ch3 (counts as first dc throughout pattern), 2dc into ring, ch2, *3dc into ring, ch2; rep from * 2 more times (4 corners total). Join with sl st to top of beg ch-3. Pull tail to close ring. (12 dc, 4 corner spaces)
Round 2 (Sage): Sl st across to next ch-2 corner sp. Ch3, 2dc, ch2, 3dc all in same sp (this is your first corner). *Sk next 3 sts, 3dc in next ch-2 corner sp, ch2, 3dc in same sp; rep from * around 2 more times. Join with sl st to top of beg ch-3. (24 dc, 4 corner spaces)
Fasten off sage, leaving a 15cm tail for later use in Part 4.
Part 2: Wing Sections (Orange, Rounds 3–6)
Round 3 (join Orange): Join orange with a sl st in any ch-2 corner sp. Ch3, 2dc, ch2, 3dc in same sp. *Sk next 3 sts, 3dc in next corner sp, ch2, 3dc in same sp; rep from * around. Join. (36 dc)
Round 4 (Orange): Rep Round 3 pattern (corner shells only, skipping 3 sts between). Join. (48 dc)
Round 5 (Orange): Rep Round 3 pattern. Join. (60 dc)
Round 6 (Orange): Rep Round 3 pattern. Join. (72 dc)
Fasten off orange.
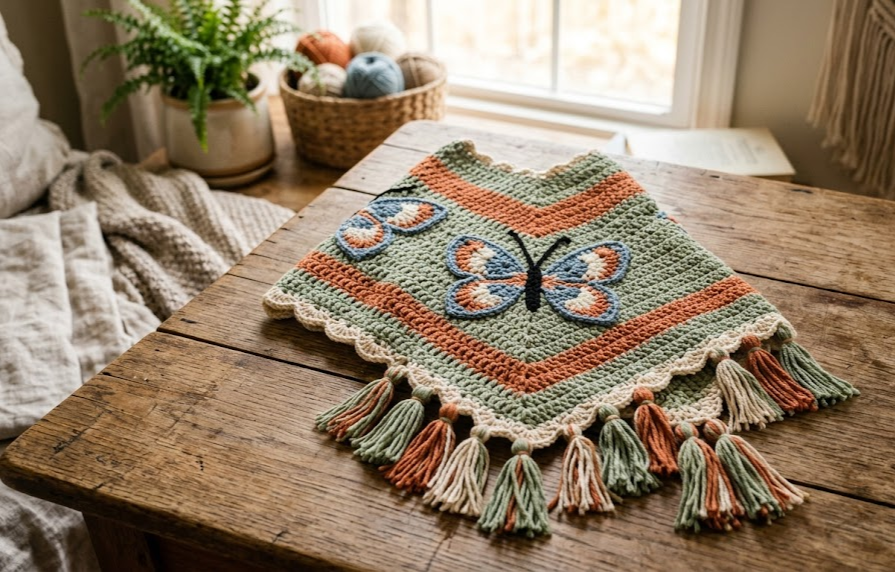
Part 3: Cream Border (Rounds 7–8)
Round 7 (join Cream, solid round): Join cream with sl st in any corner sp. Ch3, 2dc, ch2, 3dc in same sp. *Sk next 3 sts, 3dc in next corner sp, ch2, 3dc in same sp; rep from * around. Join. (84 dc)
Round 8 (Cream, scallop shell edge): Ch1 (does not count as st), sc in first st. *Sk next 2 sts, work (2tr, ch2, sl st into 2nd ch from hook to form picot, 2tr) in next st [this forms one shell], sk next 2 sts, sc in next st; rep from * evenly around all 4 sides, working 3 sc in each corner ch-2 sp to keep it flat. Join with sl st to first sc. FO and weave in end. (32 shells total — 8 shells per side)
Technique note — Picot: A picot is a small decorative bump made by chaining 3 and slip stitching back into the first of those 3 chains, used here to add texture to the tips of each scallop.
Part 4: Sage Cross Lines, Blue Wing Detail & Antennae
Sage cross lines (surface crochet): Using the sage tail left from Part 1, thread it onto a yarn needle. Working on the RS of the square, insert the needle from back to front at the center point and surface slip stitch in a straight line out to each of the 4 corners, following the ridge lines between granny rounds. This creates the visible cross/body shape dividing the four wings. FO each line and weave in ends.
Technique note — Surface Crochet: Surface crochet (or surface slip stitch) is worked by inserting your hook through the fabric from front to back and pulling up loops to form a chain-like line on top of the finished piece, used for adding contrast detail without changing the base structure.
Blue wing ovals: Join dusty blue yarn with a sl st centered inside one orange wing section. Using surface slip stitch, work an oval outline approximately 6cm wide by 10cm long, following an oval path and ending where you started. Sl st to join, FO, weave in ends. Repeat in the center of all 4 wing sections (4 ovals total).
Antennae: Cut 2 lengths of sage yarn, 20cm each. Fold each in half and twist tightly until it kinks back on itself to form a twisted cord. Knot the ends together. Attach both twisted cords to the top point of the poncho (the point that will sit at the back of the neck) with a lark’s head knot, positioning them 2cm apart so they stand up like antennae.
Part 5: Tassels
Wrap cream yarn around an 8cm piece of cardboard 20 times. Cut along one edge to create loose strands. Tie a separate strand tightly around the center, fold in half, and wrap another strand around the top 1cm to secure. Trim ends evenly to 6cm. Make 8 tassels total and attach one to the tip of every other scallop shell around the border, spacing them evenly.
Assembly Steps
- Lay the finished square flat, RS facing up, with the sage cross forming a plus-sign through the center.
- Fold the square in half diagonally, corner to corner, so two opposite wings meet and the piece forms a triangle. The fold line runs directly along one arm of the sage cross.
- Starting at the outer folded corner (this becomes the back neckline), use a yarn needle and cream yarn to whip stitch the two open edges together, working in from the corner for 10cm on each side.
- Leave the remaining edges open — this creates the poncho’s draped front and armholes.
- Check that the neck opening measures approximately 15cm across; adjust the seam length by 1–2cm if the opening feels too tight or too loose for a baby’s head to pass through comfortably.
- Weave in all remaining ends and steam-block lightly if needed to help the poncho lie flat.
Beginner/Intermediate Tips
- When switching yarn colors between rounds, always fasten off the old color and join the new one with a standing stitch or sl st directly in a corner ch-2 space — this keeps corners crisp and color transitions clean.
- Keep your ch-3 turning stitch loose at the start of each round; a tight ch-3 will pull your corners inward and distort the square shape.
- Practice your surface crochet oval on a scrap swatch first — it’s easier to control tension once you’ve done it once before working it on your actual poncho.
- If your scallop shells look uneven, count stitches carefully in Round 7 before starting Round 8; the shell pattern depends on an accurate multiple of 3 along each side.
- Block your square before folding and seaming — a blocked piece folds more accurately along the diagonal and gives cleaner assembly results.
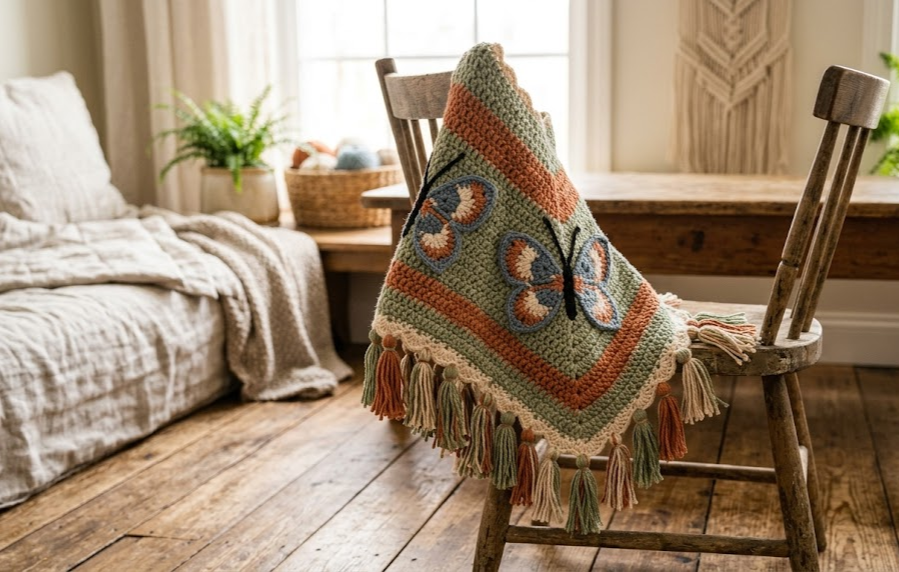
Variations
- Monochrome Bloom: Swap the orange and blue for two shades of pink to create a floral rather than butterfly look, perfect for a girl’s nursery.
- Toddler Size: Add 2 extra rounds of orange (Rounds 3–8 instead of 3–6) before the cream border to size the poncho up for toddlers 1–3 years.
- No-Tassel Minimalist: Skip the tassels entirely and finish with just the picot scallop edge for a cleaner, more modern nursery aesthetic.
- Wall Hanging Display: Skip the assembly/seaming step entirely and mount the finished square on a dowel rod as a boho butterfly wall hanging instead of a wearable piece.
- Rainbow Wings: Work each of the 4 wing sections (Rounds 3–6) in a different color instead of solid orange for a more vibrant, multicolor butterfly effect.
Save This Pattern
Loved this Butterfly Baby Poncho? Save this pattern to your Pinterest boards so you can find it again whenever you’re ready to pick up your hook. Tag your finished projects with #FoodiePlumCrochet — we’d love to see your version come to life!



