
The Best Fluffy Pancakes recipe you will fall in love with. Full of tips and tricks to help you make the best pancakes.

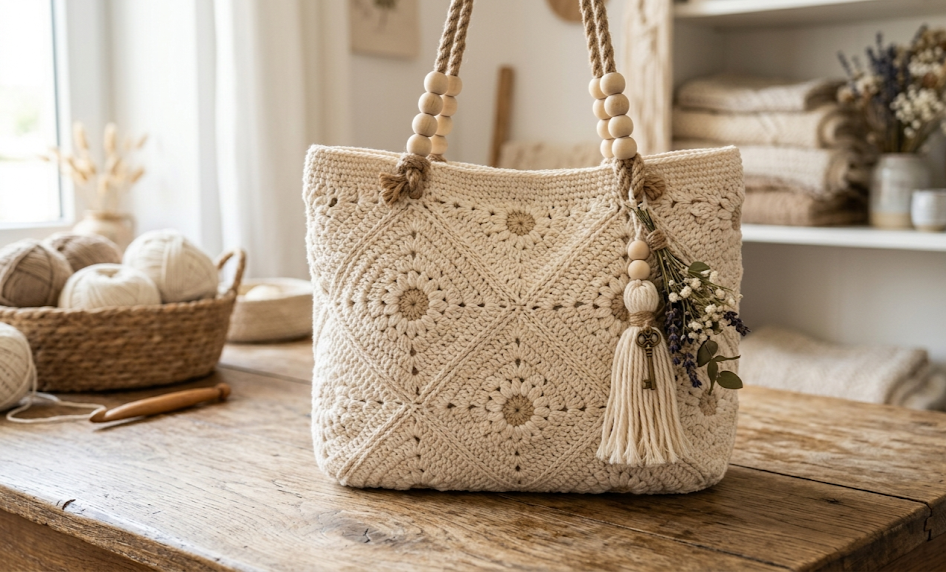
If you’ve been searching for a tote bag pattern that feels equal parts beachy, boho, and timeless, this triangle granny square crochet tote is about to become your new favorite project. Built from a series of joined triangle motifs, this bag has that effortless, sun-faded linen look that pairs perfectly with sundresses, market trips, and lazy summer afternoons. The open, lacy stitch work keeps it lightweight while still being sturdy enough to carry your essentials, and the braided rope handles with wooden bead accents give it a designer-boutique finish without the designer price tag.
This pattern is ideal for someone who already feels comfortable with basic granny square construction and wants to push into something a little more dimensional. The triangle motif looks intricate, but it’s built from simple, repeatable stitches — clusters, chains, and shells — worked in rounds. Once you get the rhythm of the first triangle, the rest come together quickly. The finished tote is roomy enough for a beach day or grocery run, and the natural cream yarn means it goes with absolutely everything in your wardrobe.
Whether you’re making this for yourself, as a gift, or to sell at a craft fair, this bag has that “I bought this in a little seaside boutique” energy while costing just a few balls of cotton yarn and a weekend of relaxed stitching.
|
Difficulty
Intermediate
|
Time
10–12 hrs
|
Hook Size
4mm (G/6)
|
Yarn Weight
DK (#3)
|
Finished Size
38 x 32cm
|
Gauge
- One triangle motif measures approximately 12cm (4.75 in) per side when blocked
- 14 sts and 7 rows = 10cm (4 in) square in double crochet (US terms)
- Hook size used for gauge swatch: 4mm (G/6 US)
- Yarn weight used: DK weight (#3 light) cotton or cotton-blend yarn
Gauge is not critical for this project, but if your triangles are coming out significantly larger or smaller than 12cm per side, adjust your hook size up or down by 0.5mm and re-check.
Materials List
- 600g (approximately 1,300m / 1,420 yds) DK weight cotton yarn in natural cream — this pattern uses 9 triangle motifs total
- 4mm (G/6 US) crochet hook
- 3.5mm (E/4 US) crochet hook for joining rounds (optional, for a tighter join)
- Yarn needle for weaving in ends and sewing motifs together
- 2 lengths of cotton or jute rope, 60cm (24 in) each, for handles
- 4 wooden beads with large center holes (to thread onto handle ends)
- Stitch markers
- Scissors
- Optional: fabric lining material, 45cm x 35cm (18 in x 14 in), for a lined interior
- Optional: small tassel and dried flower sprig for decorative charm
Abbreviations Table
| Abbreviation | Meaning |
|---|---|
| ch | chain |
| sl st | slip stitch |
| sc | single crochet |
| dc | double crochet (US terms) |
| tr | treble crochet |
| ch-sp | chain space |
| sk | skip |
| st(s) | stitch(es) |
| rep | repeat |
| rnd(s) | round(s) |
| sp(s) | space(s) |
| RS | right side |
| ( ) | stitch count at end of round/row |
| [ ] | repeat instructions inside brackets |
| MR | magic ring |
Pattern Instructions
Part 1: The Triangle Motif (Make 9)
Technique note — Magic Ring (MR): A magic ring lets you start a round with no hole in the center. Wrap yarn around your fingers to form a loop, pull your working yarn through it to form your first stitches, then pull the tail to close the ring tight once the round is complete.
Round 1: Make a magic ring. Ch 3 (counts as first dc), work 2 dc into ring, ch 3, [3 dc into ring, ch 3] twice more, sl st to top of starting ch-3 to join. Pull tail to close ring. (9 dc, 3 ch-3 sps)
Round 2: Ch 3, work 2 dc in same space (corner), ch 1, (3 dc, ch 3, 3 dc) in next ch-3 sp (corner), ch 1, rep from * one more time, then (3 dc, ch 3, 3 dc) in same corner as start to complete triangle shape, sl st to join. (Each corner now has 6 dc with a ch-3 sp; 3 ch-1 sps along sides)
Round 3: Ch 3, 2 dc in same sp, ch 1, 3 dc in next ch-1 sp, ch 1, (3 dc, ch 3, 3 dc) in corner ch-3 sp, ch 1, 3 dc in ch-1 sp, ch 1, rep from * twice more, sl st to join. (Corners now have 6 dc each; 2 ch-1 sps along each side)
Round 4: Continue building outward in the same pattern: work (3 dc, ch 3, 3 dc) in each corner ch-3 sp, and 3 dc with ch-1 spacer in each side ch-1 sp from the previous round. (Triangle now has 3 sides with 3 ch-1 sps each between corners)
Round 5 (final round): Work one more round in the same pattern, adding a shell of (3 dc, ch 3, 3 dc) at each corner and continuing the 3-dc clusters with ch-1 spacers along each side. Fasten off, leaving a 25cm (10 in) tail for joining. (Triangle measures approx. 12cm per side)
Make 9 triangles total in the same colorway.
Part 2: Joining the Triangles
Lay your 9 triangles out in your desired bag shape — typically 3 triangles across the front panel, 3 across the back panel, and 3 used as side/base gussets, depending on your preferred silhouette. A simple option: 4 triangles for the front (2 rows of overlapping points), 4 for the back, and 1 split or incorporated into the base seam.
Using a yarn needle and the leftover tail, whip stitch adjoining edges together through the back loops of corresponding stitches, matching ch-1 spaces to ch-1 spaces for a seamless lace look. Join side edges first, then join front panel to back panel along the bottom and side seams, leaving the top open.
Part 3: Top Edge Finishing Round
Once panels are joined into the bag shape, attach yarn at a side seam at the top opening.
Rnd 1: Sc evenly around the entire top opening, working 1 sc into each st and ch-sp, adding 2 sc at each inner point (V-notch) to keep the edge flat. Join with sl st. (Stitch count will vary based on final triangle arrangement — count your sts and note the number for your second round)
Rnd 2: Ch 1, sc in each st around, sl st to join. (Same count as Rnd 1)
Fasten off and weave in all ends.
Part 4: Handles
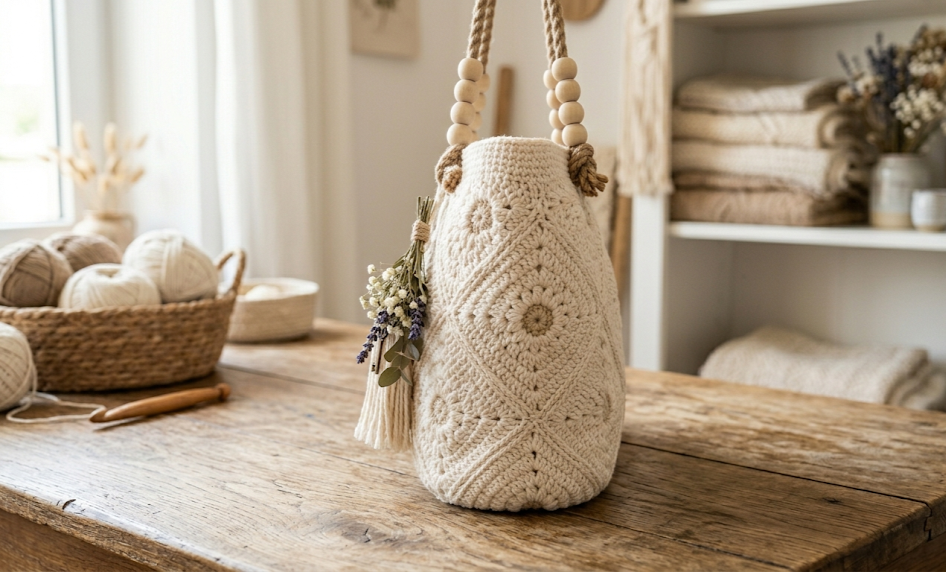
This pattern uses purchased or hand-braided rope handles rather than crocheted ones for durability.
- Cut 2 lengths of rope, 60cm (24 in) each.
- Thread one wooden bead onto each end of both ropes (4 beads total), sliding them about 8cm (3 in) from each end.
- Mark two points on the front top edge, 10cm (4 in) apart and centered. Repeat on the back top edge.
- At each marked point, fold the rope end back on itself by 6cm (2.5 in) and stitch it securely to the inside top edge of the bag using doubled strands of yarn and a yarn needle, sewing through both rope layers and the bag fabric at least 8–10 times for security. The wooden bead should sit just above this stitched point, visible on the outside.
- Repeat for all 4 rope ends so each handle connects front-to-back.
Part 5: Optional Tassel Charm
- Cut 12 strands of yarn, each 20cm (8 in) long.
- Fold the bundle in half and tie a small loop of yarn around the fold to create a hanging loop.
- Wrap a separate strand tightly around the bundle about 2cm (0.75 in) below the fold to form the tassel “neck,” and tie off securely.
- Trim the bottom ends even.
- Attach the tassel to the bag’s top edge, near a handle base, using the hanging loop. Add a small dried flower sprig and a tiny wooden charm if desired for the boho finish.
Assembly Steps
- Block all 9 triangles by lightly steaming or wet-blocking and pinning to measurement (12cm per side) — this keeps your finished bag from puckering.
- Arrange triangles in your chosen layout for front, back, and base.
- Whip stitch side seams of front-panel triangles together first, then back-panel triangles.
- Join front panel to back panel along both sides and the base, leaving the top 100% open.
- Work the sc finishing rounds around the top opening.
- Attach handles 10cm apart on both front and back top edges, stitching each fold 8–10 times through for strength.
- Add the optional tassel charm near one handle base.
- If lining, cut fabric 2cm larger than the bag’s interior on all sides, hem edges, and hand-stitch into place just below the top edge.
- Weave in any remaining yarn ends and steam the finished bag lightly to help the motifs lie flat.
Beginner/Intermediate Tips
- Keep tension consistent across all 9 triangles by crocheting them in one sitting if possible — yarn tension naturally drifts over multiple sessions.
- When joining ch-1 spaces between triangles, match them up before you start whip stitching so your lace pattern lines up visually across seams.
- If your triangles come out cupped instead of flat, you’re likely crocheting too tightly on the corner ch-3 spaces — loosen up specifically at the corners, not the whole round.
- For the rope handle attachment, do a test fold-and-stitch on a scrap rope piece first so you know how many stitches feels secure before doing it on the real bag.
- Use stitch markers on the first stitch of every round so you never lose track of where a round starts, especially with this many ch-1 spacers to count.
Variations
- Color block version: Alternate cream and terracotta yarn for triangles, joining so colors checkerboard across the front panel.
- Mini crossbody size: Make only 6 smaller triangles (reduce to 3 rounds each) for a compact crossbody bag with a long single rope strap.
- Beach blanket display: Skip the lining and use the same triangle motif pattern at a larger scale with bulky yarn to make a matching boho wall hanging or table runner.
- Two-tone handle swap: Use two different rope colors or textures (jute on one side, cotton rope on the other) for an asymmetric, eclectic look.
- Market tote upgrade: Add a fabric lining with an inner zipper pocket for a more practical, everyday version of the same exterior design.
Save This Pattern
If you love the boho look of this triangle granny square tote, save this pattern now so you don’t lose it in your feed! Pin it to your crochet board and tag your finished bag with #FoodiePlumCrochet — we’d love to see your version.



