
The Best Fluffy Pancakes recipe you will fall in love with. Full of tips and tricks to help you make the best pancakes.

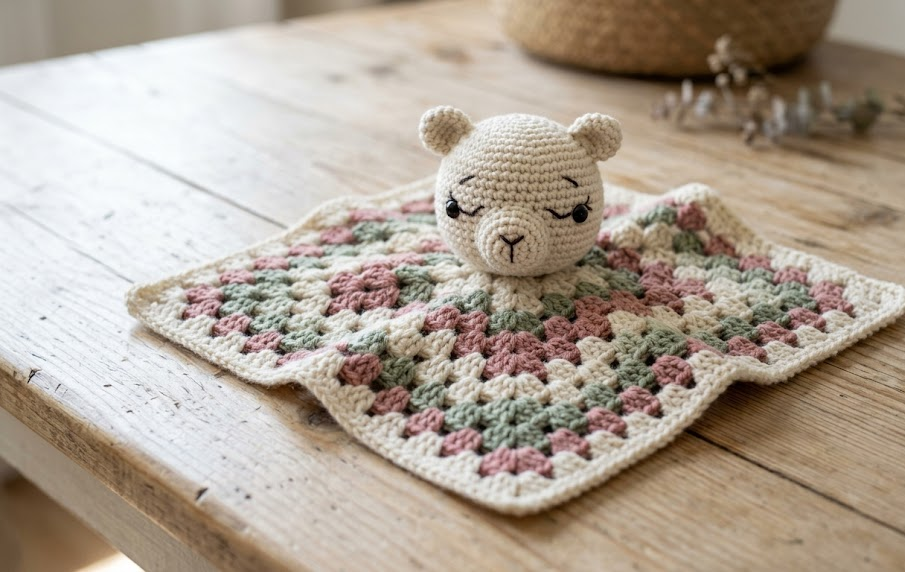
There’s something magical about a handmade baby lovey. Part stuffed animal, part security blanket, this sweet crochet accessory becomes a lifelong keepsake long before baby even knows what “handmade” means. This pattern walks you through three adorable versions of the same easy-to-follow design: a soft bunny with long floppy ears, a cuddly bear with round tufted ears, and a gentle curly-wool lamb. Each one starts with the same granny-square-style blanket body and finishes with a uniquely shaped amigurumi head, so once you’ve made one, the other two come together even faster.
These loveys are perfect for baby showers, nursery decor, or a gift that a little one can hold, chew, and drag around the house for years. The finished piece measures roughly 30cm x 30cm (12in x 12in) across the blanket corners, with a soft round head about 10cm (4in) tall sitting at the top point. It’s small enough for tiny hands to grip and large enough to double as a lightweight blanket during tummy time or stroller naps.
This pattern is written for intermediate crocheters who are comfortable working in the round, changing colors, and adding simple embroidered details. If you’ve made an amigurumi animal before, you already have most of the skills you need. Every stitch count is written out for you, so you’ll never lose track of where you are in the pattern.
Grab your hook and a few small balls of DK weight yarn in your favorite colors, and let’s get started.
|
Difficulty
Intermediate
|
Time
6–8 Hours
|
Hook Size
3.5mm (E/4)
|
Yarn Weight
DK / Light Worsted
|
Finished Size
30cm x 30cm
|
Gauge
Before you begin, work a small swatch to make sure your finished lovey matches the measurements above. Gauge matters most for the head shaping — a looser gauge can leave gaps where the stuffing shows through.
- Gauge: 18 stitches x 20 rows = 10cm x 10cm (4in x 4in) square, worked in single crochet
- Hook used for gauge swatch: 3.5mm (US E/4)
- Yarn used for gauge swatch: DK weight (8-ply / light worsted) cotton-acrylic blend
If your swatch comes out larger than 10cm, go down a hook size. If it’s smaller, go up a hook size. Getting gauge right keeps your stuffing from peeking through the stitches, which matters for baby safety.
Materials List
- Main Color (MC): 1 skein DK weight yarn in cream (for bunny), sage green (for bear), or dusty rose (for lamb) — approx. 100g/200m per lovey
- Contrast Color (CC1): small amount of tan/light brown DK yarn (for bear’s face) or white DK yarn (for lamb’s wool loops) — approx. 20g
- Accent Color (CC2): tiny amount of pink DK yarn for embroidered nose/cheeks — approx. 5g
- Hook: 3.5mm (US E/4) crochet hook
- Notions:
- Pair of 10mm safety eyes (or embroidery thread for baby-safe no-choking-hazard alternative)
- Polyester fiberfill stuffing
- Yarn needle (blunt tip, large eye)
- Stitch markers
- Small amount of pink or brown embroidery floss for nose and mouth details
- Scissors
Abbreviations Table
| Abbreviation | Meaning |
|---|---|
| ch | chain |
| sl st | slip stitch |
| sc | single crochet |
| hdc | half double crochet |
| dc | double crochet |
| tr | treble crochet |
| st(s) | stitch(es) |
| rnd(s) | round(s) |
| row(s) | row(s) |
| inc | increase (2 sc in same stitch) |
| dec | invisible decrease (insert hook through front loops of next 2 sts, yarn over, pull through both, yarn over, pull through both loops on hook — this avoids the small hole a regular decrease leaves) |
| BLO | back loop only (insert hook under the back loop of the stitch only, leaving the front loop unworked) |
| FLO | front loop only (insert hook under the front loop of the stitch only) |
| MR | magic ring (a adjustable loop you crochet your first round of stitches into, then pull tight to close the center hole completely) |
| sp | space |
| rep | repeat |
| ( ) | stitch count at end of round/row |
Pattern Instructions
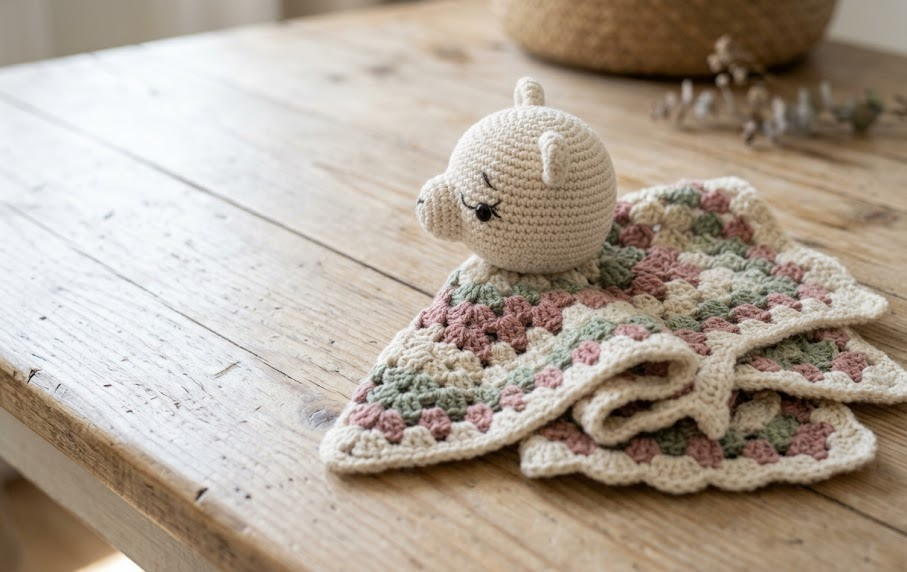
Part 1: The Head (Bunny, Bear, or Lamb Base)
Work this base head shape for all three animals; ear and detail differences are noted in Part 2.
Gauge swatch note: Work the head at a slightly tighter gauge than the blanket body to keep stuffing from showing. If needed, drop to a 3.25mm hook for the head only.
Using MC (matching your chosen animal color), begin with a magic ring.
- Rnd 1: 6 sc into MR, pull tail to close ring (6)
- Rnd 2: inc in each st around (12)
- Rnd 3: sc, inc rep around (18)
- Rnd 4: sc 2, inc rep around (24)
- Rnd 5: sc 3, inc rep around (30)
- Rnd 6: sc 4, inc rep around (36)
- Rnd 7: sc 5, inc rep around (42)
- Rnds 8–14: sc around, no increases (42) — work 7 rounds even
- Rnd 15: sc 5, dec rep around (36)
- Rnd 16: sc 4, dec rep around (30)
Begin stuffing the head firmly now, adding more as you close the round.
- Rnd 17: sc 3, dec rep around (24)
- Rnd 18: sc 2, dec rep around (18)
- Rnd 19: sc 1, dec rep around (12)
- Rnd 20: dec around (6)
Fasten off, leaving a long tail. Weave the tail through the front loops of the last 6 stitches, pull tight to close the hole, and secure.
Placing the safety eyes: Before finishing Rnd 20, insert your safety eyes between Rnds 11–12, spaced 8–10 stitches apart, so the head is fully stuffed and firm before you snap the washers on the inside.
Part 2: Ears and Face Details
Bunny Ears (make 2):
- Rnd 1: 6 sc into MR (6)
- Rnd 2: inc around (12)
- Rnds 3–4: sc around (12)
- Rnd 5: sc 1, dec rep around (8)
- Rnds 6–14: sc around, no increases (8) — work 9 rounds even for the tall floppy shape
- Flatten the ear and sl st across the opening to close, leaving a tail for sewing. Sew ears to the top of the head, angled slightly outward, about 2cm apart at the base.
Bear Ears (make 2):
- Rnd 1: 6 sc into MR (6)
- Rnd 2: inc around (12)
- Rnd 3: sc around (12) Fasten off, leaving a tail. Flatten and sew flat to the top sides of the head, about 3cm apart, so they sit rounded and close to the head.
Lamb Wool Texture: Using CC1 (white), work loop stitch (insert hook into st, wrap yarn around two fingers to form a loop, draw through, then complete a normal sc through both loop strands) evenly across Rnds 5–11 of the head to create a curly wool texture. Leave the face area (Rnds 5–10, front 12 stitches) in plain MC so the face stays smooth.
Lamb Ears (make 2): Work same as Bunny Ears but stop after Rnd 3 for a shorter, floppier ear, then sl st closed. Sew to sides of head at a downward angle.
All Animals — Face Embroidery: Using pink embroidery floss, embroider a small triangle or heart-shaped nose centered between the eyes at Rnd 9, then stitch a simple straight or V-shaped mouth beneath it. Add two small pink cheek dots using satin stitch, positioned below and slightly outside each eye.
Part 3: The Granny Square Blanket Body
Using MC, begin with a magic ring.
- Rnd 1: ch 3 (counts as first dc), 2 dc into ring, ch 2, 3 dc into ring, ch 2 rep 3 more times (4 dc-groups, 4 ch-2 corner sps), sl st to top of beginning ch-3 to join (12 dc, 4 corner sps)
- Rnd 2: sl st into next ch-2 sp, ch 3, 2 dc, ch 2, 3 dc into same sp (corner made), ch 1, 3 dc, ch 2, 3 dc into next corner sp rep around, ch 1, sl st to join (24 dc, 4 corner sps, 4 ch-1 sps)
- Rnd 3: sl st into corner sp, ch 3, 2 dc, ch 2, 3 dc into same sp, ch 1, 3 dc into next ch-1 sp, ch 1, 3 dc, ch 2, 3 dc into next corner sp rep around, ch 1, sl st to join (36 dc, 4 corner sps, 8 ch-1 sps)
- Rnds 4–9: continue in established granny square pattern, working 3 dc into each ch-1 sp along the sides and (3 dc, ch 2, 3 dc) into each corner, adding one more ch-1 sp per side each round. By Rnd 9, each side should have 7 ch-1 sps between corners (108 dc, 4 corner sps, 28 ch-1 sps)
Change to your CC1 or leave in MC for the final round, based on your color plan.
- Rnd 10 (scalloped edge): sl st into next ch-1 sp, ch 2, 4 dc into same sp, sl st into next ch-1 sp rep around, working (4 dc, sl st) shells evenly along each side, with an extra shell into each corner sp. Fasten off and weave in ends.
Attaching the Head to the Blanket: Position the finished head so it sits centered over one corner of the blanket, with the bottom edge of the head overlapping the corner by about 2cm. Pin in place, then sew securely using a whip stitch around the entire bottom edge of the head, matching yarn color to the blanket. Weave in all ends on the inside of the head for a clean finish.
Assembly Steps
- Stuff the head firmly, making sure it holds its round shape without being overstuffed or lumpy — aim for a firm but slightly squeezable feel.
- Insert safety eyes between Rnds 11–12 of the head, spaced 8–10 stitches (about 3cm) apart, before fully closing the head.
- Sew ears to the head: bunny ears 2cm apart at the base, angled outward; bear ears 3cm apart, sitting flat; lamb ears sewn at a downward slant just behind the eye line.
- Embroider the nose at Rnd 9, centered between the eyes, followed by the mouth directly beneath it.
- Complete the granny square blanket body through Rnd 10, finishing with the scalloped edge.
- Center the head over one corner of the blanket so the bottom edge overlaps the blanket point by 2cm, then whip stitch in place all the way around.
- Weave in all remaining ends and steam-block the blanket lightly to flatten the granny square corners for a crisp finished shape.
Beginner/Intermediate Tips
- When working the magic ring for the head, pull the tail slowly and evenly so the center hole closes without leaving a gap — check it before moving to Rnd 2.
- Use stitch markers on Rnd 1 and every 5th round of the head to keep track of where your round begins, since it’s easy to lose your place during the long even rounds.
- For the invisible decrease, always work into the front loops only, even though it feels different from a regular decrease — this keeps the head shaping smooth with no visible holes.
- If your granny square corners start to curl instead of lying flat, try going up half a hook size for the blanket body only.
- Stuff the head in stages as you go rather than all at once at the end — this gives a rounder, more even shape.
- Block your finished blanket by lightly steaming and pinning the corners flat; this makes a big difference in how professional the granny square looks.
Variations
- Size Swap: Add 2 extra rounds to both the head and blanket body for an oversized lovey, perfect as a nursery display piece.
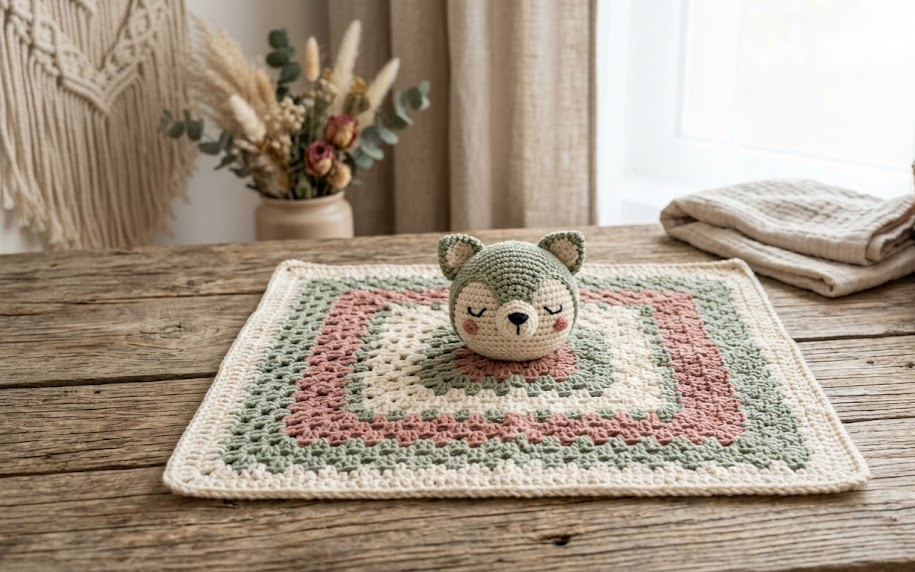
- Color Swap: Try a neutral palette of oatmeal, taupe, and blush for a gender-neutral nursery set.
- Woodland Set: Adapt the same base head shape with pointed ears and a longer snout for a fox or deer version.
- Textured Blanket: Swap the smooth dc granny square for a bobble stitch or shell stitch variation for extra texture.
- Personalized Tag: Crochet a tiny fabric or yarn tag with the baby’s initial and sew it to one corner of the blanket.



