
The Best Fluffy Pancakes recipe you will fall in love with. Full of tips and tricks to help you make the best pancakes.

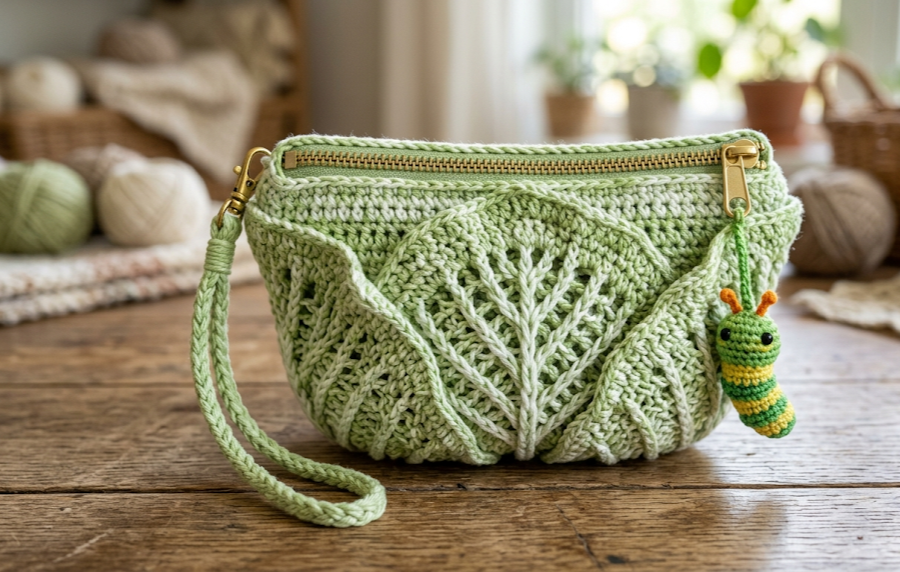
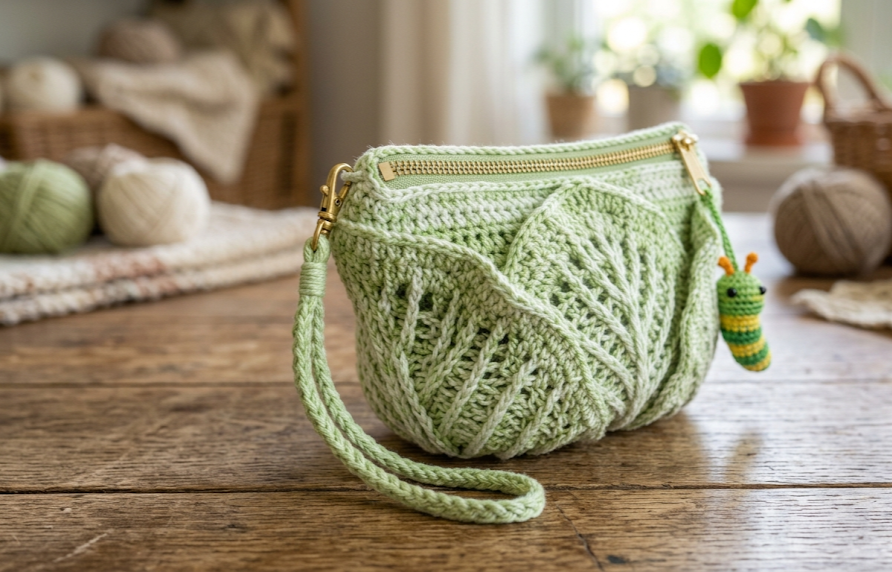
If you’ve ever wanted a project that makes people stop and ask “wait, is that crochet?” — this is it. This cabbage leaf zipper pouch looks like it was plucked straight from a garden bed, with delicate lacy veins running through a soft green leaf shape, finished off with a tiny crocheted caterpillar friend perched on the edge like he’s about to take a bite. It’s whimsical, it’s nature-inspired, and it’s a genuinely satisfying make for anyone who loves combining lacework with amigurumi.
This pouch is perfect for crocheters who already have a few projects under their belt and want to try something with a bit more texture and shaping. It works wonderfully as a coin purse, a card pouch, a tiny makeup bag, or even a quirky keychain accessory thanks to the looped wrist strap. Gift it to a gardener, a bug-loving kid, or anyone who appreciates handmade things with personality. By the end of this pattern, you’ll have a finished leaf pouch with a sweet caterpillar charm dangling from the zipper pull, ready to clip onto a bag or carry on its own.
Let’s get into the details so you can make your own.
|
Difficulty
Intermediate
|
Time
6–8 hours
|
Hook Size
2.5mm
|
Yarn Weight
Size 10 Thread
|
Finished Size
~12cm x 18cm
|
Gauge
Before starting, work a quick gauge swatch to make sure your finished pouch matches the size in this pattern.
- Gauge: 18 stitches and 20 rows = 10cm x 10cm square in single crochet
- Hook used: 2.5mm steel/fine hook
- Yarn weight used: Size 10 crochet cotton thread (lace weight) for the leaf body and lace panel; DK weight cotton for the caterpillar
- Why gauge matters here: Because this pattern relies on a lace panel meeting a solid stitch panel at the same row count, an incorrect gauge will cause the two sides to pull unevenly. If your swatch comes out smaller, move up a hook size; if larger, move down.
Materials List
- Light green crochet cotton (size 10 thread) – approximately 80g, for the leaf body, edging, and strap
- White/cream crochet cotton (size 10 thread) – approximately 30g, for the lace vein panel
- Small amount of green DK cotton yarn – approximately 10g, for the caterpillar body
- Small amount of orange DK cotton yarn – approximately 2g, for the antennae
- Black and white scraps or small safety eyes (6mm) – for the caterpillar’s eyes
- Red embroidery thread – tiny amount, for the caterpillar’s smile
- 2.5mm crochet hook (for the leaf pouch)
- 2.0mm crochet hook (for the caterpillar amigurumi details, optional smaller size for tighter stitches)
- 9-inch (23cm) gold zipper
- Sewing needle and matching thread (for attaching the zipper)
- Yarn needle (for weaving in ends and seaming)
- Fiberfill stuffing (small amount, for the caterpillar)
- Stitch markers
- Scissors
Abbreviations Table
| Abbreviation | Meaning |
|---|---|
| ch | chain |
| sl st | slip stitch |
| sc | single crochet |
| hdc | half double crochet |
| dc | double crochet |
| tr | treble crochet |
| sk | skip |
| st(s) | stitch(es) |
| rep | repeat |
| sp | space |
| BLO | back loop only |
| inc | increase (2 sc in same stitch) |
| dec | invisible decrease (worked by inserting hook into front loops only of next 2 sts, then completing as one sc) |
| MR | magic ring (an adjustable loop made by wrapping yarn around your fingers, working stitches into the loop, then pulling the tail to close it tight — used to start amigurumi pieces with no visible hole) |
| picot | ch 3, sl st into first ch to form a small loop |
Pattern Instructions
Part 1: Leaf Body (Back Panel — solid green)
Worked flat, starting at the pointed tip of the leaf and increasing outward to the rounded base.
- Row 1: With green thread and 2.5mm hook, ch 4. Sc in 2nd ch from hook, sc in next 2 ch. (3 sc)
- Row 2: Ch 1, turn. 2 sc in first st, sc in next st, 2 sc in last st. (5 sc)
- Row 3: Ch 1, turn. 2 sc in first st, sc to last st, 2 sc in last st. (7 sc)
- Rows 4–18: Ch 1, turn. 2 sc in first st, sc across to last st, 2 sc in last st, repeating the increase at both ends every row. (Increases by 2 sts each row; Row 18 = 37 sc)
- Rows 19–30: Ch 1, turn. Sc evenly across with no increases, to form the widest part of the leaf. (37 sc, all rows)
- Rows 31–40: Ch 1, turn. Sc2tog (dec) at the beginning and end of each row to taper the rounded base. (Decreases by 2 sts each row; Row 40 = 17 sc)
- Row 41: Ch 1, turn. Sc2tog across evenly to close the base gently. (9 sc)
Fasten off, leaving a long tail for seaming. This panel becomes the solid back of your pouch.
Part 2: Lace Front Panel (white veins on green ground)
This panel is worked in the same leaf shape and stitch counts as Part 1 (Rows 1–41), but every 4th row alternates to white thread to create the branching vein lines, and small ch-3 spaces are worked at intervals to create the open lacy look.
- Rows 1–8: Work exactly as Part 1 in green, following the same increase pattern.
- Row 9 (vein row): Switch to white thread. Ch 1, turn. Sc in first 2 sts, ch 3, sk 2 sts, sc in next st, ch 3, sk 2 sts, sc to end. (Stitch count includes skipped sts as part of the ch-3 spaces; total sts + ch-sps = 13)
Technique note: When skipping stitches to form a ch-3 space, those skipped stitches are not worked again until the following row, where you’ll sc into the ch-3 space itself rather than into individual stitches — this is what creates the open lace look.
- Row 10: Switch back to green. Ch 1, turn. 2 sc in first st, sc across (working sc into each ch-3 space as you reach it, and sc into each st), 2 sc in last st. (15 sc)
- Rows 11–40: Continue alternating: every 4th row is a white vein row with new ch-3 spaces branching slightly farther apart as the leaf widens (following the increase/decrease shaping from Part 1, Rows 9–40), and all other rows are solid green sc following Part 1’s shaping exactly.
- Row 41: As Part 1, sc2tog across in green. (9 sc)
Fasten off, leaving a long tail.
Technique note: Don’t worry about matching the vein branching exactly symmetrical — natural leaf veins are organic and slightly irregular, which adds to the charm.
Part 3: Lace Edging
Worked around the outer curved edge of the lace front panel only (not along the straight zipper edge).
- Round 1: Attach white thread at base corner. Ch 1, sc evenly around the curved edge, working 3 sc in the pointed tip stitch to turn the corner smoothly. (approx. 90 sc, exact count will vary with tension)
- Round 2: Ch 1. Sc in next st, ch 3, sk 1 st, picot (ch 3, sl st in first ch), ch 1, sk 1 st, rep from * around. (approx. 30 picot points)
Fasten off and weave in ends.
Part 4: Caterpillar Body
Worked in continuous rounds (do not join unless noted), stuffing lightly as you go.
- Round 1: With green DK yarn and 2.0mm hook, MR, work 6 sc into ring, pull tail to close. (6 sc)
- Round 2: Inc in each st around. (12 sc)
- Round 3: Sc 1, inc rep around. (18 sc)
- Rounds 4–6: Sc evenly around, no increases. (18 sc, each round)
- Round 7: Sc 1, dec rep around. (12 sc)
Stuff this first segment firmly, then pinch slightly and continue — this creates the first body bump.
- Round 8: Inc in each st around. (24 sc)
- Rounds 9–11: Sc evenly around. (24 sc, each round)
- Round 12: Sc 2, dec rep around. (18 sc)
- Round 13: Sc 1, dec rep around. (12 sc)
Stuff lightly, this forms the second, larger body bump.
- Rounds 14–16: Sc evenly around. (12 sc, each round)
- Round 17: Sc 1, dec rep around. (8 sc)
Stuff the tail end lightly. Fasten off, leaving a tail to close.
Technique note: Sc2tog/dec is worked using the invisible decrease method (insert hook into front loops only of next 2 sts, yarn over, pull through both loops, then complete as a normal sc) — this keeps the decrease nearly invisible compared to a standard decrease.
Part 5: Antennae (make 2)
- With orange yarn and 2.0mm hook, ch 8.
- Sl st in 2nd ch from hook and in each ch across to form a tight curled cord. (7 sl st)
Technique note: Working a slip stitch into each chain along its length (rather than sc) makes the strand curl naturally into a coil, mimicking a curled antenna.
Fasten off, leaving a 4cm tail for attaching to the head.
Part 6: Wrist Strap
- With green thread, ch 90 (or to desired length, approximately 35cm).
- Sl st back into the same chain across to reinforce and thicken the strap. (89 sl st)
- Tie the strap into a single overhand knot near the top, then fold the rest into a loop and tack the ends together to form the wrist loop shown in the photo.
Assembly Steps
- Block both leaf panels. Pin the solid back panel and the lace front panel to a blocking mat, lightly spray with water, and let dry fully before assembly — this opens up the lace pattern and squares off the curves.
- Pin panels together, wrong sides facing each other, lace panel on top, matching the pointed tips and edges.
- Sew in the zipper along the straight top edge using a sewing needle and thread, sewing through both the lace panel’s top edge and the solid panel’s top edge so the zipper sits sandwiched between both layers. Sew about 0.5cm from the zipper teeth for a clean finish.
- Seam the remaining curved edge using a whip stitch with the green tail left from Part 1, leaving the lace edging from Part 3 visible on the outside as a decorative trim. Stitch about 0.3cm inside the lace edging round so it frames the seam.
- Attach the wrist strap by folding the chain strap in half and stitching the folded end securely to one corner of the zipper top, about 1cm from the zipper pull, using the tail end of the strap chain.
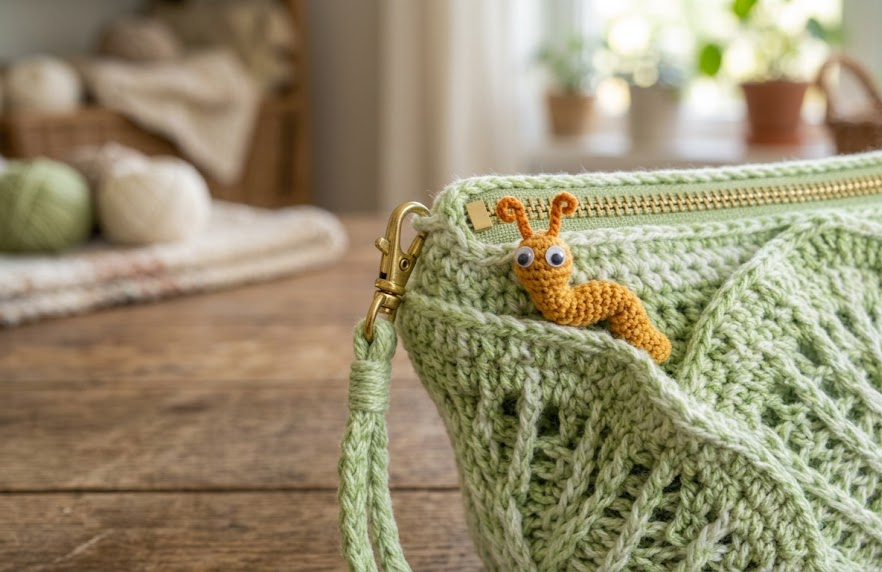
- Assemble the caterpillar: Sew the two antennae to the top of the caterpillar’s head segment (the smallest, final segment made), spacing them about 1cm apart. Attach the safety eyes or embroider eyes about 0.5cm below the antennae, spaced 1.5cm apart. Embroider a small red smile beneath the eyes using straight stitches.
- Attach the caterpillar to the pouch by stitching its underside along the top zipper edge, positioning it so the head faces toward the zipper pull, about 2cm down from the strap attachment point.
- Weave in all remaining loose ends and steam lightly to help the lace lie flat.
Beginner/Intermediate Tips
- If counting the ch-3 lace spaces feels tricky, place a stitch marker at the start of every vein row so you always know where round counts reset.
- Size 10 thread is thin — work under good light, and consider a thread that contrasts with your tablecloth or work surface so you don’t lose stitches.
- When switching between white and green thread on vein rows, don’t cut the yarn each time; carry the unused color loosely along the wrong side and pick it back up, which saves you from weaving in dozens of extra ends.
- Stuff the caterpillar’s segments a little at a time rather than all at once at the end — this gives you that defined “bump” look between body sections.
- If your lace panel comes out a different size than your solid panel, block them to match before seaming rather than trying to stretch one to fit during assembly.
Variations
- Color swap: Make the leaf in deep red and burgundy thread for a maple-leaf look perfect for autumn.
- Size up: Add 10 extra rows at the widest point (Rows 19–30) to make a larger tablet-sized pouch instead of a coin purse.
- Display version: Skip the zipper and stitch the two panels fully closed around a foam insert to create a leaf-shaped wall hanging or trinket dish.
- Style swap: Replace the caterpillar with a tiny crocheted ladybug or bumblebee charm for a different garden-critter theme.
- No-charm option: Leave off the caterpillar entirely and add a tassel or wooden bead instead for a more minimalist boho look.
Save this pattern so you don’t lose it, and tag your finished leaf pouch when you share it — I’d love to see your version! Pin it now and come back anytime you’re ready to crochet. #FoodiePlumCrochet



