
The Best Fluffy Pancakes recipe you will fall in love with. Full of tips and tricks to help you make the best pancakes.

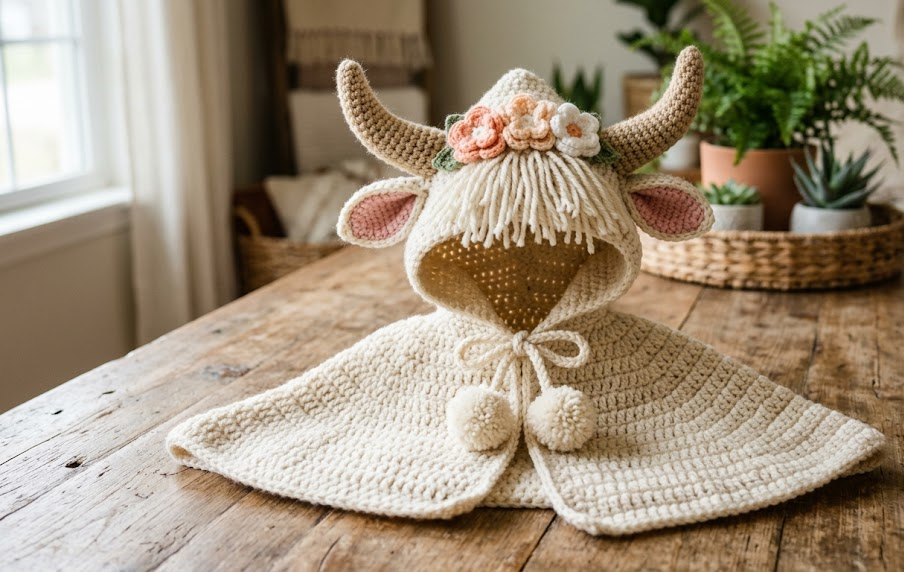
There is something irresistibly sweet about a baby bundled up in a hooded cape shaped like a tiny highland cow. The soft curved horns, the pink-lined ears, and the little cluster of crochet flowers tucked between them turn an ordinary outfit into a keepsake. This cape is worked in a plush, warm bulky yarn, so it comes together faster than you might expect while still giving you plenty of texture and dimension to enjoy along the way.
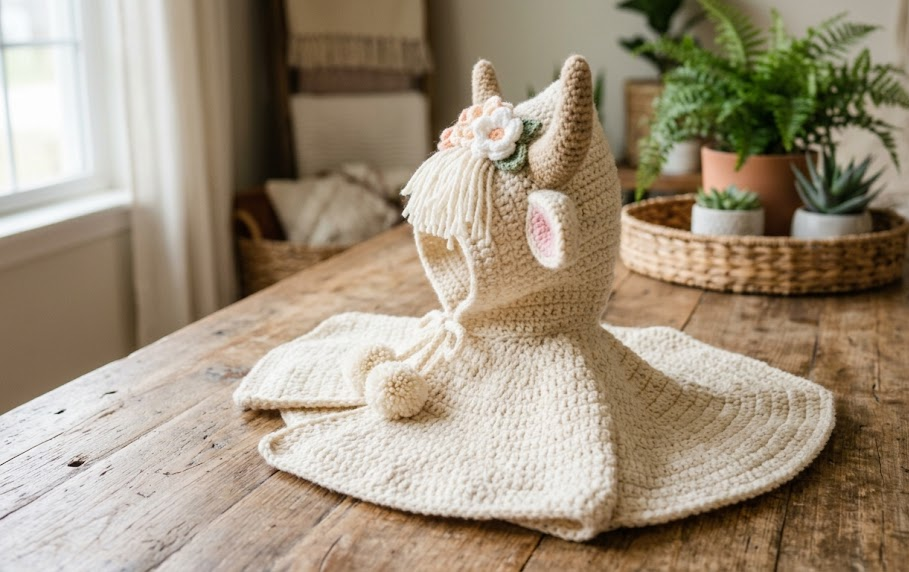
This pattern is designed for babies from six to twelve months old and makes a wonderful photo-prop piece, a baby shower gift, or a first-birthday outfit topper. It closes at the front with two wooden heart buttons and finishes with a pair of soft pom-poms dangling from twisted cord ties, so it stays snug without fussy fastenings. The hood is shaped generously to fit comfortably over a beanie or bare curls, and the cape falls just past the shoulders, leaving plenty of room for little arms to move freely underneath.
If you have made a baby hat or a simple amigurumi before, you already have the skills for this project. The stitches used are basic single crochet, half double crochet, and double crochet, worked in the round and in rows. The only techniques that might be new to you — working in the back loop only, using a magic ring, and shaping horns around a small stuffing core — are explained clearly the first time they appear below, so you will not need to look anything up elsewhere. Grab a soft cream yarn, a warm cup of tea, and let’s get started.
|
Difficulty
Intermediate
|
Time
15–18 Hours
|
Hook Size
5.0mm & 3.5mm
|
Yarn Weight
Bulky (#5) & Worsted (#4)
|
Finished Size
Fits 6–12 Months
|
Gauge
Before you begin, work a gauge swatch to make sure your finished cape matches the sizing given in this pattern. Using bulky (#5) yarn and a 5.0mm hook, single crochet a swatch that is at least 12cm x 12cm. Your gauge should measure:
11 stitches x 13 rows = 10cm x 10cm (4in x 4in) in single crochet
For the smaller detail pieces (horns, ears, flowers), use worsted (#4) yarn and a 3.5mm hook. Gauge is less critical for these small pieces, but working a swatch first will help you match the proportions shown in the photos. Always swatch first — a looser or tighter gauge will change your finished cape size and the amount of yarn you need.
Materials List
- 300g (approx. 650 yards) bulky weight yarn (#5) in cream/ivory — for the hood and cape body
- 30g worsted weight yarn (#4) in tan/caramel — for the horns
- 15g worsted weight yarn (#4) in pale pink — for the inner ears
- 10g worsted weight yarn (#4) in white — for flower petals
- 10g worsted weight yarn (#4) in peach — for flower petals
- 5g worsted weight yarn (#4) in sage green — for flower leaves
- Small scrap of mustard or gold yarn — for flower centers
- 5.0mm (H/8) crochet hook
- 3.5mm (E/4) crochet hook
- Tapestry needle
- Stitch markers
- Polyester fiberfill stuffing (for horns and pom-poms, if not using a pom-pom maker)
- Pom-pom maker (7.5cm size) or cardboard for two pom-poms
- Two small wooden heart buttons
- Sewing needle and thread to match button color (optional, for extra button security)
- Scissors
Abbreviations Table
| Abbreviation | Meaning |
|---|---|
| ch | chain |
| sl st | slip stitch |
| sc | single crochet |
| hdc | half double crochet |
| dc | double crochet |
| st(s) | stitch(es) |
| rnd(s) | round(s) |
| row(s) | row(s) |
| inc | increase (2 sts in same st) |
| dec | decrease (invisible decrease, explained below) |
| BLO | back loop only |
| FLO | front loop only |
| MR | magic ring |
| sk | skip |
| rep | repeat |
| yo | yarn over |
| ( ) | stitch count at end of round/row |
Pattern Instructions
Part 1: The Hood
Using the 5.0mm hook and cream bulky yarn, start with a magic ring. A magic ring is an adjustable loop that lets you crochet your first round of stitches into it and then pull the center closed tightly, avoiding a hole at the top of your work.
- Rnd 1: 6 sc into MR, pull tail to close (6)
- Rnd 2: inc in each st around (12)
- Rnd 3: sc, inc rep around (18)
- Rnd 4: sc 2, inc rep around (24)
- Rnd 5: sc 3, inc rep around (30)
- Rnd 6: sc 4, inc rep around (36)
- Rnd 7: sc 5, inc rep around (42)
- Rnd 8: sc 6, inc rep around (48)
- Rnds 9–18: sc around, no increases (48)
At this point, your circle should measure roughly 20cm across. Now you will divide the piece to shape the hood dome rather than continuing as a flat circle.
- Row 19: sc in next 24 sts only, turn, leaving remaining 24 sts unworked (24)
- Rows 20–28: ch 1, sc in each st across, turn (24)
This creates the domed back panel of the hood while the front opening stays open for the face. Fasten off, leaving a long tail for seaming.
Fold the rectangle formed by rows 19–28 in half and seam the back edge together using the tapestry needle and a mattress stitch (whip stitch through corresponding stitches on each side) to close the top back seam of the hood, from the fold down about 12cm.
Part 2: The Cape Body
With the hood right side facing you and the 5.0mm hook, join cream yarn at the front edge of the hood opening (the row 8 boundary, where the flat circle stopped increasing).
- Row 1: ch 2 (does not count as st), hdc evenly around the entire bottom edge of the hood — approximately 60 sts, turn (60)
- Row 2: ch 2, inc in first st, hdc across to last st, inc in last st, turn (62)
- Row 3: ch 2, hdc across, turn (62)
- Row 4: ch 2, inc, hdc across to last st, inc, turn (64)
- Row 5: ch 2, hdc across, turn (64)
- Row 6: ch 2, inc, hdc across to last st, inc, turn (66)
- Rows 7–14: ch 2, hdc across, turn (66)
Repeat this gentle increase pattern (increase one stitch at each end every other row) through row 14 if you would like a wider flare; for the size shown in the photo, 66 stitches at the hem is correct. This gradual widening from the neckline down to the hem is what gives the cape its swing and drape.
- Row 15: ch 1, sc across, turn (66) — this row tightens the fabric slightly and prepares for the scalloped edge
- Row 16 (scallop edge): ch 1, sk 1 st, 5 dc in next st, sk 1 st, sl st in next st rep across to end, fasten off
The scallop row uses a skip-and-cluster pattern: skipping a stitch and fanning five double crochets into the next stitch creates the shell shape, and the following slip stitch anchors it before the next shell begins.
Part 3: The Ears (make 2)
Outer ear — cream yarn, 3.5mm hook:
- Rnd 1: 6 sc into MR (6)
- Rnd 2: inc in each st around (12)
- Rnd 3: sc, inc rep around (18)
- Rnd 4: sc around, working into BLO only (18)
Working in the back loop only for this round leaves the front loops free, which is what allows the inner ear piece to be sewn on flat later, creating a raised petal-like lip around the inner ear.
- Rnds 5–6: sc around (18)
- Fasten off, leaving a long tail.
Inner ear — pink yarn, 3.5mm hook:
- Rnd 1: 6 sc into MR (6)
- Rnd 2: inc in each st around (12)
- Rnd 3: sc, inc rep around (18)
- Fasten off, leaving a long tail for sewing.
Flatten both pieces. Center the pink inner ear on top of the cream outer ear and sew it in place using a whip stitch, leaving the bottom third of the ear open and unstitched so it can be pinched into a cupped shape when attached to the hood.
Part 4: The Horns (make 2)
Using tan yarn and the 3.5mm hook:
- Rnd 1: 5 sc into MR (5)
- Rnd 2: sc around (5)
- Rnd 3: inc in each st around (10)
- Rnds 4–5: sc around (10)
- Rnd 6: sc 3, dec rep around (8)
An invisible decrease is worked by inserting your hook into the front loops of the next two stitches, then pulling through both at once before completing as a normal single crochet. This keeps the shaping smooth without the small hole a standard decrease can leave.
- Rnds 7–9: sc around (8)
- Stuff the horn firmly with fiberfill.
- Rnd 10: sc 2, dec rep around (6)
- Rnd 11: dec around (3)
- Fasten off, leaving a long tail, and close the top opening with a few stitches through the remaining 3 sts.
The finished horn should measure approximately 8cm from base to tip and curve gently — you can encourage this curve by lightly steaming the piece over a kettle for a few seconds and shaping it with your fingers as it cools, then letting it dry fully before attaching.
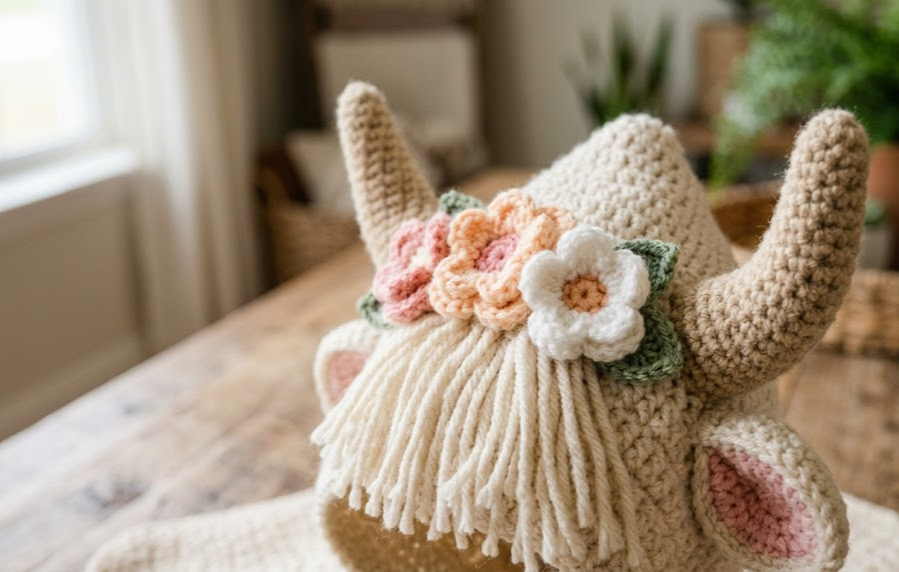
Part 5: The Flowers (make 3 small flowers total — 1 peach, 2 white)
Using worsted yarn and the 3.5mm hook:
- Rnd 1: 6 sc into MR (6)
- Rnd 2: ch 3, sl st in same st, sl st in next st rep around 6 times to form petals, fasten off
Change to mustard/gold scrap yarn for the center:
- MR, sc 6 into ring, pull closed, fasten off, and sew this small dot into the middle of each flower.
Part 6: The Leaves (make 3)
Using sage green yarn and the 3.5mm hook:
- Ch 8
- Row 1: starting in 2nd ch from hook, sc 1, hdc 1, dc 4, hdc 1, sc 1, then continue working down the opposite side of the starting chain: sc 1, hdc 1, dc 4, hdc 1, sc 1, sl st to close (16)
Working down the second side of the starting chain means you rotate your piece 180 degrees once you reach the end of the first side and crochet into the remaining loops of the original foundation chain, creating a pointed leaf shape with stitches on both edges.
Fasten off, leaving a small tail for sewing.
Part 7: Neck Ties and Pom-Poms
Cut two lengths of cream yarn, each 90cm long. Fold each in half and twist tightly until the yarn kinks back on itself when released, then let it twist into a corded tie. Knot both ends. Using a pom-pom maker (or two cardboard circles with a 7.5cm outer diameter and 2.5cm center hole), wrap cream yarn densely around both arms, cut along the outer edge, and tie tightly through the center with a length of the corded tie yarn before trimming into a full round pom-pom. Make two, one for the end of each cord.
Assembly Steps
- Position the two horns on the top of the hood, spaced 6cm apart on either side of the center back seam, angled slightly outward and forward. Pin in place before sewing.
- Sew each horn on using the leftover tail and a whip stitch around the entire base, tucking the tail inside the horn to hide it.
- Position the ears roughly 4cm below and slightly in front of the horns, along the sides of the hood where a real ear would sit. Pin, then sew around the outer edge, leaving the bottom third loose so the ear can flop naturally forward.
- Arrange the flower cluster (1 peach, 2 white) just to the right of the horns, tucking one leaf underneath and two leaves peeking out from the sides. Sew each piece in place through its center, stacking the flowers slightly so they overlap.
- Try the cape on the hood dome to check that the horns and ears sit symmetrically before your final stitches — small adjustments are easier to make now than after everything is sewn down.
- Sew the two wooden heart buttons to the front edges of the cape at the neckline, spaced 3cm apart, roughly 2cm down from the top edge.
- Thread one corded tie through the space beside each button (or through a small buttonhole loop crocheted into the front edge if you prefer a more finished look), and knot to secure. Attach a pom-pom to the free end of each cord, positioning the pom-poms so they hang 8–10cm below the neckline when the cape is closed.
- Weave in all remaining yarn tails using the tapestry needle, and steam-block the finished cape lightly if the edges feel uneven.
Beginner/Intermediate Tips
- When working the scallop edge in Part 2, keep your tension slightly looser than usual on the 5-dc shell stitches so the edge lies flat rather than cupping inward.
- Stuff the horns just until they hold their shape but still feel slightly soft when squeezed — overstuffing will make them stiff and heavy on a baby’s hood.
- If your magic rings keep loosening after the first round, try wrapping the yarn around your finger twice before starting, which gives you a firmer ring to work into.
- Use stitch markers on the first stitch of every round in Part 1 so you never lose track of where each round begins, especially once you reach the higher stitch counts.
- Block your ears and flowers flat under a damp cloth before sewing them on — this makes them lie neatly against the hood instead of curling at the edges.
Variations
- Lamb version: swap the tan horns for two small crochet curls and use all-white or soft grey yarn for a lamb-themed cape instead of a highland cow.
- Size up: repeat rows 7–14 of the cape body twice more and add two extra rounds to the hood before dividing, to size the cape up for a toddler around 18–24 months.
- Seasonal palette: work the main cape in blush pink or sage green instead of cream for a spring photoshoot look, keeping the horns and flower trim the same.
- No-horn cuddly hood: leave off the horns entirely and add a second, larger flower cluster instead, for a softer floral bonnet-style cape without the animal theme.
- Display piece: make a mini version at half scale using worsted yarn throughout and a 3.5mm hook, and mount it on a small wooden stand as a nursery shelf decoration rather than a wearable piece.
Save This Pattern
If you loved this Highland Cow Baby Hooded Cape, save this pin to your crochet board so you can find it again when you’re ready to start! Tag your finished projects with #FoodiePlumCrochet — we love seeing your version come to life.



