
The Best Fluffy Pancakes recipe you will fall in love with. Full of tips and tricks to help you make the best pancakes.

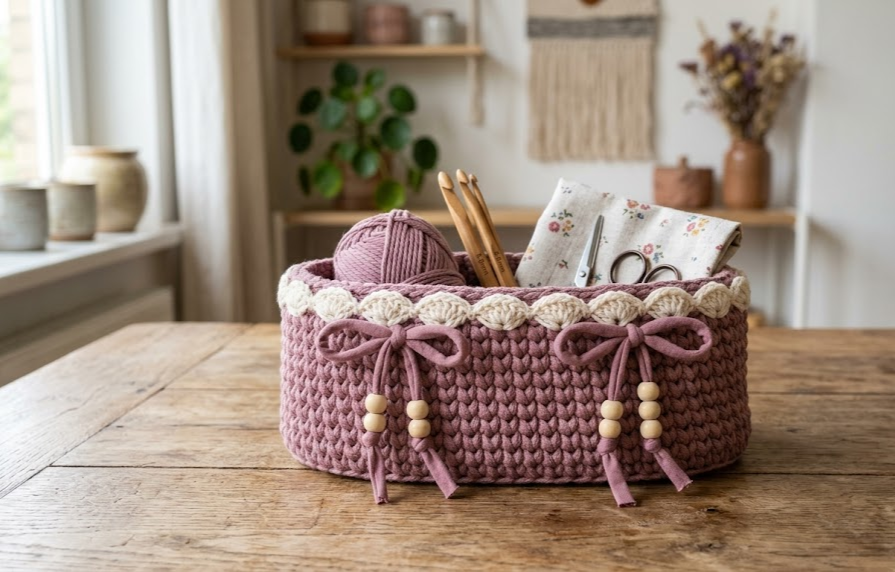
There’s something deeply satisfying about a handmade basket sitting on your countertop, catching sunlight and holding all the little things that usually end up scattered across your home. This scalloped crochet basket, made from thick T-shirt yarn in a warm dusty rose with a delicate ivory shell-stitch trim, is exactly that kind of project. It’s sturdy enough to hold fruit, bread, remotes, or bathroom essentials, yet soft and textured enough to feel like a genuine piece of handmade decor.
This basket is worked up quickly thanks to the chunky yarn and large hook, so even though the stitch pattern creates a beautifully dense, structured fabric, you won’t be sitting with your hook for weeks. It’s an ideal project for someone who has mastered the basics of single crochet and double crochet and is ready to try a slightly more textured stitch combined with a pretty decorative edge. The finished basket holds its shape on its own without any wire or stiffening spray, thanks to the density of the yarn and the tightness of the stitches, making it a genuinely functional storage piece as well as a decorative one.
Whether you’re crocheting this for your own kitchen counter, a nursery shelf, or as a handmade gift, this pattern walks you through every single stitch from the oval base to the scalloped trim to the beaded tie details that give it that final boho touch.
|
Difficulty
Intermediate
|
Time
6–8 Hours
|
Hook Size
5mm (H/8)
|
Yarn Weight
Super Bulky
|
Finished Size
25 x 12 x 10cm
|
Gauge
10 sts x 8 rows = 10cm x 10cm square, worked in Basket Stitch, using a 5mm (H/8) hook and super bulky T-shirt yarn (trapillo).
Always crochet a small gauge swatch before starting. Because this project uses thick yarn, even small tension differences can change your finished basket size significantly. If your swatch is smaller than 10cm, size up your hook; if larger, size down.
Materials List
- Super bulky T-shirt yarn (trapillo) in dusty rose/mauve — approximately 150–180 grams for the main body
- Super bulky T-shirt yarn (trapillo) in ivory/cream — approximately 40–50 grams for the scalloped trim
- 5mm (H/8) crochet hook
- Yarn needle for weaving in ends
- 6 small wooden beads (for the two ties)
- Scissors
- Stitch marker
Abbreviations
| Abbreviation | Meaning |
|---|---|
| ch | chain |
| sc | single crochet |
| dc | double crochet |
| sl st | slip stitch |
| st(s) | stitch(es) |
| rnd(s) | round(s) |
| inc | increase (2 sts worked into 1 st) |
| rep | repeat |
| ( ) | stitch count at end of round/row |
| * ** | repeat instructions between asterisks |
Pattern Instructions
Part 1: Oval Base (Dusty Rose Yarn)
Rnd 1: Ch 21. Starting in 2nd ch from hook, sc in each ch across (19 sc). Work 3 sc into the last ch to turn the corner. Now work back along the other side of the foundation chain — this means flipping your chain over and crocheting into the bumpy loops on the underside of the same starting chain, rather than starting a new chain. Sc in each of these remaining loops across (19 sc). Work 2 sc into the very first stitch of the round to close the oval and mark the start. (42 sc)
Technique note: Working into the “other side” of the foundation chain simply means using the row of small bumps running along the back of your starting chain as your stitch base, so the oval has a matching row of stitches on both the top and bottom without adding a second chain.
Rnd 2: Inc in first st, sc in next 17 sts, [inc] 4 times evenly around the curved end, sc in next 17 sts, [inc] 4 times evenly around the other curved end. (52 sc)
Rnd 3: Inc in first st, sc in next 19 sts, [inc] 4 times around curve, sc in next 19 sts, [inc] 4 times around curve. (60 sc)
Rnd 4: Sc evenly in each st around, no increases. (60 sc)
Fasten off and weave in the tail if you’d like a clean transition, or continue directly into the walls.
Part 2: Basket Walls (Dusty Rose Yarn)
The textured, ribbed look on the walls comes from the Basket Stitch, which alternates sc and dc stitches to create a thick, structured fabric that holds its shape upright without stiffening.
Rnds 5–14 (10 rounds): Working in continuous rounds (do not join or turn), sc in next st, dc in next st rep around. (60 sts each round)
Work all 10 rounds evenly, keeping your tension consistent so the walls stand straight rather than flaring or curving inward. This is the longest part of the pattern — the repetitive stitch pattern makes it easy to work on while watching TV once you get the rhythm down.
At the end of Rnd 14, sl st into next st and fasten off, weaving in the end securely on the inside of the basket.
Part 3: Scalloped Shell Trim (Ivory Cream Yarn)
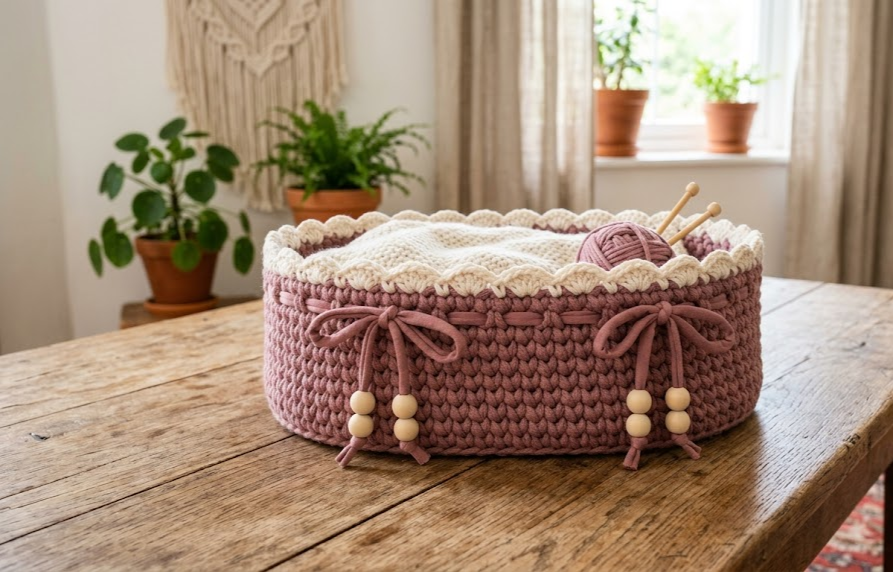
Rnd 15: Join cream yarn with a sl st in any stitch along the top edge. Ch 1 (does not count as a stitch). Skip next 2 sts, work 5 dc into next st (this creates one shell), skip next 2 sts, sl st in next st rep around. (10 shells)
Technique note: Each shell is 5 dc worked into a single stitch, fanning out to create the scalloped look. Keep your tension slightly looser on the shell stitches so they curve outward nicely instead of pulling tight.
Fasten off and weave in ends on the inside of the basket where they won’t show.
Part 4: Ties with Beads (2 pieces, Dusty Rose Yarn)
Make 2 identical ties.
Tie: Ch 40. Fasten off, leaving an 8–10cm tail on each end for threading beads and knotting.
Thread 3 wooden beads onto each tail before knotting the ends to prevent slipping.
Assembly Steps
- Lay the finished basket flat and locate the two side “waist” points, roughly 6cm in from each rounded end.
- Using a yarn needle, weave one tie horizontally through the basket wall at each side point, about 2–3cm below the scalloped trim.
- Thread 3 wooden beads onto each hanging end of yarn before knotting.
- Pull each tie snug and tie into a simple bow, cinching the basket wall in slightly at that point for the signature scalloped-basket silhouette.
- Steam-block the basket lightly by holding a steamer 5–8cm away from the surface to help the shells lie flat and the walls relax into shape. Do not iron directly on the yarn.
- Let the basket rest upright for a few hours to help it hold its final oval shape before use.
Beginner/Intermediate Tips
- T-shirt yarn splits easily if pulled too hard — always pull gently from the center of the ball rather than yanking, to avoid snapping the strip.
- Keep your increases evenly spaced around the curves in Rnds 2–3; use a stitch marker every 5 stitches while increasing so you don’t lose count on the thick yarn.
- If your shells in Part 3 look uneven, check that you’re skipping exactly 2 stitches each time — this spacing is what keeps the scallops symmetrical.
- Because trapillo yarn has natural stretch, avoid crocheting too tightly in the wall rounds or the basket will feel stiff instead of structured.
- Use a hook one size up from what feels natural if your stitches are curling inward instead of standing straight.
Variations
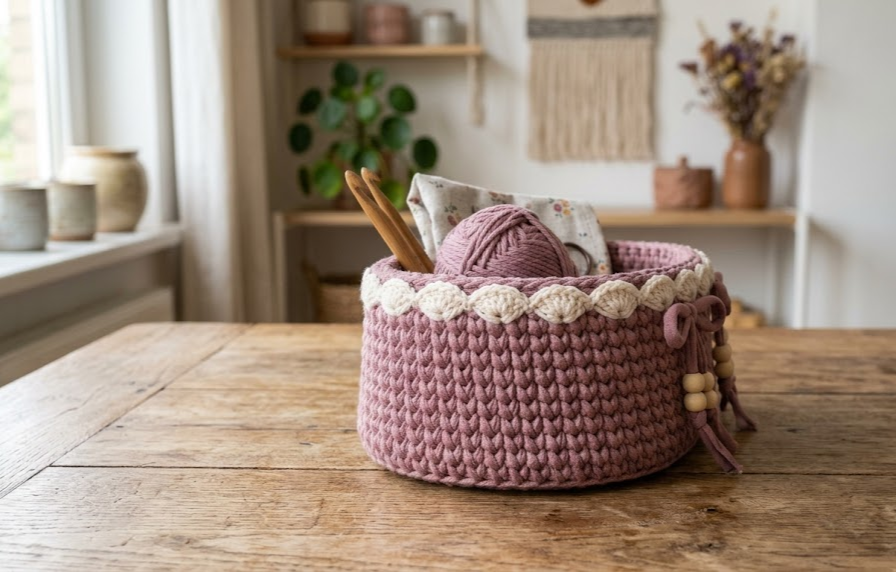
- Two-Tone Reverse: Swap the color placement — make the walls in ivory cream and the scalloped trim in dusty rose for a completely different look.
- Mini Version: Reduce the foundation chain to ch 15 and work only 6 wall rounds for a small trinket or jewelry basket.
- No-Tie Minimalist Style: Skip the beaded ties entirely and leave the scallop trim as the only embellishment for a cleaner, modern boho look.
- Handled Basket: Add two chunky crochet handles (ch 25, sc back across) attached at opposite sides instead of the bow ties, for a market-basket style carry piece.
Save this pattern now so you don’t lose it, and tag your finished basket with #FoodiePlumCrochet — I’d love to see your version!



