
The Best Fluffy Pancakes recipe you will fall in love with. Full of tips and tricks to help you make the best pancakes.

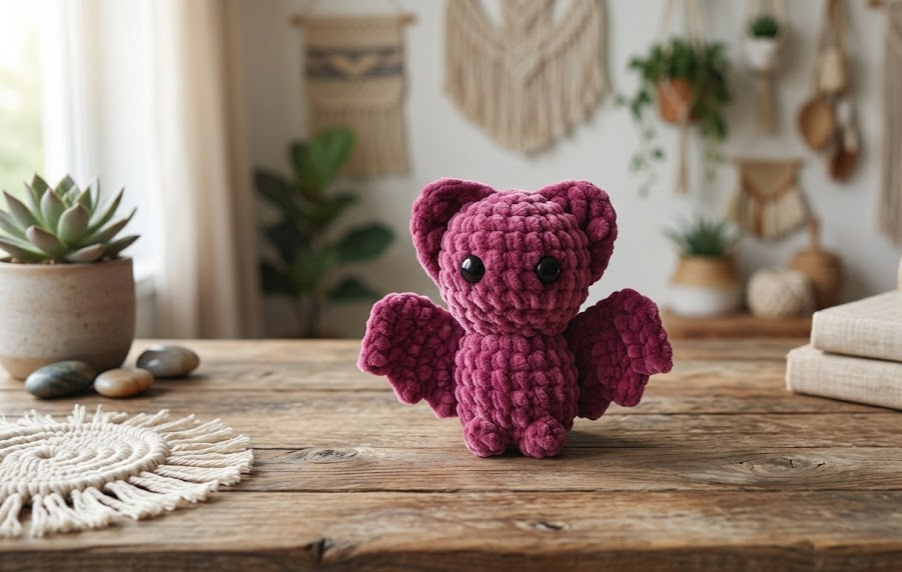
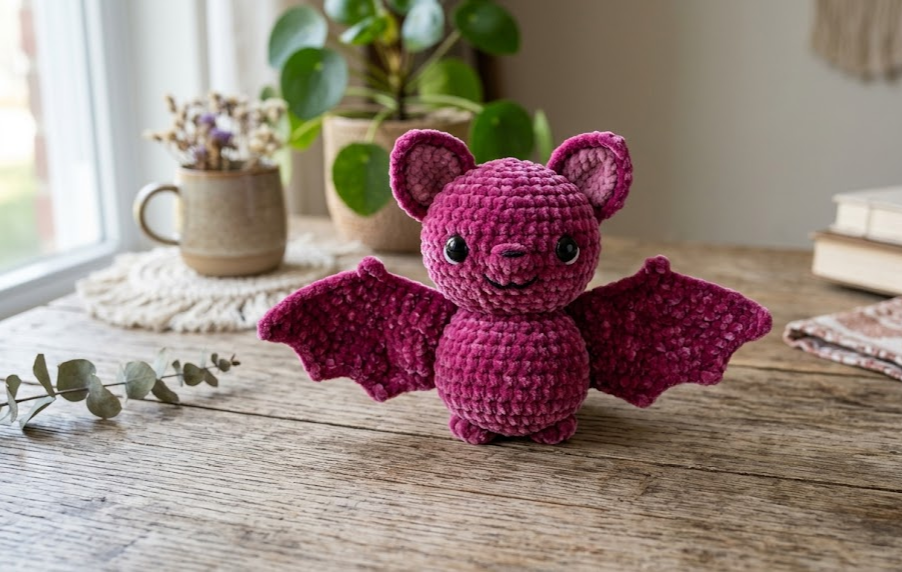
If you’ve been searching for a quick, cuddly project that comes together in an evening, this crochet bat amigurumi is exactly what you need. With its round little head, soft folded ears, and dramatically oversized wings, this bat has the kind of charm that makes it perfect for Halloween baskets, nursery shelves, or just an adorable year-round plush that happens to be shaped like everyone’s favorite spooky mammal. Made entirely in velvety chenille yarn, this bat is irresistibly soft to the touch and works up with surprisingly simple stitches.
This pattern is designed with a no-sew assembly method in mind — instead of stitching on eyes and ears separately after finishing every piece, you’ll build much of the bat as you go, minimizing the amount of finishing work at the end. That makes this an ideal project for confident beginners who have mastered the basics of single crochet and want to move into their first amigurumi shaping, as well as intermediate crocheters looking for a fast, satisfying make.
Whether you’re crafting this as a gift, a seasonal decoration, or your next amigurumi collection piece, this bat is quick, forgiving, and endlessly cute. Let’s get into the details.
|
Difficulty
Beginner-Intermediate
|
Time
2–3 Hours
|
Hook Size
5.5mm (I/9)
|
Yarn Weight
Bulky (Chenille)
|
Finished Size
~12cm x 18cm
|
Gauge
- 12 sc x 12 rows = 10cm x 10cm square, worked in single crochet using bulky/chenille weight yarn
- Hook used: 5.5mm (US I/9)
- Yarn weight used: Bulky (weight 5) velvet/chenille yarn
Gauge is not critical for this amigurumi project since it’s a stuffed toy rather than a wearable, but working close to this gauge will help your finished bat match the size listed below and will ensure your stitches are tight enough to prevent stuffing from showing through.
Materials List
- Yarn: Bulky weight velvet/chenille yarn in Magenta/Mulberry (approx. 120g total)
- Hook: 5.5mm (US I/9) crochet hook
- Stuffing: Polyester fiberfill (approx. 80–100g)
- Eyes: 2 x 12mm black safety eyes
- Notions: Yarn needle, stitch markers, small amount of scrap yarn for closing seams, fabric glue (optional, for reinforcing safety eyes)
Abbreviations Table
| Abbreviation | Meaning |
|---|---|
| MR | Magic Ring |
| sc | Single Crochet |
| inc | Increase (2 sc in same stitch) |
| dec | Invisible Decrease |
| sc2tog | Single Crochet 2 Together |
| st(s) | Stitch(es) |
| rnd | Round |
| BLO | Back Loop Only |
| FLO | Front Loop Only |
| ch | Chain |
| sl st | Slip Stitch |
| ( ) | Stitch count at end of round |
Technique Note — Magic Ring (MR): Wrap yarn around your finger twice, pull a loop through, then crochet your first round of stitches into the loop before pulling the tail to close it tightly. This creates a seamless, hole-free start for round pieces like the head and body.
Technique Note — Invisible Decrease (dec): Insert your hook into the front loop of the next two stitches (rather than through both full stitches), yarn over, and pull through both loops. This creates a smoother, less bulky decrease than a standard sc2tog and is especially helpful on visible areas like the head.
Pattern Instructions
Part 1: Head
- Rnd 1: MR, 6 sc into ring (6)
- Rnd 2: inc in each st around (12)
- Rnd 3: sc, inc around (18)
- Rnd 4: sc 2, inc around (24)
- Rnd 5: sc 3, inc around (30)
- Rnd 6-10: sc in each st around (30) — work 5 rounds even
- Rnd 11: sc 3, dec around (24)
- Rnd 12: sc 2, dec around (18)
Technique Note: After Rnd 11, insert and secure your safety eyes between Rnds 8 and 9, spaced 5 stitches apart. Attach the backing washers firmly from inside before continuing — this is much easier to do before the head is fully stuffed.
- Stuff the head firmly at this point.
- Rnd 13: sc 1, dec around (12)
- Rnd 14: dec around (6)
- Fasten off, leaving a 15cm tail for closing. Weave through remaining 6 sts, pull tight, and secure.
Part 2: Ears (make 2)
- Rnd 1: MR, 5 sc into ring (5)
- Rnd 2: sc around (5)
- Rnd 3: sc around (5)
- Fasten off, leaving a long tail for attaching. Do not stuff — flatten slightly for a soft, floppy ear shape.
Attachment: Pinch the base of each ear slightly and sew flat onto the top of the head, angled outward, about 2cm apart from each other.
Part 3: Body
- Rnd 1: MR, 6 sc into ring (6)
- Rnd 2: inc in each st around (12)
- Rnd 3: sc, inc around (18)
- Rnd 4: sc 2, inc around (24)
- Rnd 5-9: sc in each st around (24) — work 5 rounds even
- Rnd 10: sc 2, dec around (18)
- Stuff the body firmly.
- Rnd 11: sc 1, dec around (12)
- Rnd 12: dec around (6)
- Fasten off, leaving a 15cm tail. Close the hole and set aside for assembly.
Part 4: Wings (make 2)
- Ch 16.
Technique Note — Working the Second Side of a Chain: After chaining, you’ll work down one side of the chain and then flip to work back up the opposite side of the same foundation chain, creating two rows of stitches from a single starting chain — this gives the wing its flat, leaf-like shape without a separate seam.
- Row 1: Starting in 2nd ch from hook, sc across (15 sts)
- Row 2: ch 1, turn, sc in each st across (15)
- Row 3: ch 1, turn, sc 2, dec, sc 3, dec, sc 3, dec, sc 2 (12)
- Row 4: ch 1, turn, sc 2, dec, sc 2, dec, sc 2, dec, sc (9)
- Row 5: ch 1, turn, sc 1, dec, sc 1, dec, sc 1, dec, sc (6)
- Fasten off, leaving a long tail for attaching. Do not stuff — wings stay flat for a delicate, membrane-like texture.
Optional Detail: Using a contrasting scrap of yarn, add a single straight line of chain stitch or backstitch from the base of the wing to the tip to mimic a bat wing’s vein structure.
Part 5: Feet (make 2, optional detail piece)
- Rnd 1: MR, 5 sc into ring (5)
- Fasten off, leaving a short tail. Flatten into a small triangle shape and attach to the base of the body, one on each side.

Assembly Steps
- Stuff both the head and body firmly but not overly tight, leaving about 1cm of give so pieces sit naturally when joined.
- Attach the head to the top of the body by sewing around the opening, matching the flattened bottom of the head to the top of the body. Sew all the way around for a secure no-gap seam.
- Position the two ears on top of the head, spaced approximately 2cm apart, angled slightly outward. Sew each in place using the long tail left from the ear piece.
- Attach the wings to the upper sides of the body, roughly at the same height as the neck seam. Angle each wing diagonally upward and outward at about a 45-degree angle for a mid-flight look, or flatten them fully to the sides for a resting pose.
- Attach the small feet to the lower front of the body, spaced about 2cm apart, pointing slightly outward.
- Weave in all remaining yarn tails securely using your yarn needle.
- Fluff and shape the finished bat by gently patting the body into a rounded shape and smoothing the wings flat.
Beginner/Intermediate Tips
- Chenille/velvet yarn splits easily, so crochet a little more slowly than usual and keep an eye on your stitch definition — it hides mistakes well, but it can also hide dropped stitches.
- Insert safety eyes before you finish stuffing the head; once the head is fully stuffed and closed, it’s very difficult to adjust eye placement.
- Use stitch markers on Rnd 1 of every new piece so you never lose track of where your round begins, since chenille yarn makes stitches harder to distinguish visually.
- If your wings look overly floppy, add a single layer of interfacing or a light stiffening spray to the back before attaching for more structure.
- Slightly under-stuff the wings and feet compared to the head and body — this keeps them soft and floppy versus firm and round, giving nice contrast in texture.
Variations
- Color Swap: Make the bat in black, deep purple, or classic Halloween orange-and-black for a more traditional spooky look.
- Mini Size: Use a 3.5mm hook with worsted weight yarn to create a miniature 8cm version perfect for keychains or ornaments.
- Hanging Bat: Skip the feet and instead sew a loop of yarn or ribbon to the top of the head so it can be hung from a shelf or Halloween display.
- Bat Family Set: Crochet three bats in graduating sizes using different hook sizes to create an adorable trio for seasonal decor.
- Sparkle Edition: Add a fine strand of metallic thread held together with your main yarn for a shimmery, magical bat variation.
Pinterest CTA
Loved this pattern? Save it now so you don’t lose it, and tag your finished bat with #FoodiePlumCrochet — we love seeing your makes!



