
The Best Fluffy Pancakes recipe you will fall in love with. Full of tips and tricks to help you make the best pancakes.

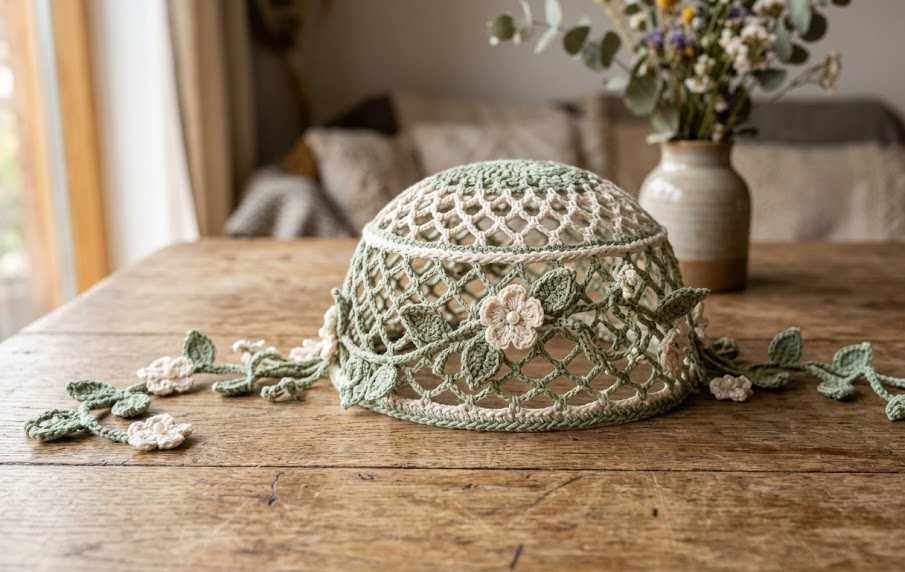
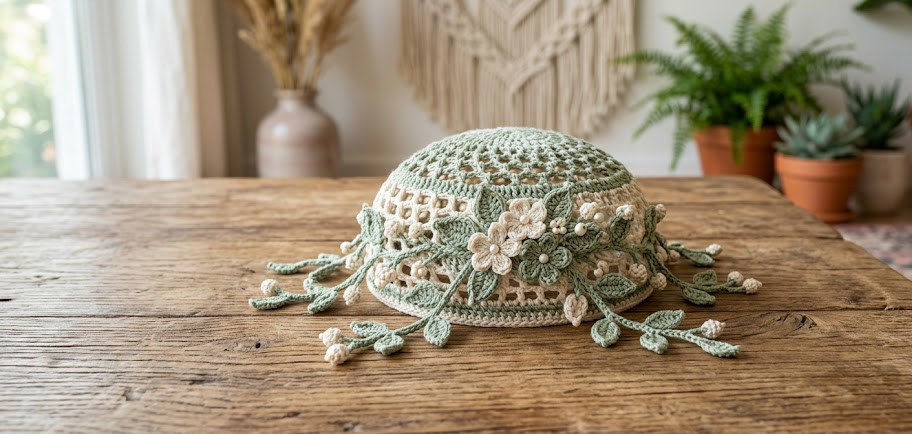
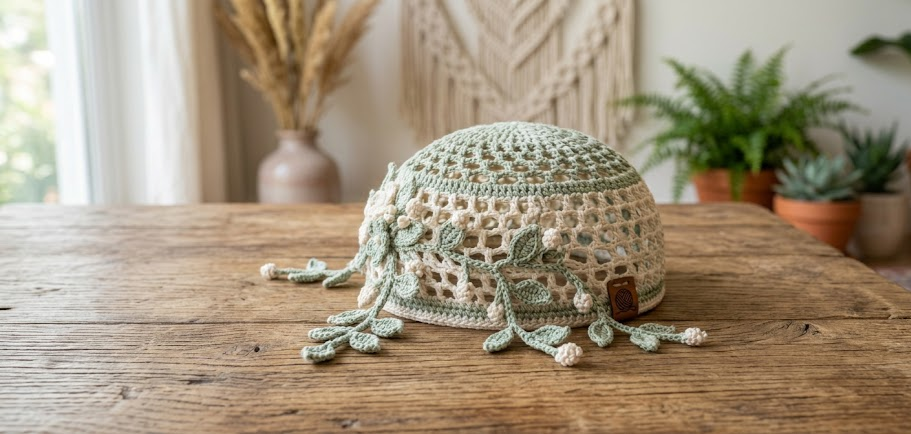
There’s something quietly magical about a hairpiece that looks like it grew rather than was made — and this crochet leaf vine hair cap does exactly that. A soft, open mesh crown sits close to the head like a delicate net, while trailing sage-green leaf vines cascade down through the hair, finished with a small ivory flower and tiny pearl bead accents at each vine tip. It reads like something between a woodland crown and a bridal accessory, which is exactly why it works for so many occasions: outdoor weddings, garden parties, festival season, or simply an elevated everyday look for anyone who loves textured, nature-inspired hair accessories.
This piece is worked in fine cotton thread, which is what gives the netting its delicate, lace-like drape and lets the leaf vines fall naturally through loose waves rather than sitting stiffly on top of the hair. It’s an intermediate-level project — nothing in it is difficult on its own, but there are several different techniques stacked together (mesh shaping, leaf motifs, a small flower, and bead-finished vine tips), so a little prior crochet experience will make the process smoother. If you’ve made granny squares, filet mesh, or simple flower appliqués before, you already have every skill you need.
Below you’ll find the full gauge, materials, abbreviations, and pattern instructions written out completely, round by round, so you can make this piece from start to finish using nothing but what’s on this page.
|
Difficulty
Intermediate
|
Time
10–12 hours
|
Hook Size
2mm
|
Yarn Weight
Lace / Size 10 Cotton
|
Finished Size
54–58cm cap, 30–50cm vines
|
Gauge
- 16 sts x 16 rows = 10cm x 10cm in mesh pattern (dc, ch-1 net)
- Hook used for gauge swatch: 2mm steel hook
- Yarn weight used for gauge swatch: lace weight cotton thread (size 10 crochet cotton or fingering weight cotton)
Always crochet a small gauge swatch before starting. Because this cap is worn close to the head, gauge affects fit — if your mesh comes out looser than 16 sts per 10cm, go down a hook size; if it’s tighter, go up a hook size.
Materials List
- Lace weight cotton thread in sage green — approx. 80g (for leaf vines and stems)
- Lace weight cotton thread in ivory/cream — approx. 50g (for the net cap and flower)
- 2mm steel crochet hook
- 20–24 small ivory pearl beads (4–6mm), for vine tips
- Sewing needle and thread matching yarn colors, for attaching vines and flower
- Tapestry needle, for weaving in ends
- 30cm of thin elastic thread or ribbon, for the cap edge casing
- Stitch markers
Abbreviations Table
| Abbreviation | Meaning |
|---|---|
| ch | chain |
| sl st | slip stitch |
| sc | single crochet |
| hdc | half double crochet |
| dc | double crochet |
| sp | space |
| st(s) | stitch(es) |
| rnd | round |
| BLO | back loop only |
| MR | magic ring |
Pattern Instructions
Part 1: Net Cap (crown)
The cap is worked in the round from the crown outward in a mesh (ch-1 net) pattern, then edged with a casing round for elastic.
Technique note — Magic Ring (MR): an adjustable loop that lets you close the center hole tightly after your first round, rather than leaving a gap like a standard chain ring.
Rnd 1: MR, ch3 (counts as first dc throughout), 15 dc into ring, pull ring closed, join with sl st to top of beg ch3. (16 dc)
Rnd 2: Ch3, dc in same st, 2 dc in each dc around, join. (32 dc)
Rnd 3: Ch3, dc in same st, dc in next dc, 2 dc in next dc, repeat around, join. (48 dc)
Rnd 4 (mesh begins): Ch4 (counts as dc + ch1), skip next dc, dc in next dc, ch1, skip next dc, dc in next dc, repeat around, join to 3rd ch of beg ch4. (24 dc, 24 ch-1 sps)
Rnd 5 (increase): Sl st into first ch-1 sp, ch4, dc in same sp, ch1, dc in next ch-1 sp, ch1, 2dc in next ch-1 sp, repeat around, join. (32 dc, 32 ch-1 sps)
Rnds 6–9 (work even): Ch1, dc in next ch-1 sp, ch1, dc in next ch-1 sp, repeat around, join each round. (32 dc, 32 ch-1 sps — repeat for all 4 rounds)
Rnd 10 (increase): Ch1, dc in next sp, ch1, 2dc in next sp, repeat around, join. (40 dc, 40 ch-1 sps)
Rnds 11–14 (work even): Ch1, dc in next ch-1 sp around, join each round. (40 dc, 40 ch-1 sps — repeat for all 4 rounds)
Rnd 15 (edge): Ch1, sc in each dc and each ch-1 sp around, join. (80 sc)
Rnd 16 (casing): Ch3, skip 1 sc, dc in next sc, skip 1 sc, dc in next sc, repeat around, join. (40 dc)
Weave elastic thread or narrow ribbon through the ch-1 spaces of Rnd 16, pull to fit your head comfortably (54–58cm), and knot securely on the inside.
Part 2: Leaf Vine (make 7)
Technique note — working across a foundation chain: you’ll work stitches into one side of the chain, then turn and work back down the opposite side of the same chain to complete each leaf shape.
Leaf motif: Ch6. Sc in 2nd ch from hook, hdc in next ch, dc in next 2 ch, (sc, ch1, sc) in last ch (this forms the leaf tip), turn to work down the opposite side of the foundation chain: dc in next 2 ch, hdc in next ch, sc in last ch, sl st to base of leaf. (12 sts, 1 leaf made)
Full vine sequence:
Ch8 (stem section), work 1 leaf motif as above, ch8 (stem section), work 1 leaf motif, repeat until vine has 6 leaves total, then ch10 (tail), fasten off leaving a 15cm tail. (6 leaves, 1 vine made)
Repeat to make 7 vines total.
Part 3: Flower (make 1)
Rnd 1: MR, ch1, 10 sc into ring, join. (10 sc)
Rnd 2 (petals): (Sc, hdc, 3dc, hdc, sc) in next sc, skip next sc, repeat around 5 times, join. (5 petals)
Fasten off, leaving a 15cm tail for attaching.
Part 4: Beaded Vine Tips
Thread 1 pearl bead onto the fastening-off tail of each vine, slide it snugly to the leaf tip, then tie a small secure knot below the bead and weave the tail back up through 2–3cm of the vine stitches to lock it in place before trimming. Repeat for each of the 7 vines (or fewer, if you prefer a lighter look).
Assembly Steps
- Weave the elastic through the Rnd 16 casing of the cap and adjust to a comfortable head fit (54–58cm circumference), then knot the ends together inside the cap and trim.
- Lay the cap flat and mark the front edge (the section that will sit at the hairline).
- Using sewing thread, whipstitch the top (stem) end of each leaf vine to the inside front edge of the cap, spacing the 7 vines about 2cm apart across a 14cm span at the front-center and sides.
- Position the flower motif over the point where 2–3 vines converge near the front, slightly off-center. Whipstitch around the base of the flower with 8–10 small stitches to secure it flat against the cap.
- Let the vines hang and trim to your preferred graduated length: leave the front-center vines longest (45–50cm) and the side vines shorter (30–35cm) for a natural cascading effect.
- Weave in all remaining yarn tails through 5cm of nearby stitches on the wrong side, then trim close to the work.
Beginner/Intermediate Tips
- If you’re new to magic ring, practice it separately a few times before starting Rnd 1 of the cap — a snug closed center keeps the crown from puckering.
- Keep tension slightly looser than usual on the leaf motif chains; a tight foundation chain will make the leaves curl instead of lying flat.
- Pin the vines to the cap edge before sewing to check spacing and length balance while the cap is on a wig head or your own head — it’s much easier to adjust before stitching than after.
- If your pearl beads have small holes, switch to a size 10 steel beading needle to thread them onto the yarn tail rather than forcing a tapestry needle through.
- Block the finished cap by pinning it flat and lightly steaming before attaching vines — this keeps the mesh rounds even and the shape symmetrical.
Variations
- Bridal white: Work the entire piece in ivory or white thread with clear or pearl bead accents for a bridal veil alternative.
- Autumn palette: Swap sage green for rust, mustard, and burnt orange leaf vines for a fall-themed piece.
- Mini version: Reduce to 3–4 shorter vines (20–25cm) attached to a small comb instead of a full cap, for a subtle half-up hairstyle accent.
- Lavender garden: Add tiny crochet lavender-bud clusters along the vines instead of leaves only, using French knot-style bobbles in purple thread.
- No-bead version: Skip the pearl beads entirely and finish vine tips with a simple small leaf or picot point for a more minimalist, everyday-wearable look.
Save This Pattern
If you love nature-inspired hair accessories, save this pattern so you can come back to it anytime you’re ready to crochet your own leaf vine hair cap. Tag your finished pieces and share your version with the hashtag #FoodiePlumCrochet — I’d love to see how your vines turn out!



