
The Best Fluffy Pancakes recipe you will fall in love with. Full of tips and tricks to help you make the best pancakes.

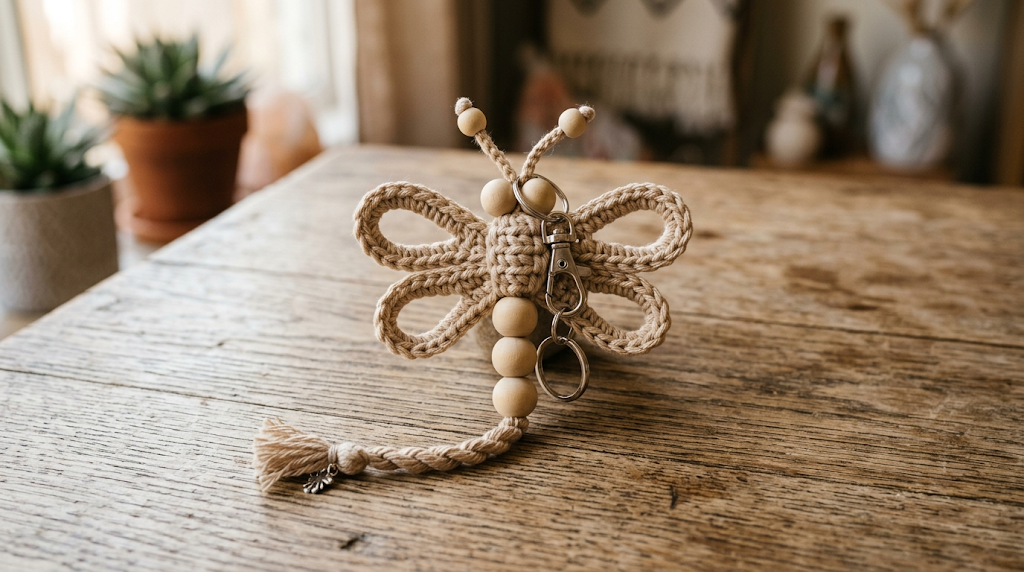
If you’ve been searching for a quick, beautiful handmade gift that takes almost no yarn and almost no time, this crochet dragonfly keychain is exactly what you need. With its delicate looped wings, natural wooden bead body, and soft twisted tassel tail, this little charm has that effortless boho look that makes it perfect for clipping onto a handbag, backpack, keyring, or diaper bag. It’s the kind of project you can start after dinner and finish before bed, and it works up so quickly that most crocheters end up making three or four in one sitting — one for themselves and a few to give away.
This pattern is ideal for confident beginners who already know basic chain and slip stitch techniques, and it’s a fantastic stash-buster for leftover worsted or DK weight yarn in earthy, neutral tones. The wooden beads add warmth and a natural, handcrafted feel that pairs beautifully with leather bags, canvas totes, and rattan accessories. Because the wing construction is just a series of long loops anchored together rather than a traditional shaped motif, it’s also a wonderful introduction to non-amigurumi crochet accessories — no shaping, no increases, no decreases, just simple repetitive loops that build into something elegant.
Below you’ll find everything you need: gauge, full materials list, every abbreviation explained, and a complete row-by-row pattern with stitch counts, followed by assembly instructions and styling variations.
|
Difficulty
Beginner-Intermediate
|
Time
45–60 minutes
|
Hook Size
3.5mm (E/4)
|
Yarn Weight
DK (Light Worsted)
|
Finished Size
~10cm x 13cm
|
Gauge
Gauge is not critical for this pattern since the wings are formed from chains and loops rather than a fitted shape, but matching gauge will keep your dragonfly’s proportions consistent with the size below.
- 14 sts and 16 rows = 10cm x 10cm square in single crochet (US terms)
- Hook used: 3.5mm (US E/4)
- Yarn weight used: DK weight (light worsted, #3)
- Always crochet a small swatch first if you want your finished dragonfly to match the size given in this pattern exactly.
Materials List
- DK weight cotton or cotton-blend yarn, approximately 8–10 grams, in a natural beige, tan, or oatmeal shade (small amount needed — this is a great scrap-yarn project)
- 3.5mm (US E/4) crochet hook
- 4 wooden beads, approximately 8–10mm in diameter, with a hole large enough to thread your yarn or cord through twice
- 1 metal lobster clasp or keyring finding
- 1 small jump ring (to attach the lobster clasp to the dragonfly, if your clasp doesn’t already have a loop)
- Yarn needle (tapestry needle) for weaving in ends
- Scissors
- Optional: small amount of fabric glue or clear-drying craft glue to secure bead placement on the tail cord
Abbreviations Table
| Abbreviation | Meaning |
|---|---|
| ch | chain |
| sl st | slip stitch |
| sc | single crochet |
| st(s) | stitch(es) |
| rep | repeat |
| ch sp | chain space |
| yo | yarn over |
| RS | right side |
Pattern Instructions
Part 1: The Wing Loops (make 4 identical loops)
The dragonfly’s wings are made from four separate chain loops, two slightly longer for the top wings and two slightly shorter for the bottom wings, all anchored to a central point.
Large Wing Loop (make 2):
Row 1: Ch 26. Working back along the same chain, sl st into the first chain you made to form a loop. (26 ch, joined into a ring)
Row 2: Ch 1 (does not count as a stitch), work 1 sc into each ch around the loop. (26 sc)
Fasten off, leaving a 15cm tail for assembly.
Technique note: Joining a length of chain into a ring with a slip stitch creates the base loop for each wing. Be careful not to twist the chain before joining — lay it flat on your table to check before you slip stitch.
Small Wing Loop (make 2):
Row 1: Ch 20. Working back along the same chain, sl st into the first chain you made to form a loop. (20 ch, joined into a ring)
Row 2: Ch 1 (does not count as a stitch), work 1 sc into each ch around the loop. (20 sc)
Fasten off, leaving a 15cm tail for assembly.
Part 2: Joining the Wings into a Bow Shape
This step uses your yarn needle rather than your hook.
Step 1: Lay your two large loops side by side so they form a wide “M” or bow-tie shape, with the centers touching.
Step 2: Thread your yarn needle with one of the tail ends and stitch through the center point where both large loops meet, pulling them together tightly so they pinch into a bow shape rather than two separate circles. Knot off securely on the wrong side.
Step 3: Repeat this same pinching join with your two small loops directly underneath the large loops, so all four loops pinch together at one central point. (You should now have a four-winged dragonfly shape, large wings on top, small wings on bottom, all meeting in the middle.)
Step 4: Weave in all loose ends at this central pinch point, but do not trim them too short — you’ll be securing the body beads here next.
Part 3: Body and Antennae (Wooden Beads)
The dragonfly’s body is built from your remaining yarn tail and the wooden beads, stacked vertically through the center pinch point of the wings.
Step 1: Cut a fresh strand of yarn approximately 40cm long. Fold it in half and pass the folded end up through the center pinch point of the wings from the back, so a small loop pokes out the front and two tails hang out the back.
Step 2: Thread both strands together through your yarn needle and pass them up through one wooden bead, positioning the bead just above the wings to act as part of the antennae area. Push the bead down so it sits snugly on top of the wing center. (1 bead placed)
Step 3: Pass the two strands back down through the same bead and back through the wing center to the back side. This anchors the top bead firmly above the wings.
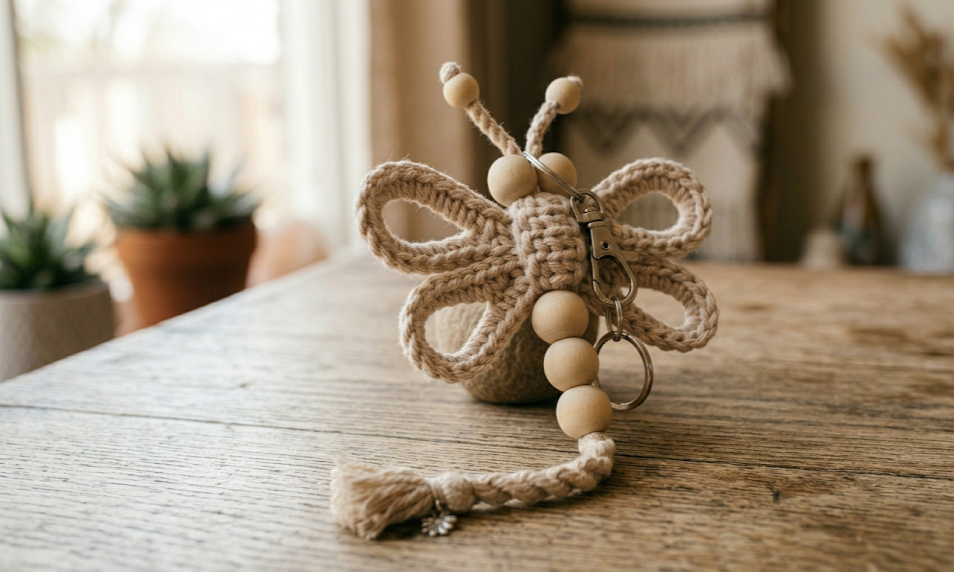
Step 4: Bring the two strands through to the front again, just below the wing center this time, and thread on your second, third, and fourth wooden beads one at a time, pushing each one up snugly against the last. (3 beads stacked below the wings = 4 beads total used)
Technique note: Threading the same two strands through the bead twice (once down, once back up) before stacking the body beads keeps the top bead from sliding and gives the body a firm, secure base to stack from.
Part 4: Tail Tassel
Step 1: After the last (fourth) bead, separate your two yarn strands so they hang freely below the bottom bead. These will form the simple twisted tail.
Step 2: Twist the two strands together clockwise until they begin to kink, then fold the twisted length in half and let it naturally twist back on itself into a neat twisted cord. Knot the bottom end to prevent unraveling.
Step 3: Trim the tail so it hangs approximately 5–6cm below the last bead.
Step 4: Add a small dot of fabric glue inside the bottom bead hole where the cord passes through, if desired, to keep the tassel from slipping.
Part 5: Attaching the Clasp
Step 1: Using your yarn needle and a short separate strand, stitch a small secure loop at the very top of the dragonfly, above the top bead, just large enough to fit your jump ring or lobster clasp loop through.
Step 2: Attach your jump ring through this loop, then clip your lobster clasp onto the jump ring. If your clasp already comes with its own attached ring, you can skip the jump ring and attach the clasp directly.
Assembly Steps
- Make 2 large wing loops (26 ch each) and 2 small wing loops (20 ch each) as instructed above.
- Pinch and stitch the 2 large loops together at their centers to form the top wing pair.
- Pinch and stitch the 2 small loops together at their centers to form the bottom wing pair, positioning them directly beneath the top pair so all four wings meet at one shared center point.
- Stack 1 wooden bead just above the wing center (this becomes the upper body/antenna area).
- Stack 3 wooden beads just below the wing center, pushed snugly against one another, for a total body length of approximately 3–3.5cm of beads below the wings.
- Twist the remaining two yarn strands into a tail cord approximately 5–6cm long below the last bead and knot the end.
- Stitch a small attachment loop above the top bead and attach your jump ring and lobster clasp.
- Weave in any remaining loose ends and trim neatly.
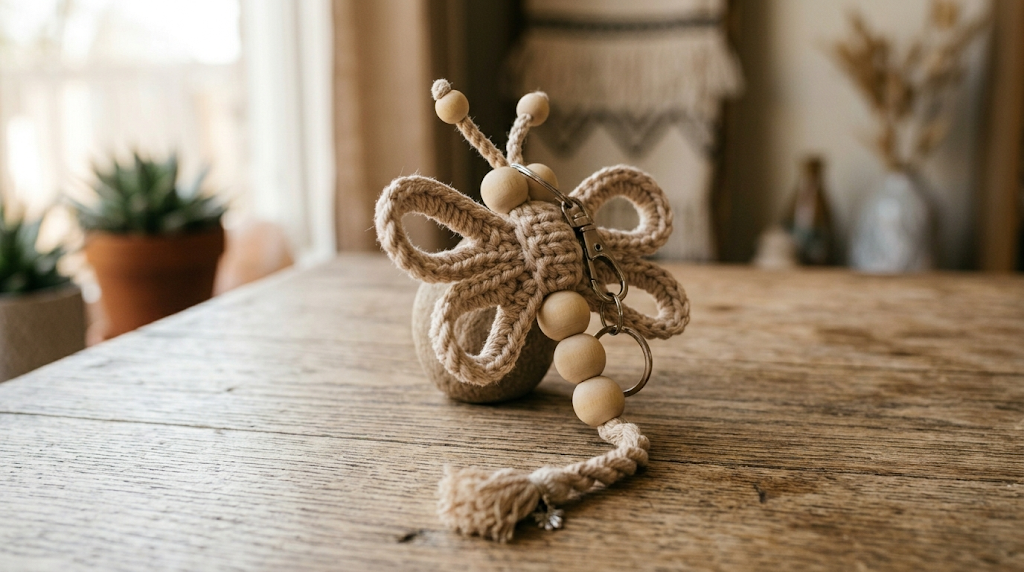
- Finished dragonfly should measure approximately 9–10cm wide (wingtip to wingtip) and 12–13cm tall including the tail tassel.
Beginner/Intermediate Tips
- If your chain loops feel floppy after joining into rings, give them a light press with a steam iron (yarn-safe, low heat) before stitching them into the bow shape — this helps them hold their loop shape better.
- When pinching the wing loops together, stitch through the same spot two or three times rather than once. A single stitch will work loose with handling, especially on a keychain that gets jostled around in a bag.
- Choose wooden beads with a hole just barely large enough for two strands of your yarn to pass through twice. Too large a hole and the beads will wobble and slide; too small and you won’t be able to double back through them.
- If you’re using a thicker worsted weight yarn instead of DK, reduce your chain counts by 2–4 stitches on each loop to keep the wings from becoming oversized.
- Cotton yarn holds its shape better than acrylic for this project since the wings need to stay open and loopy rather than soft and floppy.
Variations
- Two-Tone Wings: Make the large top wings in one color and the small bottom wings in a contrasting color for a layered, ombre-style dragonfly.
- Mini Earring Version: Reduce all chain counts by half (13 ch for large loops, 10 ch for small loops) and skip the tassel tail, attaching earring hooks instead of a lobster clasp.
- Beaded Wings: Thread 2–3 small seed beads onto your yarn before working each wing loop’s chain for a sparkly, embellished wing edge.
- Ornament Display: Skip the lobster clasp and instead attach a ribbon loop at the top to hang the dragonfly as a window or boho wall ornament instead of a keychain.
- Rainbow Gradient: Use a self-striping or gradient yarn so each wing loop comes out a slightly different shade, giving the dragonfly a painted, watercolor-wing effect.
Save this pattern now so you don’t lose it, and tag your finished dragonflies — I love seeing your color and bead combinations! Pin this post and share your version using #FoodieRippleCrochet.



