
The Best Fluffy Pancakes recipe you will fall in love with. Full of tips and tricks to help you make the best pancakes.

If you have been searching for a crochet doll pattern that is equal parts charming and satisfying to make, this crochet girl doll is exactly what you need. With her curly brown pigtails, sage green overalls, cream cardigan, pink boots, and tiny crossbody bag, she is one of the most complete and detailed amigurumi patterns available – and it is completely free. Whether you are making her as a gift for a child or keeping her as a decorative piece, this pattern walks through every single step from head to toes.
This pattern is rated intermediate in difficulty, which means it is a wonderful step up for anyone who has already made a basic amigurumi ball or animal and is ready to tackle a more detailed project. The estimated completion time is 10 to 14 hours depending on pace, and the finished doll stands approximately 25 to 28 cm (10–11 inches) tall.
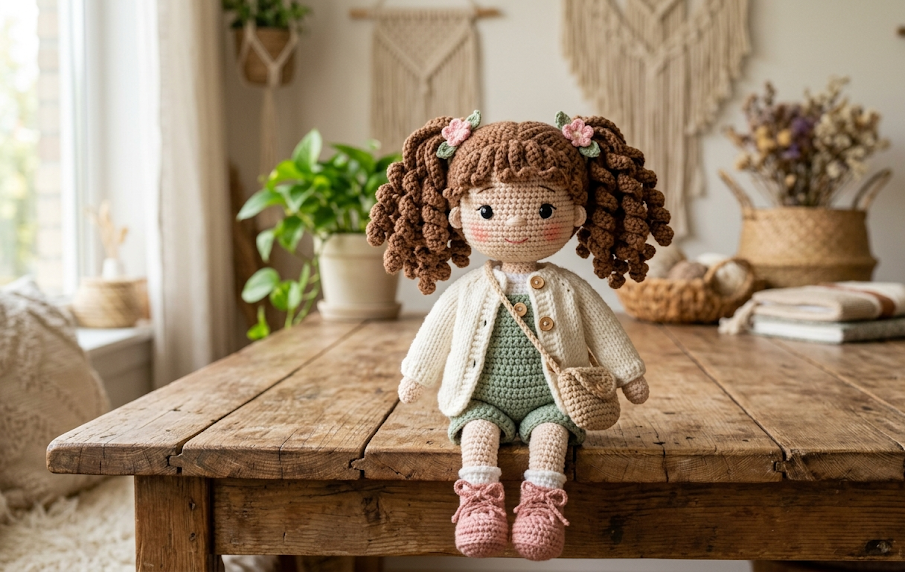
| Difficulty Intermediate | Time 6-8 Hours | Hook Size 2.5 mm | Yarn Weight Sport (#2) | Finished Size 10 inches |
Materials Needed
- Worsted weight yarn (Category 4) in the following colors:
- Skin tone (peach or beige) – approx. 80g
- Brown (for hair) – approx. 60g
- Cream or off-white (for cardigan) – approx. 50g
- Sage green (for overalls) – approx. 50g
- Dusty pink (for boots and flower accents) – approx. 30g
- Tan/beige (for bag and neck bow) – approx. 20g
- Small amount of white for boot sole detail
- Crochet hook: 3.5mm
- Black safety eyes – 12mm (2 pieces)
- Fiberfill stuffing – approx. 80g
- Yarn needle for assembly
- Stitch markers
- Scissors
- Optional: blush powder and a makeup brush for cheek detail
- Optional: small white flower buttons or felt for bag embellishment
Abbreviations
- MR – Magic ring
- sc – Single crochet
- inc – Increase (2 sc in same stitch)
- dec – Decrease (invisible decrease)
- sl st – Slip stitch
- ch – Chain
- BLO – Back loop only
- FLO – Front loop only
- st(s) – Stitch(es)
- rnd – Round
- rep – Repeat
Pattern Instructions
Part 1: Head
Start with skin tone yarn.
- Rnd 1: MR, 6 sc (6)
- Rnd 2: inc x6 (12)
- Rnd 3: (sc 1, inc) x6 (18)
- Rnd 4: (sc 2, inc) x6 (24)
- Rnd 5: (sc 3, inc) x6 (30)
- Rnd 6: (sc 4, inc) x6 (36)
- Rnd 7: (sc 5, inc) x6 (42)
- Rnd 8: (sc 6, inc) x6 (48)
- Rnd 9–15: sc around (48) — 7 rounds even
- Rnd 16: (sc 6, dec) x6 (42)
- Rnd 17: (sc 5, dec) x6 (36)
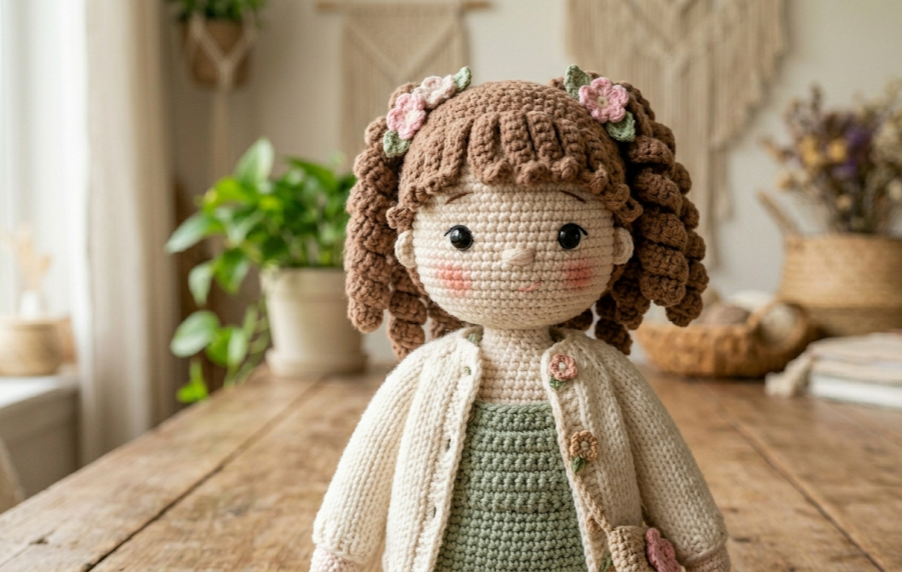
Place safety eyes between rounds 11 and 12, approximately 10 stitches apart. Embroider a small V-shaped nose with skin tone or a slightly darker thread. Apply blush to cheeks using powder.
- Rnd 18: (sc 4, dec) x6 (30)
- Rnd 19: (sc 3, dec) x6 (24)
Stuff the head firmly.
- Rnd 20: (sc 2, dec) x6 (18)
- Rnd 21: (sc 1, dec) x6 (12)
- Rnd 22: dec x6 (6)
Fasten off and close the opening.
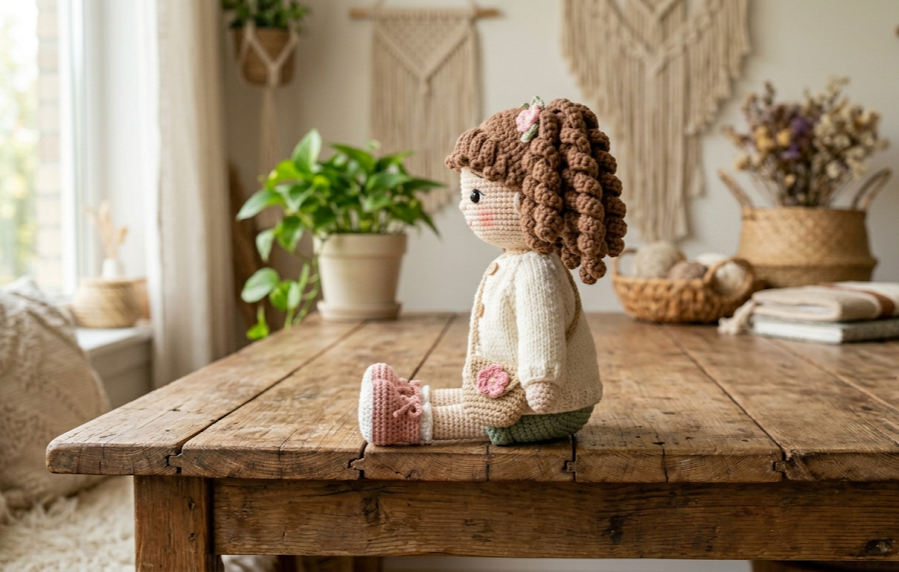
Part 2: Body
Start with skin tone yarn for the lower body, then switch to sage green for the overalls bib area.
- Rnd 1: MR, 6 sc (6)
- Rnd 2: inc x6 (12)
- Rnd 3: (sc 1, inc) x6 (18)
- Rnd 4: (sc 2, inc) x6 (24)
- Rnd 5: (sc 3, inc) x6 (30)
- Rnd 6–10: sc around (30) — 5 rounds even
Switch to sage green.
- Rnd 11–20: sc around (30) — 10 rounds even
Switch to cream for the cardigan layer.
- Rnd 21: BLO sc around (30)
- Rnd 22–25: sc around (30)
Stuff firmly before closing.
- Rnd 26: (sc 3, dec) x6 (24)
- Rnd 27: (sc 2, dec) x6 (18)
- Rnd 28: (sc 1, dec) x6 (12)
- Rnd 29: dec x6 (6)
Fasten off and close.
Part 3: Legs (Make 2)
Start with pink yarn for the boot.
- Rnd 1: MR, 6 sc (6)
- Rnd 2: inc x6 (12)
- Rnd 3: (sc 1, inc) x6 (18)
- Rnd 4: sc around in BLO (18)
- Rnd 5–6: sc around (18)
- Rnd 7: sc 5, dec x4, sc 5 (14)
- Rnd 8: sc 5, dec x2, sc 5 (12)
Switch to white for boot sole ridge.
- Rnd 9: sc around in BLO (12)
Switch to skin tone.
- Rnd 10–20: sc around (12) — 11 rounds
Stuff lightly. Fasten off, leaving a tail for assembly.
Part 4: Arms (Make 2)
Start with skin tone yarn.
- Rnd 1: MR, 6 sc (6)
- Rnd 2: inc x6 (12)
- Rnd 3–5: sc around (12) — 3 rounds
Pinch and sc across to close the hand (6 sc). Do not stuff.
Switch to cream for sleeve.
- Continue working in the round: sc around (6)
- Rnd 6–18: sc around (6) — 13 rounds
Fasten off, leaving a tail for assembly.
Part 5: Hair
Using brown yarn, create the main hair cap first by crocheting a flat circle up to round 7 (same increases as the head), then work even rounds down to cover the back of the head. For the pigtails, use a separate piece of yarn to gather and loop sections at each side of the head. Use a looping technique or make two curly spirals separately and sew them on.
For the flower hair clips: using pink yarn, make 2 tiny flowers (ch 4, sl st to form ring, then work 5 petals of ch 3, sc, ch 3 sl st each), and sew onto the pigtails.
Part 6: Overalls Bib and Straps
Using sage green yarn, crochet a small rectangle (ch 7, sc for 6 rows) for the front bib. Add two thin chain straps (ch 20 each) and attach them crossing over the back. Sew a tiny flower embellishment at the center of the bib using pink yarn.
Part 7: Crossbody Bag
Using tan/beige yarn:
- Rnd 1: MR, 6 sc (6)
- Rnd 2: inc x6 (12)
- Rnd 3: (sc 1, inc) x6 (18)
- Rnd 4–8: sc around (18)
Fold flat and sc across to close (9 sc). Attach a long chain strap. Sew a small white flower button to the flap.
Assembly Steps
- Sew the head onto the body, aligning the center front seam.
- Attach legs to the bottom of the body, evenly spaced.
- Sew arms to each side of the upper body just below the neck.
- Sew the hair cap onto the head, then attach the pigtails to each side.
- Attach the flower hair clips to the pigtail bases.
- Position the bag strap over one shoulder and secure with a few stitches.
- Weave in all ends carefully.
Beginner Tips
- Use stitch markers to mark the beginning of every round – it is easy to lose count in amigurumi.
- Stuff as you go for the body; do not wait until the end as it becomes difficult to get an even result.
- For tighter, neater stitches, go down half a hook size from what the yarn label recommends.
- Invisible decreases (pulling through front loops only before pulling through both) give a much smoother finish than standard decreases.
- When attaching the head, pin it in place and check the alignment from multiple angles before sewing.
- If the safety eye gaps look too wide or too narrow, reposition before clicking the washers permanently into place.
Variations to Try
- Winter version: swap the sage green for deep burgundy overalls and replace the cardigan with a chunky cable-textured coat
- Pastel fairy version: use lavender overalls, add tiny crocheted wings to the back, and swap boots for white ankle strap shoes
- Autumn doll: rust orange overalls, a mustard-colored sweater, and a tiny crocheted mushroom bag instead of the crossbody purse
- Personalized hair colors: make her with blonde, black, or red hair by simply swapping out the brown yarn
This crochet girl doll is a project worth taking slowly and enjoying. Every little detail – the pigtails, the tiny flower clips, the wee crossbody bag – adds to her personality and makes her a truly special handmade object. Save this pattern, share it with your crochet circle, and tag your finished doll on Pinterest!
Save this pattern to your Pinterest boards and share your finished doll using #FoodiePlumCrochet – the community would love to see your version!



