
The Best Fluffy Pancakes recipe you will fall in love with. Full of tips and tricks to help you make the best pancakes.

There is something undeniably magical about a pair of handmade baby overalls. Now imagine those overalls crafted entirely from pastel granny squares — tiny patchwork tiles of lavender, mint, blush pink, and cream — stitched together into the most charming little set you have ever seen. These Crochet Granny Square Baby Overalls are exactly that: a wearable work of fiber art that feels heirloom-quality and boho-beautiful all at once.
This free crochet pattern is designed to fit babies aged approximately 6 to 12 months, producing a finished garment that sits just below the ankle with a relaxed, roomy leg fit perfect for diaper days. The overalls fasten at the shoulders with wooden toggle buttons, and the bib and leg cuffs are finished with a simple single crochet border in lavender that ties the whole palette together. Whether you are making these as a baby shower gift, for a photoshoot, or just because you cannot resist how adorable they are, this pattern is sure to become one of your most-loved makes.
The construction is approachable for intermediate crocheters. You will make a set of individual granny squares, then join them using a flat slip-stitch join before working borders and straps. No sewing machine is needed — just a hook, some beautiful DK-weight yarn, and a little patience.
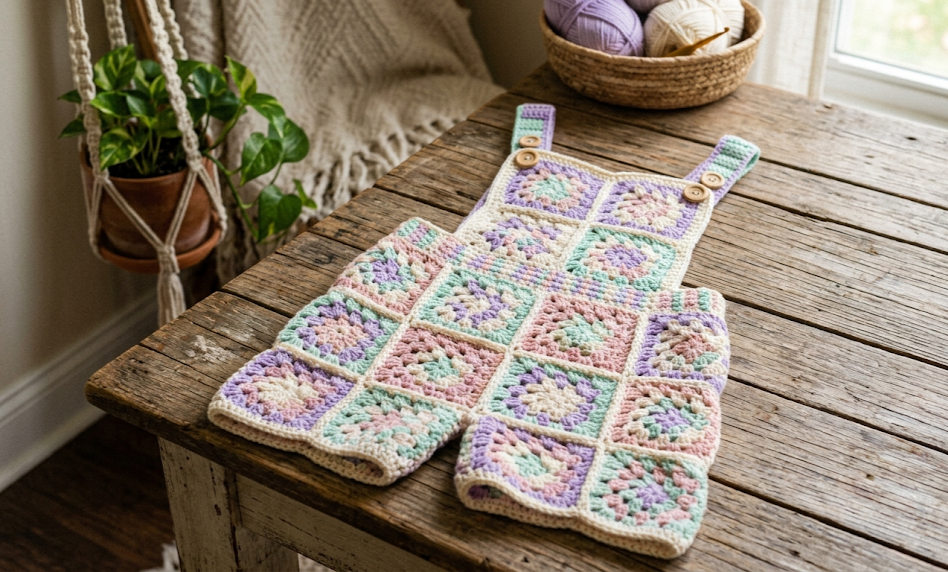
| Difficulty Intermediate | Time 10–14 Hours | Hook Size 4.0 mm (US G/6) | Yarn Weight DK Weight (#3) | Finished Size Fits 6–12 Months |
Gauge
To ensure your overalls fit as intended, work a gauge swatch before starting.
Gauge: 1 completed granny square (3 rounds) = approximately 8 cm × 8 cm (3.25 in × 3.25 in) after light blocking.
In single crochet (for the border sections): 20 sts × 24 rows = 10 cm × 10 cm (4 in × 4 in)
Hook size used: 4.0 mm (US G/6)
Yarn weight used: DK weight (#3 Light)
Gauge is important for garments. If your squares come out smaller than 8 cm, try a larger hook. If they come out larger, try a smaller hook.
Materials List
Yarn (DK weight #3 — approximately 200m/100g per skein):
- Color A: Lavender — 80 g (approx. 160 m)
- Color B: Mint Green — 60 g (approx. 120 m)
- Color C: Cream/Off-White — 60 g (approx. 120 m)
- Color D: Blush Pink — 50 g (approx. 100 m)
Suggested yarn: any soft DK or light worsted machine-washable blend (superwash merino or acrylic blend both work well for baby garments)
Hook: 4.0 mm (US G/6)
Notions:
- Yarn needle (tapestry needle) for weaving ends
- 4 wooden toggle buttons, approximately 18–20 mm diameter
- Stitch markers (at least 6)
- Scissors
- Blocking mat and pins (optional but recommended)
- Measuring tape
Abbreviations Table
| Abbreviation | Meaning |
|---|---|
| ch | chain |
| sl st | slip stitch |
| sc | single crochet |
| dc | double crochet |
| sp | space |
| ch-sp | chain space |
| rep | repeat |
| RS | right side |
| WS | wrong side |
| BLO | back loop only |
| st(s) | stitch(es) |
| MR | magic ring |
| sk | skip |
| pm | place marker |
| yo | yarn over |
| join | slip stitch to join round |
| turn | turn work |
Technique notes:
- Magic ring (MR): Make a loop with the yarn tail over your fingers, insert hook, pull up a loop and ch 1 to secure. This creates a tight, adjustable center — pull the tail to close it after completing the first round.
- BLO (Back Loop Only): Insert hook under only the back loop of the stitch to create a ridged, ribbed texture.
- Flat join: To join squares without a visible ridge, hold two squares with WS together, insert hook through both corresponding stitches, and sl st across.
Pattern Instructions
Part 1: Granny Square (Make 30 total)
You will need 30 squares total. For a scrappy pastel look, vary the center and round colors. A suggested breakdown:
- 8 squares: lavender center, cream round 2, lavender round 3
- 7 squares: mint center, lavender round 2, cream round 3
- 8 squares: blush pink center, cream round 2, mint round 3
- 7 squares: cream center, mint round 2, lavender round 3
Round 1: Using your chosen center color, make a MR. Ch 3 (counts as first dc), work 2 dc into the ring, ch 2, 3 dc into ring, ch 2, rep from * to * 2 more times. Join to top of ch-3 with sl st. Pull MR closed. (4 clusters of 3 dc, 4 ch-2 corner spaces)
Round 2: Sl st into the ch-2 corner sp. Join new color if changing. Ch 3 (counts as dc), work 2 dc into same corner sp, ch 2, 3 dc into same corner sp, ch 1, [3 dc, ch 2, 3 dc] into next ch-2 corner sp, rep from * to * 2 more times, ch 1, join to top of ch-3. (8 clusters of 3 dc total — 2 per corner; 4 ch-1 side spaces; 4 ch-2 corner spaces)
Round 3: Sl st into ch-2 corner sp. Join border color (lavender recommended for all squares for consistency). Ch 3, [2 dc, ch 2, 3 dc] into same corner sp, ch 1, 3 dc into ch-1 sp, ch 1, [3 dc, ch 2, 3 dc] into next ch-2 corner sp, rep from * to * 2 more times, ch 1, 3 dc into final ch-1 sp, ch 1, join to top of ch-3. (12 clusters of 3 dc total — 3 per side plus 2 per corner; 4 ch-2 corner spaces)
Fasten off and weave in all ends. Block each square to 8 × 8 cm if desired.
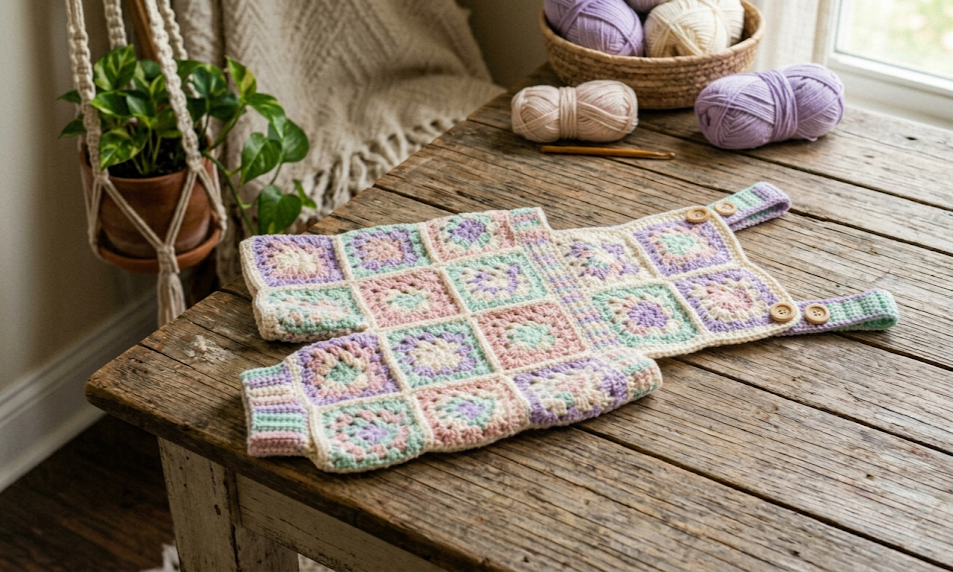
Part 2: Joining the Squares
The overalls are constructed from flat panels that are later joined and assembled.
Bib Panel: Join 2 squares wide × 2 squares tall = 4 squares total.
Back Panel: Join 2 squares wide × 2 squares tall = 4 squares total.
Left Leg: Join 2 squares wide × 3 squares tall = 6 squares total (tube, joined at sides).
Right Leg: Join 2 squares wide × 3 squares tall = 6 squares total (tube, joined at sides).
Front/Back Lower Body: Join 2 squares wide × 2 squares tall = 4 squares each = 8 squares (front and back of the seat).
Remaining 2 squares: Used for extra bib width or joining reinforcement strips (optional).
How to join: Hold two squares with WS together and RS facing outward. Using lavender yarn and your hook, insert through the outermost loops of both edges and sl st across the entire edge. When joining at corners, work 1 sl st into each corner ch-2 sp. Do not pull tight — keep joins relaxed to maintain drape.
Join the bib panel along its bottom edge to the top edge of the front seat panel. Join back panel in the same way to the back seat panel. Join the two seat panels together at the crotch seam using a flat slip stitch join along approximately 8 cm (3.5 in) — this is the center seam between the legs.
Join each leg tube by flat-joining the two long vertical edges of the 2×3 leg panels, forming a tube approximately 16 cm tall and 16 cm in circumference.
Attach each leg tube to the lower body by aligning the top edge of each leg with the bottom opening of the seat panel on both front and back, and sl st around the entire opening (approximately 32 sts per leg attachment).
Part 3: Body Border
Using lavender (Color A) and 4.0 mm hook, join yarn at any point along the top waist edge of the back panel.
Row 1 (WS): Work 1 sc into every stitch and 1 sc into every ch-sp along the top back edge. (approximately 32 sc across — adjust to your tension)
Do not join. Turn and work sc back and forth in rows for 4 rows total to create a waistband. Fasten off.
Repeat on the front bib edge, working the sc border up the sides and across the top of the bib panel (approximately 60 sc total around the bib perimeter — sides + top).
Part 4: Shoulder Straps (Make 2)
Using lavender and 4.0 mm hook, ch 51 (or adjust for desired strap length — approximately 25 cm / 10 in of strap).
Row 1: Sc in 2nd ch from hook and in each ch across. (50 sc)
Row 2: Ch 1, turn, sc in BLO of each st across. (50 sc) Note: BLO creates a subtle ridged texture on the strap.
Row 3: Ch 1, turn, sc in each st across. (50 sc)
Rep Rows 2–3 once more (5 rows total). Fasten off, leaving a 20 cm tail for sewing.
Buttonhole option (Row 3 of second repeat): Work 10 sc, ch 2, sk 2 sts, sc to end. On next row, sc 2 into the ch-2 sp to complete the buttonhole.
Part 5: Ankle Cuffs (Make 2)
Join lavender yarn to the bottom opening of one leg tube. Work in rounds (join with sl st at end of each round).
Round 1: Work 1 sc into every st around the leg opening. (approximately 24 sc — place stitch marker at beginning of round)
Rounds 2–4: Sc in BLO of each st around. (24 sc each round) The BLO creates the ribbed cuff texture.
Round 5: Sc in each st around (both loops). (24 sc)
Fasten off and weave in ends. Repeat for second leg.
Assembly Steps
- Block all squares (optional but recommended): Wet, pin to 8 × 8 cm, and allow to dry fully. This makes joining much easier and gives a neater finished look.
- Assemble front body: Lay out your bib panel (2×2 squares) and attach the front seat panel (2×2 squares) by flat-joining the bottom edge of the bib to the top edge of the front seat. The joined seam should sit approximately 14 cm below the top bib edge.
- Assemble back body: Join the back panel (2×2 squares) to the back seat panel (2×2 squares) in the same way.
- Join front and back at sides: With RS out, flat-join the front and back panels along both side edges, from waist to crotch point. Leave the crotch seam open at this stage.
- Close the crotch seam: Align the front and back seat edges at the crotch. Flat-join approximately 8 cm (3.5 in) along this bottom seam, stopping where the legs will divide.
- Attach leg tubes: Align each leg tube (top edge) with one leg opening in the body. Flat-join or sc-join all the way around, working approximately 32 sts per leg. Ensure the leg seams sit toward the inside of each leg.
- Add ankle cuffs: Work as described in Part 5. Finished length from crotch seam to ankle cuff bottom should be approximately 28–30 cm (11–12 in).
- Attach shoulder straps: Pin straps to the top back edge of the overalls, approximately 3 cm in from each side. Sew securely using the yarn tail and tapestry needle, working through all layers at least 3 times for durability. Bring straps over the shoulders, cross them at the back if desired, and secure the front ends with wooden toggle buttons sewn to the bib front — place buttons approximately 2–3 cm from the top corners of the bib.
- Sew all buttons: Using a tapestry needle and a short length of matching yarn or thread, sew each wooden button through both layers of the strap buttonhole and bib, knotting securely on the wrong side.
- Weave in all remaining ends. Check all seam joins and reinforce any gaps.
Beginner/Intermediate Tips
Managing yarn ends: Granny squares create a lot of ends. Work over your tails as you go during Rounds 2 and 3 to reduce finishing time dramatically.
Consistent tension on joins: The flat slip stitch join can tighten up if you pull too hard. Work each sl st loosely — a relaxed join keeps the fabric drapey and wearable.
Blocking makes a difference: Even a quick spritz-and-pin block on each square before joining makes the granny squares line up much more neatly. It takes time, but the professional finish is worth it.
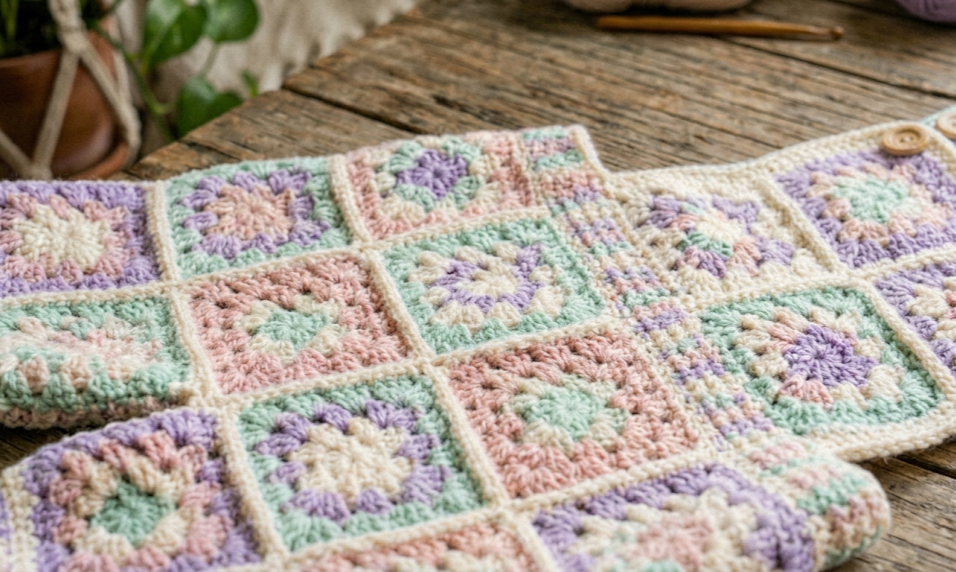
Granny square color distribution: Lay all your finished squares out flat on a table before joining them. Alternate the color combinations so no two identical squares are directly adjacent. Take a photo of your layout before you start joining so you do not lose your arrangement.
Button safety for babies: Always use buttons with a shank or large diameter (18–20 mm) and check them after every wash. Alternatively, substitute snaps sewn to the strap ends and bib for a snap closure instead of buttons for very young babies.
Seam placement: When assembling the leg tubes, position the seam toward the inner leg so it sits against the baby’s thigh area rather than the outside of the leg — this is more comfortable and less visible.
Variations
1. Monochromatic Rainbow: Make all squares in shades of a single color — for example, all lavender ranging from the palest lilac to deep violet. The tonal effect is sophisticated and modern, and works beautifully for photos.
2. Gender-Neutral Earthy Tones: Swap the pastel palette for terracotta, sage, tan, and ochre. Use a 4.5 mm hook with a slightly chunkier DK for a denser, warmer-weather look. This variation is especially popular for autumn newborn sessions.
3. Newborn Size: Reduce your squares to a finished size of 6 × 6 cm by working only 2 rounds instead of 3. Make 20 squares total using the same construction method. The finished garment will fit a 0–3 month baby.
4. 18-Month Size: Work 4 rounds per square to a finished size of 10 × 10 cm. Make 30 squares and join as written. The additional size from the larger squares accommodates an 18-month fit without changing the square count or construction.
5. Jumper/Dress Version: Replace the leg panels with a single wide skirt panel. Join 4 squares wide × 2 squares tall into a rectangle. Attach this panel to the bottom of the bib and back sections, leaving the bottom open for a skirt hem, and finish the hem with 3 rows of lavender sc border. This creates a sweet pinafore-style dress.
Love this pattern? Save it to your crochet boards on Pinterest and share your finished overalls with us! Tag your photos with #FoodiePlumCrochet — we would love to see your pastel creations. 🌿



