
The Best Fluffy Pancakes recipe you will fall in love with. Full of tips and tricks to help you make the best pancakes.

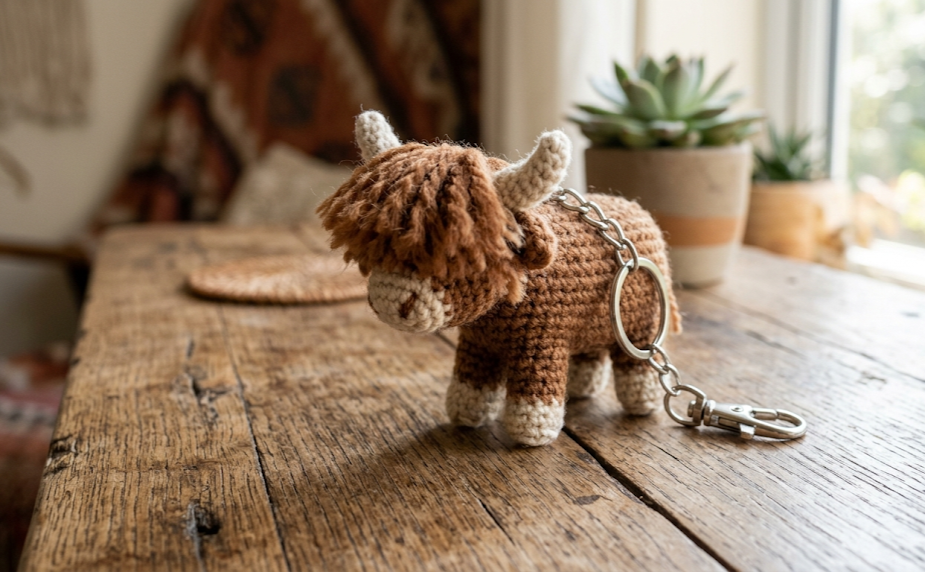
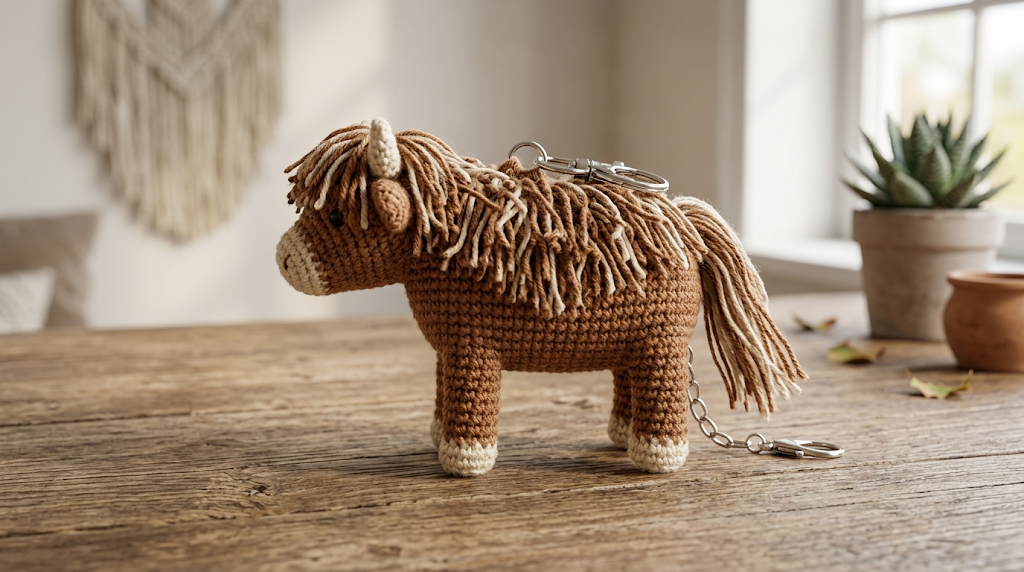
There’s something irresistible about a tiny Highland cow — those shaggy bangs, that gentle face, those little horns peeking through a mess of yarn fringe. This crochet Highland cow keychain captures all of that charm in a pocket-sized amigurumi you can clip onto your keys, backpack, or purse. Standing on four sturdy little legs with a soft cream-and-brown coat and an adorably overgrown fringe, this cow is the kind of project that makes people stop and ask, “wait, did you make that?”
This pattern is designed for crocheters who enjoy amigurumi animals and want to try their hand at the “shaggy fringe” technique that makes Highland cows look so distinctly fluffy. It’s a satisfying weekend project that results in a keychain sturdy enough for daily use, yet detailed enough to double as a shelf decoration or a thoughtful handmade gift for any cow lover, farmhouse-style decor fan, or amigurumi collector.
Whether you’re pairing it with a handmade beaded lanyard for a cottagecore bag charm or keeping it simple as a straightforward keyring, this little cow is endlessly versatile. Let’s walk through exactly how to make one from start to finish.
|
Difficulty
Intermediate
|
Time
3–4 hours
|
Hook Size
2.5mm
|
Yarn Weight
DK (Light Worsted)
|
Finished Size
Approx. 8cm long
|
Gauge
This pattern uses a tight amigurumi gauge to keep stuffing from showing through the stitches.
- Gauge: 18 stitches x 20 rows = 10cm x 10cm square in single crochet, worked in continuous rounds
- Hook used for gauge swatch: 2.5mm (C/2) crochet hook
- Yarn used for gauge swatch: DK weight yarn (yarn weight 3)
Exact gauge isn’t critical for a small sculptural piece like this — slight variation in tension will only shift the finished size by a centimeter or so. Still, swatching helps confirm your stitches are tight enough that stuffing won’t peek through.
Materials List
- DK weight yarn (yarn weight 3) in chestnut brown – approx. 15g, for the body, head, and legs
- DK weight yarn in cream/oatmeal – approx. 10g, for the muzzle, inner ears, and mane fringe
- Small amount of light brown/tan DK yarn for muzzle shading (optional)
- Small amount of black embroidery thread, for nose detail
- 2.5mm crochet hook
- Pair of 6mm black safety eyes (or embroider eyes with black thread for younger gift recipients)
- Polyester fiberfill stuffing
- Tapestry/yarn needle
- Stitch marker
- 1 metal keyring clip (lobster clasp style)
- Small length of leather cord or fabric loop (2cm), to attach the clip to the body
- Small amount of craft wire (20-22 gauge) for horn shaping (optional)
- Clear-drying craft glue (for securing the keyring loop)
Abbreviations Table
| Abbreviation | Meaning |
|---|---|
| ch | chain |
| sc | single crochet |
| sl st | slip stitch |
| inc | increase (2 sc in same stitch) |
| dec | invisible decrease (sc2tog) |
| MR | magic ring |
| BLO | back loop only |
| st(s) | stitch(es) |
| rnd(s) | round(s) |
| rep | repeat |
| (xx) | total stitch count at end of round |
Pattern Instructions
Part 1: Body
Technique note: A magic ring (MR) creates an adjustable loop so your first round starts with no center hole — simply pull the tail after the round to close it tight.
With brown yarn:
- Rnd 1: 6 sc into MR (6)
- Rnd 2: inc in each st around (12)
- Rnd 3: sc 1, inc rep around (18)
- Rnd 4: sc 2, inc rep around (24)
- Rnd 5: sc 3, inc rep around (30)
- Rnds 6–11: sc around, no increases (30) — work 6 rounds even
- Rnd 12: sc 3, dec rep around (24)
- Rnd 13: sc around (24)
- Rnd 14: sc 2, dec rep around (18)
Begin stuffing the body firmly as you continue closing.
- Rnd 15: sc 1, dec rep around (12)
- Rnd 16: dec around (6)
Finish stuffing, fasten off, and close the hole using the invisible fastening method (weave through remaining 6 sts, pull tight, tuck tail inside).
Part 2: Head
With brown yarn:
- Rnd 1: 6 sc into MR (6)
- Rnd 2: inc in each st around (12)
- Rnd 3: sc 1, inc rep around (18)
- Rnd 4: sc 2, inc rep around (24)
- Rnd 5: sc 3, inc rep around (30)
- Rnds 6–9: sc around, no increases (30) — work 4 rounds even
Place safety eyes between rounds 5 and 6, spaced 7 stitches apart on the front of the head.
- Rnd 10: sc 3, dec rep around (24)
- Rnd 11: sc around (24)
- Rnd 12: sc 2, dec rep around (18)
Begin stuffing the head firmly.
- Rnd 13: sc 1, dec rep around (12)
- Rnd 14: dec around (6)
Finish stuffing, fasten off, and close using the same invisible fastening method as the body.
Part 3: Muzzle (make 1, cream yarn)
- Rnd 1: 6 sc into MR (6)
- Rnd 2: inc in each st around (12)
- Rnd 3: sc 1, inc rep around (18)
- Rnd 4: sc around, working in BLO only (18)
Technique note: BLO (back loop only) means inserting your hook under only the back loop of each stitch — this creates a subtle ridge that gives the muzzle a slightly raised, defined edge.
Fasten off, leaving a long tail for sewing. Leave unstuffed — this piece stays flat against the face.
Part 4: Ears (make 2, brown yarn with cream inner detail)
- Rnd 1: 6 sc into MR (6)
- Rnd 2: inc in each st around (12)
- Rnd 3: sc around (12)
Fasten off, leaving a tail. Fold in half slightly to create a gentle cup shape before attaching, with cream embroidered or appliqued onto the inner ear.
Part 5: Legs (make 4, brown yarn)
- Rnd 1: 5 sc into MR (5)
- Rnd 2: sc around (5)
- Rnd 3: sc around (5)
- Rnd 4: sc around (5)
Fasten off, leaving a long tail. Lightly stuff each leg, leaving the top 1cm unstuffed and flat for easy attachment.
Part 6: Horns (make 2, cream yarn)
Technique note: rather than chaining and flipping for these horns, you’ll work them entirely in continuous rounds — no second side of a chain needed here.
- Rnd 1: 5 sc into MR (5)
- Rnd 2–4: sc around (5) — work 3 rounds even
Fasten off, leaving a long tail.
Wire insertion (optional but recommended): Cut a 4cm piece of 20-22 gauge craft wire. Bend one end into a small loop so it can’t poke through the tip. Insert the wire into the horn, pushing the looped end toward the closed tip, and pack a small pinch of stuffing around it to secure. This lets you bend the horns into a gentle outward curve once sewn to the head.
Part 7: Tail (make 1, brown yarn)
- Ch 8.
- Row 1: sc in 2nd ch from hook and each ch across (7)
Fasten off, leaving a long tail. Cut 6-8 short strands of brown yarn (3cm each) and tie them around the end of the tail tip to create a tassel, trimming evenly.
Part 8: Mane (cream and brown yarn, fringe technique)
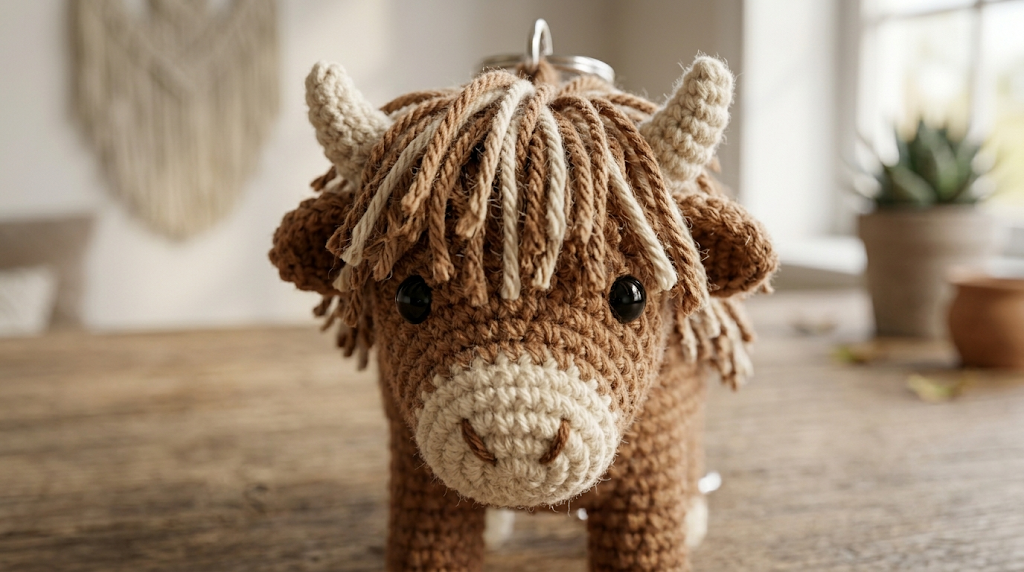
Cut 40–50 strands of yarn (mix cream and brown for a natural blended look), each approximately 6cm long. Using your crochet hook, pull each strand through a stitch on the top and front of the head — beginning just above the eyebrow line, covering the entire forehead and crown down to the base of the neck — using a simple fold-and-pull technique: fold the strand in half, insert the hook into a stitch, pull the folded loop through, then pull both yarn ends through that loop and tighten. Trim the fringe so it falls just over the top of the eyes, then fluff with your fingers or a small comb for that signature shaggy Highland cow look.
Assembly Steps
- Attach the head to the body: Center the head on top of the front of the body. Using brown yarn and a tapestry needle, whip stitch securely around the entire base of the head, sewing through both the head and body stitches with no gaps.
- Attach the muzzle: Center the cream muzzle on the lower-front of the head, about 1cm below the eyes. Whip stitch around the edge, tucking in a small pinch of stuffing before fully closing for a slightly puffed look.
- Embroider the nose and mouth: Using black embroidery thread, stitch two small straight lines for nostrils, spaced 0.5cm apart, on the upper muzzle. Below them, stitch a small curved “v” or smile shape for the mouth.
- Attach the ears: Position the ears about 2cm apart on the top sides of the head, just behind where the mane fringe begins, angled slightly outward.
- Attach the horns: Position the horns just above and between the ears, about 3cm apart. Sew the open base of each horn flat against the head, then gently curve the wired tips outward and slightly upward.
- Attach the legs: Position all four legs along the underside of the body — front two spaced 2cm apart, back two spaced 2.5cm apart — ensuring the cow can stand stably on a flat surface. Sew each leg’s flat top opening directly to the body, adding a touch more stuffing through the seam if needed.
- Attach the tail: Sew the tail to the back of the body, about 1cm above where the back legs meet the body, allowing the tassel end to hang freely.
- Attach the mane: If not already fringed directly during Part 8, complete the fringe now across the crown and forehead, blending strands so the foundation rows aren’t visible.
- Attach the keyring clip: Fold the leather cord or fabric loop in half and sew both ends securely into the top-back seam of the head or the back of the neck, creating a small loop approximately 1.5cm long. Thread the metal keyring clip through this loop and add a dot of clear-drying glue at the stitch points for extra durability.
Beginner/Intermediate Tips
- When closing rounds with the invisible fastening method, pull the tail just tight enough to leave no gap, but not so tight that the fabric puckers.
- Stuff in small pinches throughout each piece instead of all at once — this keeps the final shape smooth and prevents lumps from forming.
- Attach the legs before fully fluffing the mane; it’s much easier to make the cow stand and balance correctly while you can still see the leg placement clearly.
- When trimming the mane fringe, cut it slightly longer than you think you need on the first pass — you can always trim more once you see how it falls over the eyes.
- Test the keyring loop’s strength by gently tugging before considering the piece finished; reinforce with an extra few stitches if it feels at all loose.
Variations
- Color swap: Make an all-cream “white Highland” version with a soft pink-tinted muzzle for a gentler, pastel look.
- Bracelet charm version: Skip the keyring clip and instead attach a braided macramé or beaded cord through the back loop to turn this cow into a wearable bracelet charm.
- Mini ornament version: Reduce the stitch counts slightly and add a hanging loop at the top of the head to turn this into a tiny holiday ornament.
- Bag charm with tassel cord: Replace the simple keyring loop with a longer beaded tassel cord for a boho-style bag charm instead of a keychain.
Save this pattern now so it doesn’t wander off into your “someday” pile — pin it to your crochet board and tag your finished cow with #FoodiePlumCrochet so we can see your version!



