
The Best Fluffy Pancakes recipe you will fall in love with. Full of tips and tricks to help you make the best pancakes.

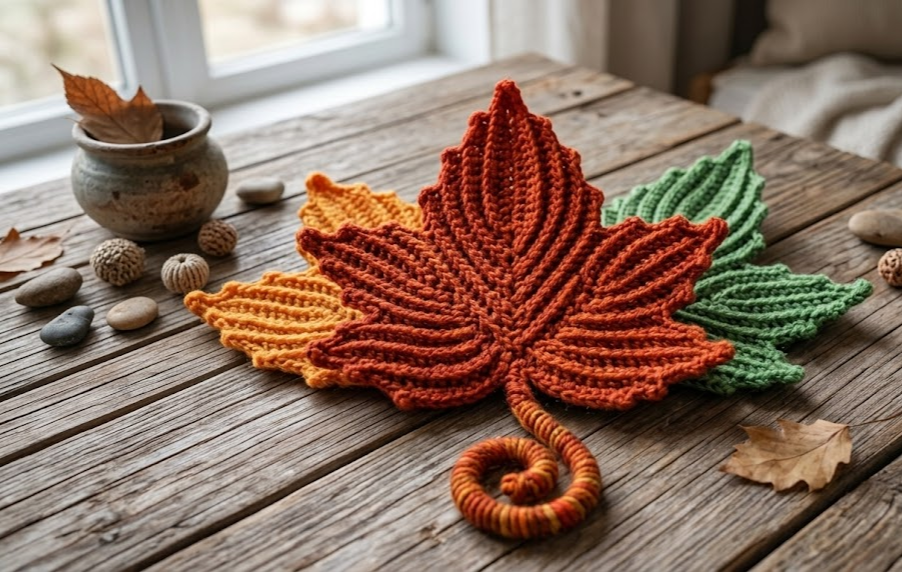
There’s something about a crochet maple leaf that captures autumn better than almost any other handmade project. This pattern creates a textured, five-pointed leaf with raised veins running down each point and a soft curled stem, and it works up quickly enough that you can make an entire garland or bowl filler in an afternoon. Whether you stitch it in classic fall red, golden orange, or forest green, this leaf brings a cozy, seasonal touch to garlands, wreaths, table runners, coasters, and gift toppers.
This pattern is written for confident beginners and intermediate crocheters. It uses simple stitches — chains, single crochet, half double crochet, double crochet, and treble crochet — combined in a way that creates natural-looking points without any complicated shaping. If you’ve made a granny square and know how to follow a stitch count, you’re ready for this leaf. The finished piece is soft, lightly textured, and holds its shape well thanks to the ridged center veins.
Because the leaf uses such a small amount of yarn, it’s the perfect stash-buster project. Grab your leftover worsted weight scraps in red, orange, yellow, or green and turn an afternoon into a whole basket of finished leaves ready for fall decorating.
|
Difficulty
Intermediate
|
Time
1.5–2 hours
|
Hook Size
4.5mm (US 7)
|
Yarn Weight
Worsted (#4)
|
Finished Size
12–14cm
|
Gauge
14 sts x 16 rows = 10cm x 10cm in half double crochet, using a 4.5mm (US 7) hook and worsted weight (medium, US #4) yarn.
Gauge is not critical for this project since the leaf shape is decorative, but working a quick swatch helps you confirm your finished leaf will match the size listed below. If your leaf comes out noticeably larger or smaller than 12–14cm across, adjust your hook size up or down slightly.
Materials List
- Worsted weight yarn (US #4 / medium / Aran), small amounts of each:
- Approximately 15g red yarn
- Approximately 15g orange yarn
- Approximately 15g green yarn
(You only need one color per leaf — these amounts make one full-size leaf each)
- 4.5mm (US 7) crochet hook
- Yarn needle for weaving in ends
- Scissors
- Stitch marker
- Optional: 15cm piece of floral wire or pipe cleaner, for a poseable stem
- Optional: fabric stiffener or diluted white glue, for a firmer finished leaf
Abbreviations Table
| Abbreviation | Meaning |
|---|---|
| ch | chain |
| sl st | slip stitch |
| sc | single crochet |
| hdc | half double crochet |
| dc | double crochet |
| tr | treble crochet |
| st(s) | stitch(es) |
| sp | space |
| rep | repeat |
| sk | skip |
| yo | yarn over |
| RS | right side |
| tog | together |
| ( ) | stitch count at end of row |
Pattern Instructions
Part 1: The Center Base
Row 1: Ch 6. Starting in the 2nd ch from hook, sc in each ch across. (5 sts)
Technique note: “2nd ch from hook” means you skip the chain closest to your hook and begin working into the next one — this keeps your row count accurate.
Row 2: Ch 1, turn. Sc in each st across. (5 sts)
Fasten off, leaving a 15cm tail. This small strip becomes the central stem base that all five points will branch from.

Part 2: The Five Points
Each point is made individually by chaining out from the base and working back down the chain in increasing stitch heights, which creates the natural tapering leaf-point shape. Work all 5 points in the same yarn color for one solid leaf.
Point 1 (small, bottom left):
Join yarn with a sl st into the bottom left corner of the base strip. Ch 8. Sl st in 2nd ch from hook, sc in next 2 ch, hdc in next 2 ch, dc in next 2 ch, sl st into base to secure. (7 sts along point, plus join)
Point 2 (medium, upper left):
Ch 12 from the same base corner area (moving slightly along the base edge). Sl st in 2nd ch from hook, sc in next 2 ch, hdc in next 2 ch, dc in next 3 ch, tr in next 3 ch, sl st into base to secure. (11 sts along point, plus join)
Point 3 (large, center top):
Ch 16 from the center top of the base. Sl st in 2nd ch from hook, sc in next 3 ch, hdc in next 3 ch, dc in next 4 ch, tr in next 4 ch, sl st into base to secure. (14 sts along point, plus join)
Point 4 (medium, upper right):
Repeat Point 2 instructions, working from the upper right side of the base. (11 sts along point, plus join)
Point 5 (small, bottom right):
Repeat Point 1 instructions, working from the bottom right side of the base. (7 sts along point, plus join)
Technique note: working “sl st into base to secure” after each point means you are anchoring the finished point back into the central strip before starting the next chain — this is what pulls all five points into a single connected leaf shape rather than five separate strips.
Fasten off after Point 5 and weave in the end at the base.
Part 3: Raised Veins
Using the same yarn color, work a line of surface slip stitches down the center of each point, from the base of the point to its tip, to create a raised vein line.
Technique note: surface slip stitch means you hold your working yarn behind the fabric and pull loops through to the front, from back to front, moving up the leaf. This creates a raised chain-like line sitting on top of your stitches without disturbing the leaf’s shape underneath.
Repeat this vein line on all 5 points. (No stitch count applies to surface slip stitch rows — work until you reach the tip of each point, then fasten off and weave in.)
Part 4: Stem
Ch 12. Sl st in 2nd ch from hook and in each ch across. (11 sts)
If using wire: cut a 15cm piece of floral wire, fold it in half, and insert it into the chain stem before working the sl st row, sliding it inside the loops as you go so the wire sits fully encased inside the finished stem. This lets you bend and pose the stem once attached.
Fasten off, leaving a 20cm tail for attaching to the leaf base.
Assembly Steps
- Lay your finished leaf flat and identify the underside (back) of the central base strip.
- Thread the stem’s tail onto a yarn needle and stitch the stem to the bottom-center back of the base, inserting the needle through 2–3mm of the base fabric for a secure hold.
- If your stem is wired, curl the last 2cm of the tip gently to mimic a natural leaf stem curve.
- Weave in all remaining yarn tails on the back of the leaf using your yarn needle, running each tail through 3–4cm of stitches before trimming.
- For a crisper, more dimensional finish, lightly coat the leaf in diluted fabric stiffener (1 part white glue to 1 part water) and lay flat to dry for 4–6 hours, shaping the points as it dries.
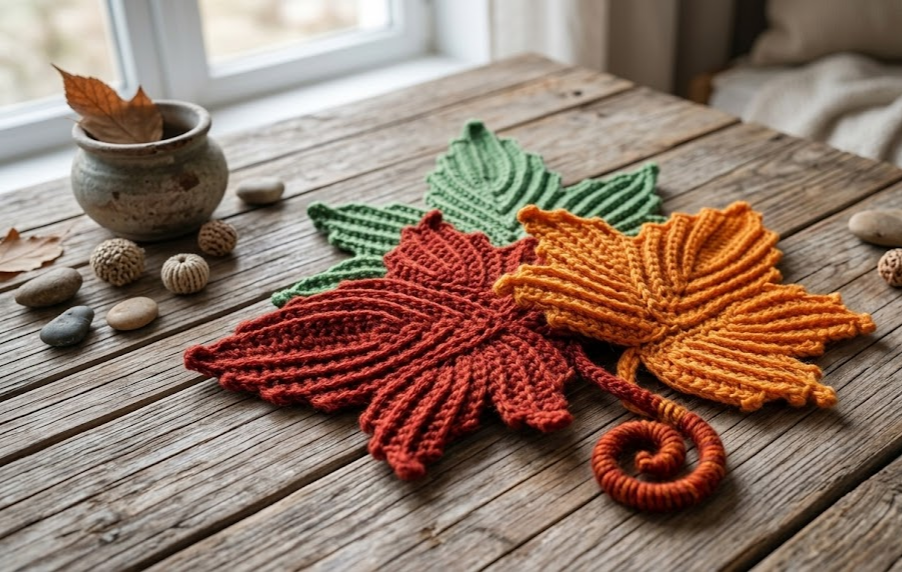
- If making a multi-leaf cluster like the one pictured, stitch 2–3 leaves together at their base points, overlapping slightly, using a few small whip stitches on the back side where they meet.
Finished leaf measures approximately 12–14cm from stem to top point, and 12cm across at the widest point.
Beginner/Intermediate Tips
- Keep tension even as you move from sc to hdc to dc to tr along each point — this gradual stitch height increase is what gives the point its natural taper, so rushing through it can make points look uneven.
- If your points curl instead of lying flat, try going up half a hook size — tighter tension tends to cause curling in this pattern.
- Work your surface slip stitch veins a little looser than your base stitches so they lie flat rather than puckering the point.
- Use a stitch marker to mark your “2nd ch from hook” starting point on each new chain — it’s easy to miscount when working several points back to back.
Variations
- Ombre Leaf — use a gradient yarn or change colors partway through each point for a sunset-style fade from yellow to red.
- Mini Garland Leaves — reduce all chain lengths by 2–3 stitches to make a smaller version perfect for stringing into a fall garland.
- Oak Leaf Style — round out the points by working even stitch heights instead of tapering, for a softer oak-leaf silhouette.
- Coaster Leaf — stiffen the finished leaf fully flat (no curled stem) and add a layer of fabric backing to turn it into a functional autumn coaster.
- Giant Statement Leaf — double all chain lengths and switch to a bulky yarn with a 6mm hook for an oversized wall-hanging leaf.
Save this pattern now so you don’t lose it, and tag your finished leaves — I’d love to see your colors! Pin it to your fall crochet board using #FoodiePlumCrochet.



