The Best Fluffy Pancakes recipe you will fall in love with. Full of tips and tricks to help you make the best pancakes.
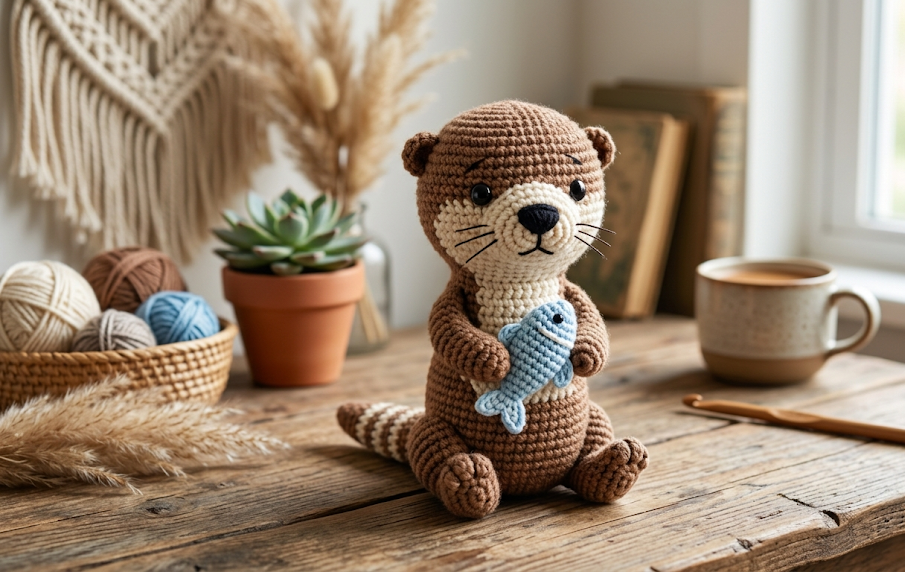
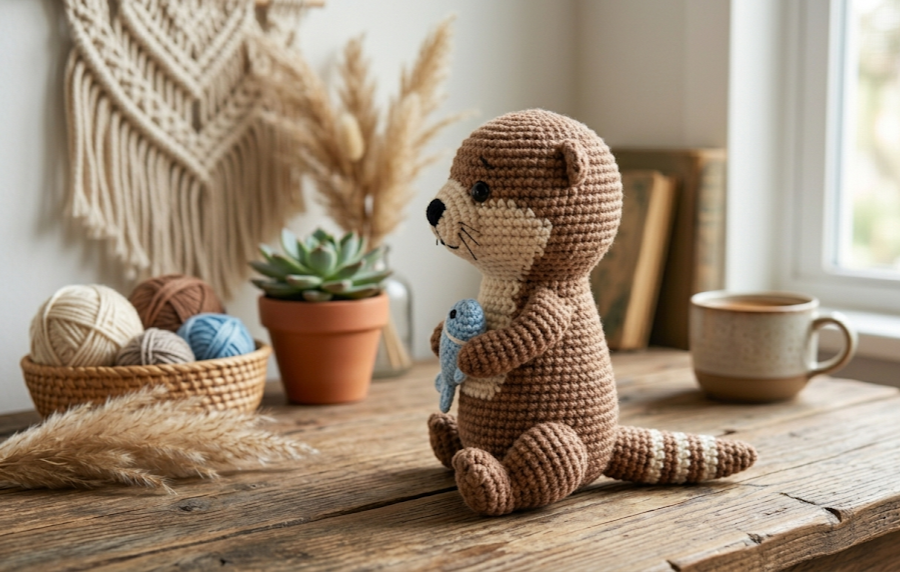
If there is one amigurumi project that will steal your heart the moment you finish it, it is this crochet otter holding a tiny fish. With its fluffy bouclé texture, round little belly, and the sweetest bead eyes, this handmade otter is the kind of project that makes people stop and ask, “Wait — did you make that yourself?” And yes, you did. This free crochet otter pattern is written for beginners and walks through every single step, from the head down to that adorable little fish accessory.
Whether making this as a gift, a nursery decoration, or just a fun weekend project, this little otter is sure to become a favorite in any handmade collection.
|
Difficulty
Beginner
|
Time
3–5 Hours
|
Hook Size
3.5 mm (E/4)
|
Yarn Weight
DK / Bouclé
|
Finished Size
10–12 cm / 4″
|
Materials Needed
- Yarn: Bouclé or loop yarn in brown (main color) and cream/off-white (belly and face)
- Yarn: Light blue bouclé or soft DK yarn for the fish
- Hook Size: 3.5 mm (US E/4)
- Stuffing: Polyester fiberfill
- Eyes: 6 mm black safety eyes (x2)
- Nose: 4 mm brown safety eye or embroidered with brown yarn
- Yarn needle: For seaming and finishing
- Scissors
- Stitch markers
Finished Size
Approximately 10–12 cm (4–4.5 inches) tall when seated
Abbreviations
- MR – Magic ring
- sc – Single crochet
- inc – Increase (2 sc in same stitch)
- dec – Invisible decrease (sc2tog)
- sl st – Slip stitch
- ch – Chain
- st – Stitch
- FO – Fasten off
- BLO – Back loop only
- ( ) x – Repeat instructions in parentheses that number of times
Pattern Instructions
Part 1 – Head (Brown Yarn)
Work in continuous rounds. Use a stitch marker to mark the beginning of each round.
Round 1: MR, 6 sc (6)
Round 2: inc in each st around (12)
Round 3: (sc 1, inc) x 6 (18)
Round 4: (sc 2, inc) x 6 (24)
Round 5: (sc 3, inc) x 6 (30)
Round 6: (sc 4, inc) x 6 (36)
Rounds 7–12: sc in each st around (36) — 6 rounds even
Round 13: (sc 4, dec) x 6 (30)
At this point, attach the safety eyes between rounds 9 and 10, approximately 8–9 stitches apart. Attach the nose just below center, between rounds 10 and 11.
Round 14: (sc 3, dec) x 6 (24)
Round 15: (sc 2, dec) x 6 (18)
Stuff the head firmly with fiberfill.
Round 16: (sc 1, dec) x 6 (12)
Round 17: dec x 6 (6)
Close the opening and FO. Leave a long tail for attaching.
Part 2 – Cream Face Patch
Using cream yarn, work a small oval.
Round 1: MR, 6 sc (6)
Round 2: inc in each st around (12)
Round 3: (sc 1, inc) x 6 (18)
Round 4: sc in each st around (18)
FO leaving a long tail. Flatten and sew onto the front lower half of the face.
Part 3 – Body (Brown Yarn)
Round 1: MR, 6 sc (6)
Round 2: inc in each st around (12)
Round 3: (sc 1, inc) x 6 (18)
Round 4: (sc 2, inc) x 6 (24)
Round 5: (sc 3, inc) x 6 (30)
Rounds 6–12: sc in each st around (30) — 7 rounds even
Round 13: (sc 3, dec) x 6 (24)
Round 14: (sc 2, dec) x 6 (18)
Stuff body firmly.
Round 15: (sc 1, dec) x 6 (12)
Round 16: dec x 6 (6)
Close and FO with long tail.
Part 4 – Cream Belly Patch
Round 1: MR, 6 sc (6)
Round 2: inc in each st around (12)
Round 3: (sc 1, inc) x 6 (18)
Round 4: sc in each st around (18)
Round 5: (sc 2, inc) x 6 (24)
FO leaving a tail. Sew onto the front of the body, centering it on the lower half.
Part 5 – Arms (Make 2, Brown Yarn)
Round 1: MR, 6 sc (6)
Round 2: inc in each st around (12)
Rounds 3–7: sc in each st around (12) — 5 rounds even
Lightly stuff. FO leaving a tail for sewing.
Part 6 – Ears (Make 2, Brown Yarn)
Round 1: MR, 6 sc (6)
Round 2: inc in each st around (12)
Round 3: sc in each st around (12)
FO leaving a tail. Do not stuff. Flatten and sew to the top sides of the head.
Part 7 – The Little Fish (Light Blue Yarn)
Round 1: MR, 6 sc (6)
Round 2: inc in each st around (12)
Round 3: (sc 1, inc) x 6 (18)
Rounds 4–6: sc in each st around (18)
Round 7: (sc 1, dec) x 6 (12)
Add a tiny black bead eye or embroider a small eye with black yarn before closing.
Stuff lightly.
Round 8: dec x 6 (6)
Close. Using a separate piece of blue yarn, make a small fan tail by working a few chain stitches and attaching them to the back end. Alternatively, sew a small piece of flattened crocheted oval to form the tail.

Assembly
- Sew the head to the top of the body, aligning them so the face looks slightly forward.
- Sew the cream face patch onto the lower front of the head before attaching it to the body.
- Sew the ears to the top sides of the head, slightly toward the front.
- Sew the arms to the upper sides of the body.
- Position the fish between the arms, as if the otter is hugging it. Tack it to both arms and the belly with a few stitches to hold it in place.
- Weave in all ends carefully.
Beginner Tips
- Bouclé yarn is a texture dream — the loopy surface makes this otter look incredibly fluffy with very little effort. It also hides small tension inconsistencies, which is great for beginners.
- Use stitch markers in every round. Bouclé yarn makes it very difficult to see individual stitches, so markers are essential.
- Count often. After every increase or decrease round, count the stitches before moving on.
- Invisible decrease (insert hook through front loops only of next two stitches) creates a much neater closing than a regular sc2tog. Use it especially when closing the head and body.
- Don’t overstuff. The otter should feel soft and a bit squishy. Overstuffing causes the seams to gap.
- Safety eyes for adults, embroidery for children. If this otter is for a child under 3, embroider the eyes with black yarn instead of using safety eyes.
Variations
- Color swap: Try a gray and white otter for a silver otter look, or use a tan and pale yellow for a honey bear variation.
- No fish version: Make the otter without the fish and give it a tiny crocheted heart, star, or flower instead.
- Keychain otter: Make the pattern at half scale using fingering weight yarn and a 2 mm hook. Add a jump ring and keychain clip to the top of the head.
- Seasonal editions: Add a tiny crocheted pumpkin for fall, a small snowflake appliqué for winter, or a flower crown for spring.
- Gift set: Make three sizes — small, medium, and large — using the same pattern scaled with different yarn weights. They make an adorable family set.
This crochet otter is one of those patterns that feels like a reward from start to finish. Every part is simple on its own, and when it all comes together, the result is something truly special. It makes a wonderful handmade gift, a shelf decoration, or just a fun project for a cozy afternoon.
Save this pattern for later and share the finished otter on Pinterest using #FoodiePlumCrochet — there’s nothing better than seeing a whole gallery of handmade otters holding their little fish!