
The Best Fluffy Pancakes recipe you will fall in love with. Full of tips and tricks to help you make the best pancakes.

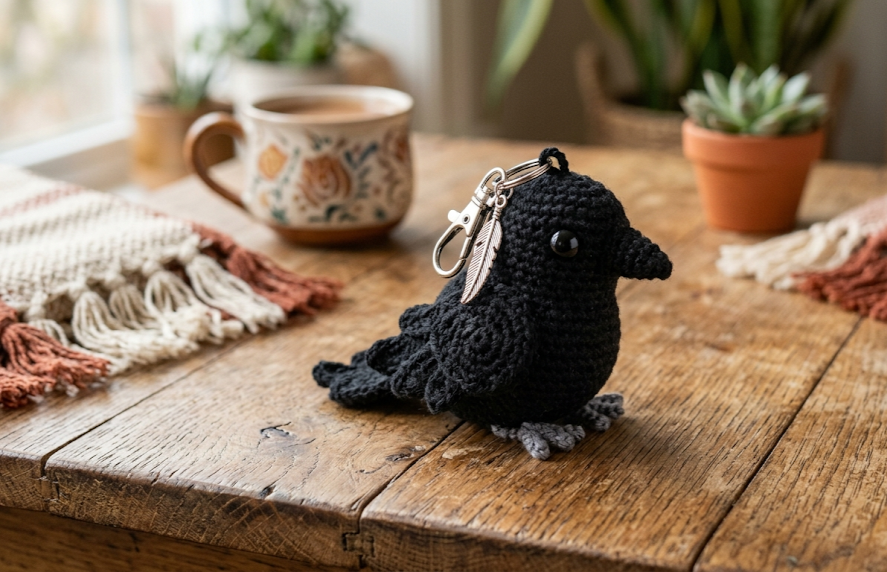
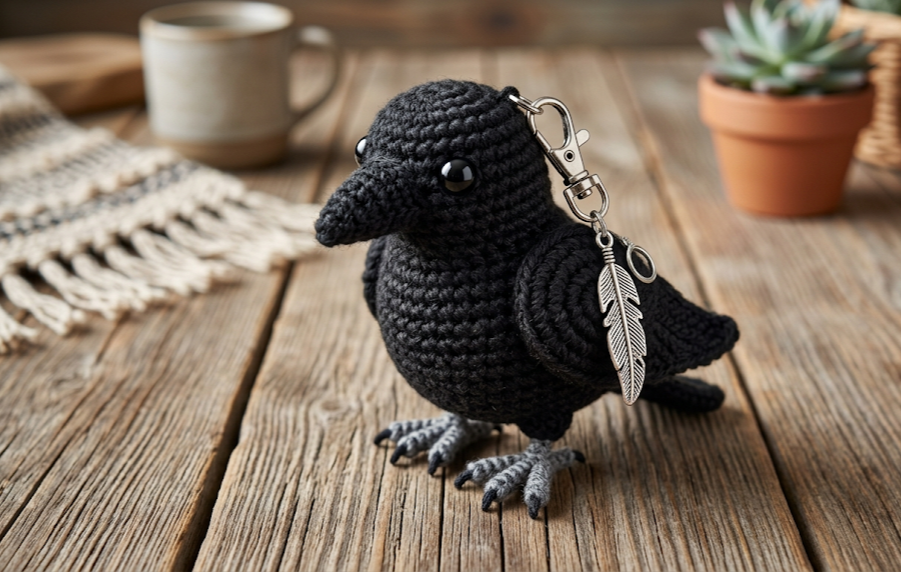
There’s something irresistible about a tiny black bird perched right in the palm of your hand. This crochet raven keychain is one of those quick, satisfying makes that punches way above its size — a round little body, a stubby beak, soft layered wings, and tiny taloned feet, all finished off with a silver clasp and a dangling feather charm. It’s moody, it’s witchy, it’s adorable, and it takes almost no yarn at all.
This pattern is perfect for anyone who loves amigurumi but doesn’t always have hours to spare. It’s small enough to finish in one sitting, simple enough for an advancing beginner, and detailed enough that intermediate crocheters will enjoy adding the finishing touches like the wing shaping and tiny feet. Clip it to your keys, your bag, your planner, or give it as a stocking stuffer for the raven-lover in your life — either way, this little guy is going to get a lot of attention for something so small.
Let’s get into the gauge, materials, and full pattern so you can make your own.
|
Difficulty
Intermediate
|
Time
2–3 Hours
|
Hook Size
2.5mm
|
Yarn Weight
Fingering (1)
|
Finished Size
~6cm tall
|
Gauge
- 10cm x 10cm square = approximately 19 stitches x 21 rows in single crochet, worked in the round
- Hook used: 2.5mm steel/small amigurumi hook
- Yarn weight used: Fingering weight (Weight 1) acrylic or cotton-acrylic blend, worked at a tight tension typical of amigurumi
Gauge isn’t critical for a toy like this since it isn’t meant to fit anything, but a tighter gauge than usual is recommended so stuffing doesn’t peek through the stitches.
Materials List
- Fingering weight (Weight 1) yarn in black, approximately 15g
- Small scrap of fingering weight yarn in gray, less than 2g, for the feet
- 2.5mm crochet hook
- Two 6mm black safety eyes (or small black beads with a needle for sew-on eyes)
- Polyester fiberfill stuffing
- Stitch marker
- Yarn needle for sewing pieces together and weaving in ends
- Small pair of sharp scissors
- 1 lobster clasp keychain finding with jump ring
- 1 small length of fine chain (about 4cm) with a jump ring
- 1 small feather charm
- 2 jump rings (if not already attached to your findings)
- Small pliers for opening and closing jump rings
Abbreviations Table
| Abbreviation | Meaning |
|---|---|
| ch | chain |
| sc | single crochet |
| inc | increase (2 sc in same stitch) |
| dec | invisible decrease |
| BLO | back loop only |
| st(s) | stitch(es) |
| rnd | round |
| sl st | slip stitch |
| MR | magic ring |
| ( ) | stitch count at end of round |
Technique note — Magic Ring (MR): A magic ring lets you start crocheting in a circle with no hole in the center. Wrap yarn around your fingers to form a loop, hold the tail, and crochet your first round of stitches into that loop, then pull the tail to close it tight before continuing.
Technique note — Invisible Decrease (dec): Insert your hook into the front loop only of the next stitch, then the front loop only of the following stitch, and pull through both, then complete as a normal single crochet. This keeps decreases smooth and nearly invisible on the surface of your amigurumi.
Pattern Instructions
Part 1: Body and Head (worked as one continuous piece, bottom-up)
Start at the base of the body.
- Rnd 1: 6 sc in MR (6)
- Rnd 2: inc in each st around (12)
- Rnd 3: sc, inc repeat around (18)
- Rnd 4: sc 2, inc repeat around (24)
- Rnd 5: sc 3, inc repeat around (30)
- Rnd 6–9: sc around, no increases (30) — work 4 rounds even
- Rnd 10: sc 3, dec repeat around (24)
- Rnd 11: sc around (24)
- Rnd 12: sc 2, dec repeat around (18)
This completes the lower body. Stuff firmly as you go from this point, adding more as the shape narrows.
- Rnd 13: sc around (18) — this begins the neck/head transition
- Rnd 14: sc, inc repeat around (27)
- Rnd 15–17: sc around (27) — work 3 rounds even, this is the head
- Place safety eyes between rounds 16 and 17, spaced about 5 stitches apart, centered on the front of the head.
- Rnd 18: sc 1, dec repeat around (18)
- Rnd 19: dec repeat around (9)
Finish stuffing the head firmly. Fasten off, leaving a long tail, and cinch the remaining 9 stitches closed by weaving the tail through the front loops and pulling tight.
Part 2: Beak
The beak is a small flattened triangle shape.
- Rnd 1: 5 sc in MR (5)
- Rnd 2: inc, sc 4 (6)
- Rnd 3: sc around (6)
- Fasten off, leaving a tail for sewing.
Flatten the beak gently and sew it onto the front of the head, just below and between the eyes, with the point facing slightly downward.

Part 3: Wings (make 2)
The wings are worked flat in rows to create the layered feather effect.
- Row 1: ch 8, sc in 2nd ch from hook and each ch across (7)
Technique note — working into the chain: When working your first row into a chain, skip the first chain from your hook (this chain just holds your loop) and single crochet into each remaining chain across.
- Row 2: ch 1, turn, sc 7 (7)
- Row 3: ch 1, turn, sc 2, dec, sc 2 (6)
- Row 4: ch 1, turn, sc 2, dec, sc 1 (5)
- Row 5: ch 1, turn, dec, sc 1, dec (3)
- Fasten off, leaving a long tail.
To create the feathered look, use your yarn needle to add 3–4 small straight stitches along the bottom edge of each wing in the same black yarn, mimicking individual feather lines. Sew the wings to either side of the body, angled slightly backward, around the area where the body begins to narrow (roughly rounds 9–11).
Part 4: Feet (make 2, in gray yarn)
- Rnd 1: 5 sc in MR (5)
- Do not join; fasten off leaving a short tail.
For the toes, with the same gray yarn, make 3 small chains of 3 stitches each (ch 3, sl st back down the chain) coming off the front of the foot disc, fanned slightly apart to look like talons. Sew the completed feet to the underside of the body, spaced about 1.5cm apart, so the bird sits flat and balanced.
Assembly Steps
- Stuff the body and head firmly before closing each section — don’t wait until the whole piece is done, as you won’t be able to stuff the head once it’s sewn shut.
- Sew the beak onto the head, positioned just under and between the eyes, point facing down and slightly out.
- Attach both wings to the sides of the body at the point where the increases stop and the body rounds become even (around rnd 9), angling them backward toward the tail end of the body.
- Attach the two feet to the bottom of the body, about 1.5cm apart from each other, so the bird balances upright when set down.
- Weave in all remaining yarn tails securely using your yarn needle.
- Attach a jump ring to the top center of the head/back, about 1cm from the top, by carefully threading it through a few stitches and closing it with pliers.
- Connect the lobster clasp to the jump ring on the bird.
- Attach a second jump ring to a short length of chain (about 4cm) and connect the other end to the feather charm.
- Attach the chain unit to the same point as the clasp, or to a second small jump ring placed just beside it, so the chain and feather dangle freely beside the clasp.
Beginner/Intermediate Tips
- Because this raven is so small, use a hook one size smaller than you’d normally pick for the yarn weight — this tightens your stitches so stuffing won’t show through the gaps.
- Stuff in small pinches rather than one big handful. Small amounts let you control the shape of the head and body much more precisely.
- When placing the safety eyes, hold the head up and look at it from straight on before pushing the posts through — symmetry is much easier to judge this way than when the head is on its side.
- The wing decrease rows can look fiddly at first. Go slowly on rows 3–5, since each row removes a stitch and the fabric narrows fast.
- If you don’t have safety eyes on hand, small black seed beads sewn on with sturdy thread work beautifully and give the same glossy look.
- Keep a stitch marker in your current stitch every time you set the project down — with rounds this short, it’s very easy to lose your place.
Variations
- Color Swap Raven: Make the same pattern in deep navy or charcoal gray yarn for a softer, less gothic look that still keeps the corvid silhouette.
- Snowy Owl Twist: Use white and light gray yarn with the same body shape, add small rounded ear tufts, and swap the feather charm for a tiny moon charm.
- No-Keychain Ornament: Skip the clasp and chain entirely, and instead attach a loop of thin ribbon to the top of the head to turn this into a tiny hanging ornament for a tree or window.
- Mini Brooch Raven: Sew a pin backing to the underside of the body instead of attaching keychain hardware, turning the same pattern into a wearable accessory.
- Giant Display Raven: Re-make the pattern using worsted weight yarn and a 4mm hook instead of fingering weight, creating a larger version perfect for shelf display rather than a keychain.
Save This Pattern
If you loved this little raven as much as we did, save this pin so you can come back to it any time you’re ready to crochet your own! Tag your finished birds and share your makes using #FoodiePlumCrochet — we love seeing your version come to life.



