
The Best Fluffy Pancakes recipe you will fall in love with. Full of tips and tricks to help you make the best pancakes.

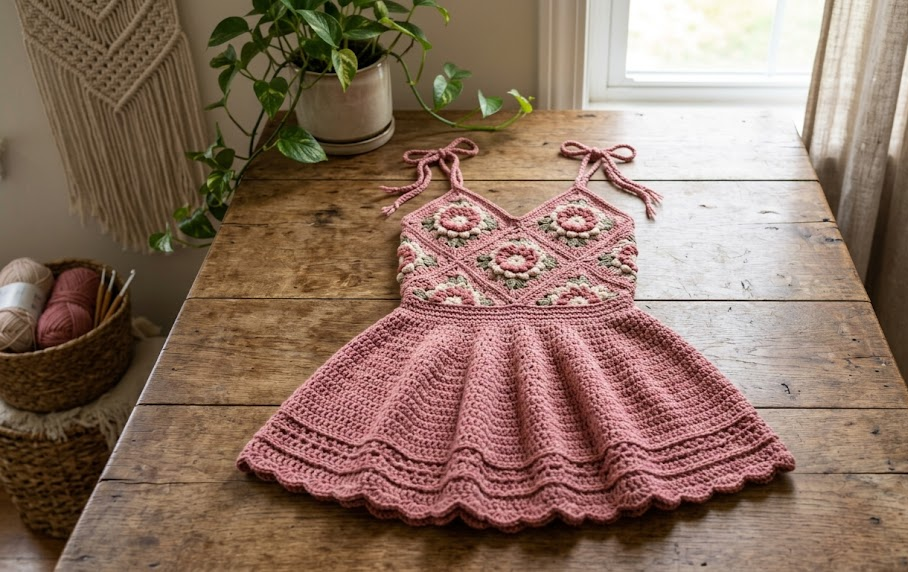
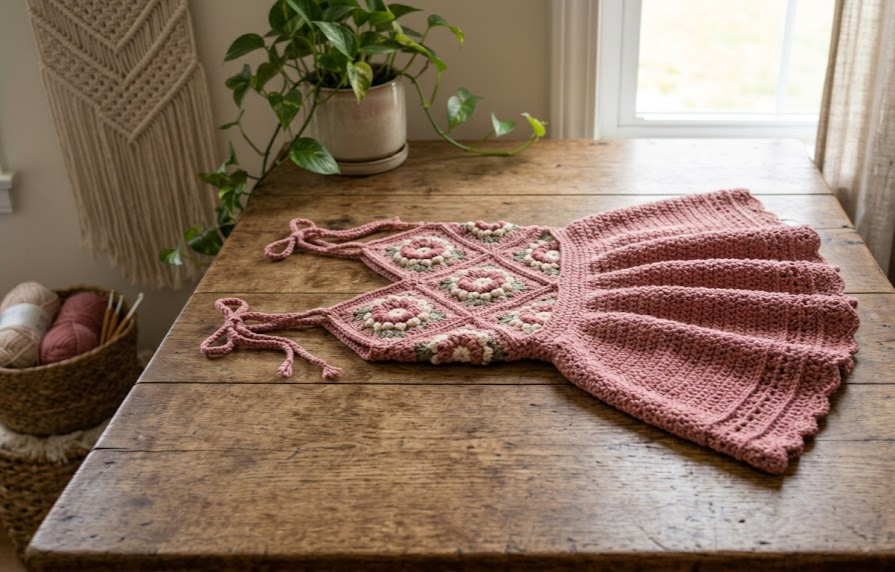
There’s something magical about a dress that starts as nothing more than a ball of cotton yarn and a hook, and ends up looking like it belongs in a boutique window. That’s exactly what the Crochet Rose Garden Mini Sundress is: a flirty, fitted-bodice, full-skirted little dress built from delicate rose granny squares and finished with soft tie straps that knot into bows at the shoulders.
This dress is built for warm-weather wandering — beach boardwalks, garden parties, festival weekends, or a golden-hour photo session where you want something that moves when you twirl. The bodice is fitted and structured thanks to a combination of shaped granny motifs and closely worked rows, while the skirt is worked in a soft, breezy shell-and-chain lace that flares out into a full circle silhouette. It photographs beautifully, but more importantly, it’s genuinely comfortable to wear thanks to the lightweight, breathable cotton yarn.
This pattern sits at an intermediate skill level. If you’ve made a few granny squares before and are comfortable with basic shaping, increases, and reading a written pattern without a video walkthrough, you’re ready for this project. It isn’t a weekend dress — plan on 18 to 22 hours of hooking time spread across a couple of weeks — but every hour shows in the finished piece.
Below you’ll find the full gauge specification, materials list, abbreviations, and complete written pattern broken into clearly labeled sections: Bodice Squares, Bodice Assembly, Waist Join, Skirt, and Straps. Every round and row includes a stitch count so you always know exactly where you stand.
|
Difficulty
Intermediate
|
Time
18–22 Hours
|
Hook Size
2.5mm (C/2)
|
Yarn Weight
Sport (#2 Fine)
|
Finished Size
Bust 32–34″
|
Gauge
Gauge matters more in this pattern than in most, because the bodice needs to sit snugly against the body while the skirt needs to flare freely. Before starting, work a gauge swatch using your chosen hook and yarn.
- Motif gauge: One completed rose granny square motif measures 8cm x 8cm (3.25in x 3.25in) using a 2.5mm hook
- Stitch gauge (skirt lace section): 22 stitches x 26 rows in single crochet = 10cm x 10cm (4in x 4in)
- Hook used for gauge swatch: 2.5mm (C/2)
- Yarn used for gauge swatch: Sport weight (#2 Fine) mercerized cotton
If your motif comes out smaller than 8cm, move up to a 2.75mm or 3mm hook. If it comes out larger, drop down to a 2.25mm hook. Because the bodice motifs are joined directly to shape the bust and ribcage, gauge accuracy here affects fit more than in a typical garment.
Materials List
- Yarn: Sport weight (#2 Fine) 100% mercerized cotton, approximately 700–800m (765–875yds) total
- 5–6 skeins (50g/125m each) in Dusty Rose / Blush Pink
- Hook: 2.5mm (US size C/2) crochet hook
- Notions:
- Tapestry/yarn needle for weaving in ends and joining motifs
- 12–16 stitch markers (locking style recommended)
- Sewing pins to hold motifs in place before joining
- Measuring tape
- Small pair of sharp scissors
Abbreviations Table
| Abbreviation | Meaning |
|---|---|
| ch | chain |
| sl st | slip stitch |
| sc | single crochet |
| hdc | half double crochet |
| dc | double crochet |
| tr | treble crochet |
| st(s) | stitch(es) |
| rnd(s) | round(s) |
| row(s) | row(s) |
| sp(s) | space(s) |
| rep | repeat |
| sk | skip |
| MR | magic ring (an adjustable loop that starts a round and closes tightly, leaving no hole at the center) |
| BLO | back loop only (insert hook only under the back loop of the stitch, leaving the front loop free) |
| ch-sp | chain space |
| inc | increase (work 2 or more stitches into the same stitch) |
| dec | decrease (work 2 stitches together as one) |
| yo | yarn over |
| (…) | stitch count at end of round/row |
Pattern Instructions
Part 1: Rose Bodice Squares (make 6)
You’ll make 6 rose motif squares total: 2 for the front bust cups, 2 for the side/underarm panels, and 2 for the back.
Round 1: Using MR, ch 3 (counts as first dc), work 11 dc into ring, sl st to top of ch-3 to join. (12 dc)
Round 2: Ch 3 (counts as first dc), dc in same st, *ch 2, sk next st, 2 dc in next st; rep from * around, ch 2, sl st to top of ch-3 to join. (6 petals of 2-dc groups, 6 ch-2 spaces)
Round 3 (petals): Sl st into first ch-2 sp, ch 1, in same sp work (sc, hdc, 3 dc, hdc, sc) — this completes one petal. Rep in each remaining ch-2 sp around (6 petals total). Sl st to first sc to join. (6 petals)
Round 4 (square corners): Working behind the petals into the round 2 stitches, ch 5 (counts as dc + ch 2), *dc in next 2-dc group, ch 2; rep from * around, sl st to 3rd ch of beg ch-5. (6 dc, 6 ch-2 sps)
Round 5 (squaring off): Sl st into next ch-2 sp. In this round you’ll build the square shape: *(3 dc, ch 2, 3 dc) in ch-2 sp, ch 1; rep from * around working corner groups in 4 of the 6 spaces to form a square outline, sl st to join. (4 corner groups, square shape complete)
Technique note: Because the base is a hexagon (6 petals), squaring it off means you’ll place corner shell groups in 4 of the 6 spaces and simple dc groups in the remaining 2, which flattens the motif into a square. Pin your first motif to a measuring guide as you go to confirm you’re hitting 8cm x 8cm.
Fasten off, leaving a 20cm tail for joining. Repeat to make 6 rose squares total.
Part 2: Bodice Assembly
- Lay out your 6 squares: 2 for the front (side by side, these will form the bust cups), 2 for the sides, 2 for the back.
- Using a tapestry needle and the join-as-you-go whip stitch method, sew the front two squares together along one edge, leaving the top 3cm unjoined to create the sweetheart neckline gap between the cups.
- Join the side squares to the outer edges of the front squares, then join the back squares to the side squares, leaving a 6cm gap at the center back for the zipper-free stretch closure.
- Try the joined bodice band around your ribcage at bust level to check fit before moving on — it should sit snugly but not tightly.
Part 3: Waist Join Row
Row 1: With RS facing, join yarn at center back. Work 1 row of sc evenly around the bottom edge of the joined bodice squares, working through both loops, placing 3 sc in each corner join point to keep the edge flat. Count your total stitches and place a marker every 20 sts — you’ll need this number for the skirt. (approx. 140–160 sc, adjust to your gauge)
Row 2 (BLO foundation for skirt): Ch 1, turn. Working in BLO only (this creates a decorative ridge and gives the skirt lace a clean anchor row), sc in each st around. (same st count as Row 1)
Part 4: Skirt (worked in rounds from waist down)
Round 1: Ch 3 (counts as dc), 2 dc in same st, sk 2 sts, *3 dc in next st (this is your shell), sk 2 sts; rep from * around, sl st to top of ch-3. (shells evenly spaced around, count = waist stitch count ÷ 3)
Round 2 (first flare increase): Sl st into first dc of shell, ch 3, 2 dc in same sp, ch 1, *3 dc in center st of next shell, ch 1; rep from * around, sl st to join. (same number of shells, now separated by ch-1 sps)
Rounds 3–8: Continue working shell rounds, increasing the flare by adding one extra ch between shells every 2 rounds (ch-1 becomes ch-2 by round 5, ch-3 by round 7). This is what creates the circle-skirt flare. Sl st to join at the end of every round.
Rounds 9–12 (hem lace): *3 dc in next shell, ch 3, sc in next ch-sp, ch 3; rep from * around for 4 rounds to create an open, airy scalloped hem. Fasten off and weave in ends.
Finished skirt length from waist: approximately 32–35cm, adjustable by adding or removing shell rounds in 2cm increments.
Part 5: Straps
Make 2: Ch 90 (adjust to your torso length, roughly shoulder-to-bust-point plus 10cm for tying). Row 1: sc in 2nd ch from hook and each ch across. Fasten off, leaving 15cm tails at both ends for tying into bows.
Technique note — working the second side of a chain: if you want a straight strap with no lace at the base, simply work your sc row along the top loops of the foundation chain only; there’s no need to turn and work a second side since these straps are single-layer.
Assembly Steps
- Weave in all loose ends from the bodice squares and skirt using a tapestry needle, running each tail through at least 4cm of stitching to prevent unraveling.
- Attach one end of each strap to the top inner corner of a front bust cup, sewing through 3–4 stitches for a secure hold.
- Try the dress on and mark where the strap should cross at the back or tie at the shoulder — most sizes need the strap ends left free at the top of the shoulder to tie into a bow, with about 8–10cm of extra length for the bow itself.
- Tie each strap into a neat double-loop bow at the shoulder, adjusting tension evenly on both sides so the neckline sits level.
- Steam-block the finished dress by pinning it to rough size on a padded surface and hovering a steam iron 3–5cm above the fabric — do not press directly, as this flattens the dimensional rose texture.
- Let the piece dry fully (2–4 hours) before wearing to lock in the shape.

Beginner/Intermediate Tips
- Block each rose square to exactly 8cm x 8cm before joining them — uneven motifs are the #1 cause of a wavy waistline in this pattern.
- Use locking stitch markers on every 20th stitch of your waist join row so you can quickly recount if you lose your place mid-round.
- Cotton yarn has very little stretch, so size your bodice slightly looser than you think you need — snug cotton crochet doesn’t “give” the way wool does.
- When increasing the skirt flare, always increase in the same spot every round (center of each shell) so your flare stays symmetrical instead of spiraling.
- If your rose petals look flat instead of dimensional, you’re likely working Round 3 too loosely — snug up your tension specifically on that round.
Variations
- Two-Tone Version: Work the rose motifs in dusty rose and the skirt in cream for a romantic color-block look.
- Maxi Length: Add 8–10 extra shell rounds to the skirt for a floor-length version, perfect for a beach wedding guest look.
- Halter Straps: Instead of two shoulder straps, join both strap ends at the center back of the neck for a halter silhouette.
- Chunky Winter Version: Swap to a DK or worsted weight yarn with a 4mm hook and layer it over a long-sleeve top as a crochet pinafore.
- Mini Version for Kids: Reduce to 4 bodice squares and 6 fewer skirt rounds for a child-sized sundress.
Save This for Later
This one’s worth pinning before you lose the pattern in your feed! Save this Crochet Rose Garden Mini Sundress now so you can come back to it whenever you’re ready to pick up your hook. Tag your finished dress with #FoodiePlumCrochet — we love seeing your version come to life!



