
The Best Fluffy Pancakes recipe you will fall in love with. Full of tips and tricks to help you make the best pancakes.

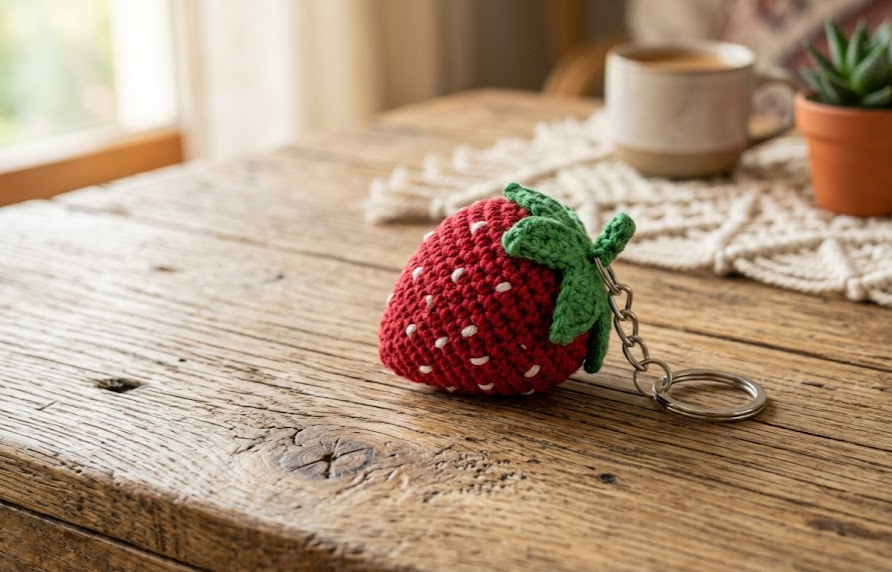
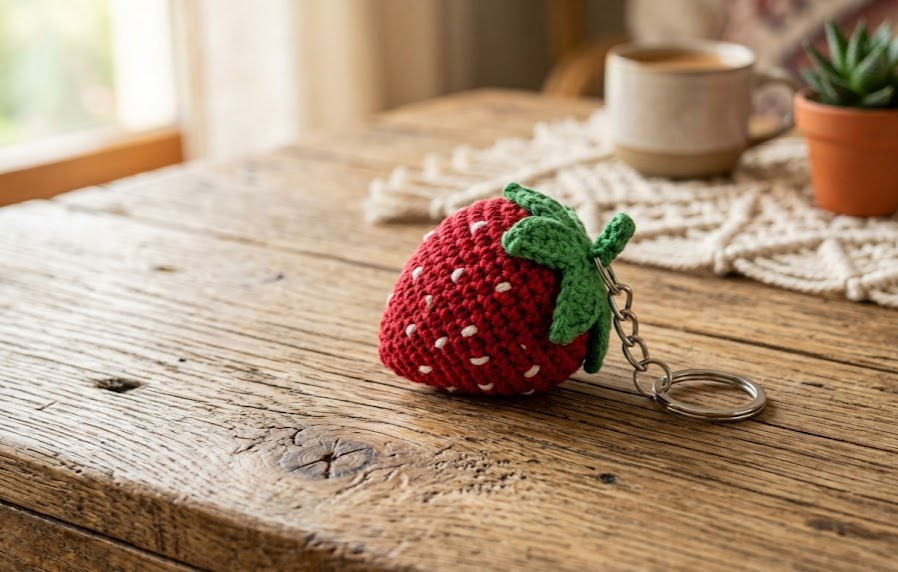
There’s something irresistibly charming about a tiny crocheted strawberry dangling from your keys, bag, or backpack zipper. This crochet strawberry keychain pattern is the perfect quick-and-cute project for anyone who loves amigurumi but doesn’t want to commit to hours and hours of stitching. In under an hour, you’ll have a plump little strawberry, complete with a leafy green top and delicate embroidered seeds, ready to clip onto anything you like.
This pattern is ideal for beginners who already know the basics of single crochet, magic rings, and simple increases and decreases. It’s also a fantastic stash-buster project since it only takes small amounts of yarn in each color. Whether you make it in classic strawberry red or a soft blush pink, this little fruit-shaped accessory works up quickly and makes an adorable handmade gift, keychain swap item, or craft fair bestseller. Grab your hook and cotton yarn, and let’s get stitching.
|
Difficulty
Beginner
|
Time
45–60 mins
|
Hook Size
2.5mm
|
Yarn Weight
DK / Sport
|
Finished Size
5cm x 4cm
|
Gauge
- Gauge: Approximately 19 single crochet stitches and 21 rows per 10cm x 10cm square
- Hook used for gauge swatch: 2.5mm crochet hook
- Yarn used for gauge swatch: DK/sport weight cotton yarn
Gauge isn’t critical for this project since it’s a small stuffed toy rather than a wearable, but working a quick swatch helps you confirm your tension will produce a firm, tightly stitched fabric that won’t let stuffing peek through. If your stitches look loose or gappy, size down your hook slightly.
Materials List
- Cotton yarn in red (for the strawberry body) — approximately 8g
- Cotton yarn in pink, if making the pink variation — approximately 8g
- Cotton yarn in green (for the leaf top) — approximately 3g
- Small amount of white cotton yarn (for embroidering seed dots)
- 2.5mm crochet hook
- Polyester fiber filling / stuffing
- Yarn needle (for weaving in ends and embroidering seeds)
- Keyring with a short chain attachment
- Scissors
- Stitch marker (optional, to track rounds)
Abbreviations Table
| Abbreviation | Meaning |
|---|---|
| MR | Magic Ring |
| sc | Single Crochet |
| inc | Increase (2 single crochet stitches worked into the same stitch) |
| dec | Decrease (single crochet 2 stitches together) |
| slst | Slip Stitch |
| ch | Chain |
| st(s) | Stitch(es) |
| rnd | Round |
Pattern Instructions
Part 1: Strawberry Body
Work in continuous rounds (do not join unless noted). Use a stitch marker to track the start of each round if needed.
Magic Ring Note: A magic ring is an adjustable loop that lets you close the center hole tightly after your first round, avoiding any gap at the very top of your work.
- Rnd 1: 6 sc into MR (6)
- Rnd 2: [1 sc, inc] repeat around (9)
- Rnd 3: [2 sc, inc] repeat around (12)
- Rnd 4: [3 sc, inc] repeat around (15)
- Rnd 5: [4 sc, inc] repeat around (18)
- Rnd 6: [5 sc, inc] repeat around (21)
- Rnd 7: [2 sc, inc] repeat around (28)
- Rnd 8: sc in each st around (28)
- Rnd 9: sc in each st around (28)
- Rnd 10: [2 sc, dec] repeat around (21)
- Rnd 11: [1 sc, dec] repeat around — begin adding fiber filling now, packing it firmly into the bottom and sides before continuing (14)
- Rnd 12: [dec] repeat around (7)
Finish stuffing the strawberry body completely so it holds a firm, rounded shape, then fasten off, leaving a long tail for sewing the leaf top in place later. Weave the tail through the remaining front loops of the last round and pull tight to close the small opening at the top.
Part 2: Leaf Top (Star Leaf Pattern)
This leafy cap sits on top of the strawberry and covers the opening left after stuffing.
- Rnd 1: 6 sc into MR, slst to close (6)
Chain-Loop Technique Note: Working “the second side of a chain” means after making a chain, you crochet back down the opposite side of the same chain to create a pointed leaf shape rather than a flat strip.
- Chain 4, slip stitch into the second chain from the hook, single crochet into the remaining 2 chains, then slip stitch into the next stitch on the base ring. This completes one pointed leaf triangle.
- Repeat this same chain-and-stitch sequence 4 more times around the ring, so you have 5 total leaf points forming a star shape.
- Fasten off, leaving a long tail for sewing the leaf top onto the strawberry body.
Assembly Steps
- Lay the finished leaf top over the closed opening at the top of the strawberry body, making sure the leaf points face outward evenly around the top like a star.
- Using the long tail left on the leaf piece, sew around the center of the leaf to the top of the strawberry with small, secure whip stitches, going all the way around so it sits flat and doesn’t flop to one side.
- Weave in and hide all loose ends inside the strawberry body using your yarn needle.
- Thread a length of white cotton yarn onto your needle. Embroider small straight-stitch “seeds,” each about 3-4mm long, scattered evenly across the surface of the strawberry body in a spiral or diagonal pattern, mimicking real strawberry seeds. Space each dot roughly 8-10mm from the next.
- Attach the keyring’s short chain to the top of the leaf, looping it securely through 1-2 stitches at the center of the leaf top, then closing the jump ring with pliers if needed.
- Give the leaf a gentle shape with your fingers so the five points sit slightly upward, like a natural strawberry crown.
Finished size should measure approximately 5cm tall by 4cm wide, small enough to sit comfortably on a keyring without feeling bulky.
Beginner/Intermediate Tips
- Stuff the body a little at a time as you work rounds 9 through 12, rather than all at once at the end. This gives you better control over the rounded strawberry shape and prevents lumps.
- Use a smaller hook than the yarn label recommends. Amigurumi projects like this one rely on tight stitches so filling doesn’t show through, so going down half a size from the suggested hook is standard practice.
- When making the leaf top, keep tension consistent across all 5 leaf points so they end up the same length. Uneven leaf points are one of the most common beginner mistakes on this pattern.
- If your embroidered seeds look too bold or too subtle, use a single strand of embroidery floss instead of full-weight cotton yarn for a more delicate seed texture.
- Count your stitches after every single round for the first project. It only takes a few seconds and saves you from unraveling several rounds later.
Variations
- Pink Strawberry: Swap the red yarn for a soft pink for a “unripe” or Valentine’s-themed version, perfect for spring color palettes.
- Mini Strawberry Bunch: Make three or four strawberries in miniature (reduce each round’s stitch count slightly) and attach them together on a single keyring for a fuller, bunch-style accessory.
- Ornament Version: Skip the keyring entirely and attach a ribbon loop instead to turn this into a hanging strawberry ornament for a kitchen-themed or summer-themed tree.
- Two-Tone Strawberry: Work the bottom two-thirds in red and the top third in a lighter pink or cream, blending the colors gradually to mimic a strawberry that’s still ripening.
- Bag Charm Cluster: Add a small crochet bow or extra fabric ribbon at the base of the keyring chain for a layered, decorative bag charm look.
Save This Pattern!
Loved this cute little crochet strawberry keychain? Save this pattern to your crochet board so you can come back to it anytime you want to whip up a quick, adorable handmade accessory. Tag your finished strawberries with #FoodiePlumCrochet so we can see your makes!



