
The Best Fluffy Pancakes recipe you will fall in love with. Full of tips and tricks to help you make the best pancakes.

There is something quietly satisfying about a handmade bow. It carries none of the stiffness of a store-bought ribbon, yet it holds its shape beautifully and softens anything it touches — a hair clip, a gift box, a nursery mobile, or the corner of a tote bag. This crochet bow pattern is built for exactly that kind of versatility. Worked in a rich, deep wine yarn, it has a soft, textured finish that looks polished without demanding advanced skills.
This project is ideal for someone who has just learned single crochet and wants a fast, rewarding win. There’s no shaping, no counting decreases, no fussy construction — just a simple rectangle, folded and cinched at the center. In under an hour, you’ll have a finished bow ready to embellish anything you like. It also makes a lovely stash-buster, since it only takes a small amount of worsted weight yarn.
Whether you’re making one for a headband, a garland of bows for a nursery, or a stack of them as gift toppers, this pattern comes together quickly and repeats beautifully once you’ve made your first one.

|
Difficulty
Beginner
|
Time
45 Minutes
|
Hook Size
4.0mm (G/6)
|
Yarn Weight
Worsted (#4)
|
Finished Size
11cm x 8cm
|
Gauge
- 16 sts x 20 rows = 10cm x 10cm in single crochet
- Hook used: 4.0mm (US G/6)
- Yarn used: Worsted weight (Medium, #4)
Gauge is not critical for this project since the bow shape is forgiving, but working a quick swatch will help you judge how tightly you’re crocheting and whether your finished bow will match the size given here. If your rectangle comes out noticeably smaller or larger than expected, adjust your hook size up or down slightly.
Materials List
- Worsted weight yarn (Medium, #4) in deep wine/burgundy — approximately 20g for the main panel
- Small amount of the same yarn in a slightly contrasting or matching shade for the center wrap (about 2g)
- 4.0mm crochet hook
- Yarn needle
- Scissors
Abbreviations Table
| Abbreviation | Meaning |
|---|---|
| Ch | Chain |
| Sc | Single crochet |
| St(s) | Stitch(es) |
| Rep | Repeat |
Pattern Instructions
Part 1: Main Bow Panel
Work a gauge swatch before starting if you want to confirm sizing. This panel becomes the entire bow shape once folded.
Row 1: Ch 21. Sc in 2nd ch from hook and in each ch across. (Working into the 2nd chain from the hook, rather than the first, keeps your edge even and avoids a gap at the start of the row.) (20 sts)
Row 2: Ch 1, turn. Sc in each st across. (20 sts)
Row 3: Ch 1, turn. Sc in each st across. (20 sts)
Row 4: Ch 1, turn. Sc in each st across. (20 sts)
Row 5: Ch 1, turn. Sc in each st across. (20 sts)
Row 6: Ch 1, turn. Sc in each st across. (20 sts)
Fasten off, leaving a long tail of about 30cm. You will use this tail for the center wrap and to secure the back of the bow, so don’t trim it short.
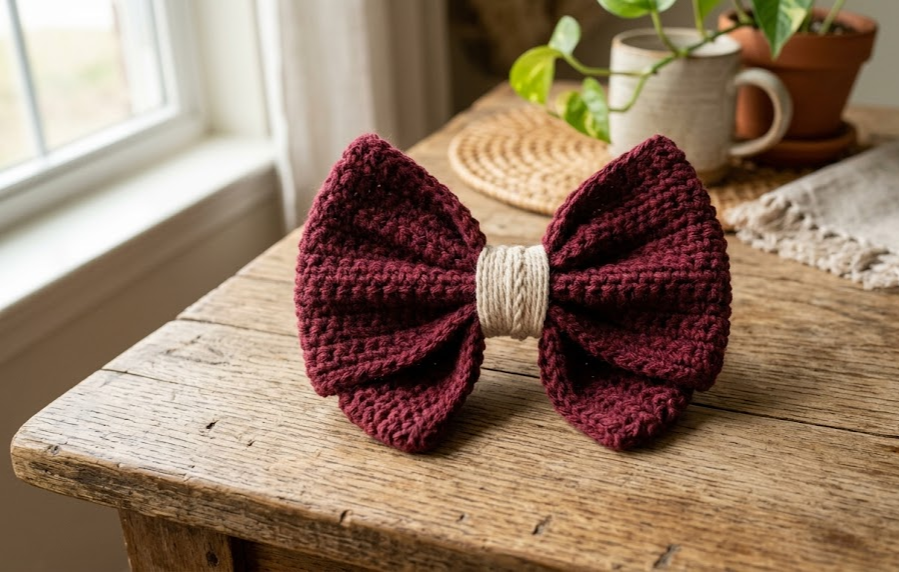
Part 2: Center Wrap
This step is what transforms a flat rectangle into a dimensional bow shape. It uses the same long tail left from Part 1, no separate technique needed, but if you prefer a thicker or contrasting wrap, you can attach a fresh strand of yarn instead.
- Fold the rectangle in half widthwise, so the two short ends meet, forming a loop shape with the seam at the back.
- Locate the center point of the folded panel (roughly 5.5cm from the fold, at the midpoint of the strip).
- Using your yarn tail, wrap tightly around the center of the folded panel 8–10 times, pulling snug each time so the middle cinches in and the two sides puff outward into bow “wings.”
- Once wrapped, pass the needle through to the back of the work and tie off securely with a firm double knot.
Assembly Steps
- Fold the rectangle in half so the short ends meet at the back, creating a looped shape roughly 10cm wide before cinching.
- Wrap the center tightly with yarn 8–10 times, positioning the wraps at the exact midpoint of the folded panel so both bow wings are even in size.
- Tie off at the back, knotting the wrap yarn securely against the underside of the bow so it won’t loosen with handling.
- Weave in all tails using your yarn needle, running each tail through several stitches on the back of the work before trimming close to the fabric.
- Fluff and shape the bow by gently pulling the two wings outward and slightly forward, and pressing the center wrap flat so it sits neatly against the fabric. Let the bow rest for a few minutes to hold its shape before attaching it to anything.
- If attaching to a clip, headband, or gift, glue or stitch the flat back of the center wrap to your base, centering it so the wings hang evenly on both sides.
Beginner/Intermediate Tips
- Keep your tension even across all 6 rows of the panel — a swatch with tight, uniform stitches will hold the folded bow shape much better than a loose, floppy one.
- When wrapping the center, pull each pass snug but not so tight that it distorts the folded fabric underneath. A medium-firm wrap gives the cleanest cinch.
- If your bow wings look uneven after folding, double-check that you folded exactly at the halfway point of the rectangle (10 chains from each end) before wrapping.
- Worsted weight yarn with a bit of body (rather than very soft, drapey yarn) will hold the folded bow shape best. If your yarn feels too limp, consider going down half a hook size for denser stitches.
- Weave in your tails before you fluff and shape the final bow — it’s much easier to hide ends on a flat panel than on a puffed-out finished shape.

Variations
- Two-Tone Bow: Crochet the main panel in wine and use a cream or gold yarn for the center wrap for a striking contrast.
- Mini Bow Set: Reduce the chain to Ch 13 and work only 4 rows for a smaller version, perfect for stud earrings or doll accessories.
- Oversized Statement Bow: Double the chain to Ch 41 and work 10 rows for a large decorative bow ideal for wreaths or wall hangings.
- Textured Bow: Swap single crochet for half double crochet across all rows for a fluffier, more raised stitch texture.
- Seasonal Palette: Make a set in red and green for the holidays, or pastel shades for spring gifting and baby accessories.
Save This Pattern
Loved this easy crochet bow? Save this pin so you can come back to it anytime you need a quick handmade accent — and don’t forget to tag your finished bows with #FoodiePlumCrochet!



