
The Best Fluffy Pancakes recipe you will fall in love with. Full of tips and tricks to help you make the best pancakes.

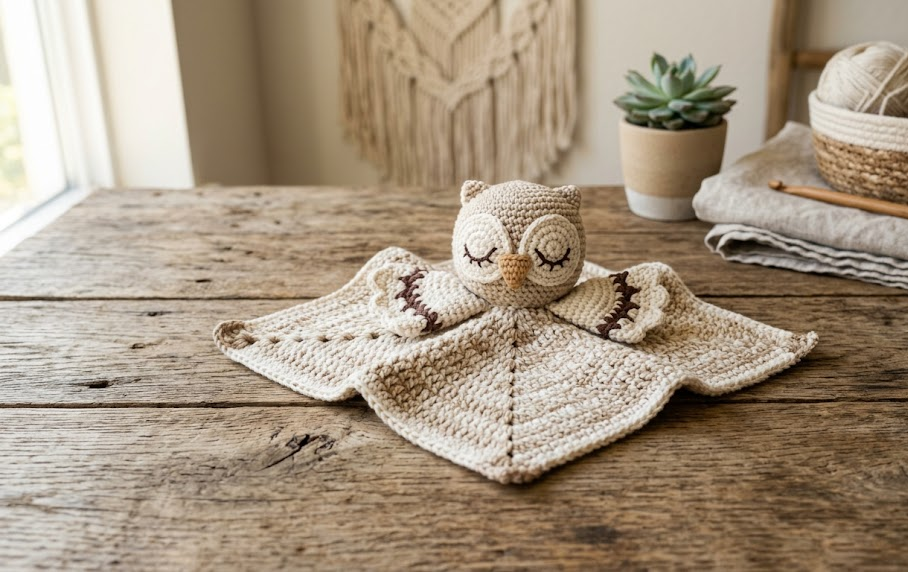
There’s something about an owl that just feels like bedtime. Maybe it’s the big round eyes, or the way a sleepy face instantly reads as “cozy.” This crochet owl lovey blanket brings that feeling into a soft, huggable shape that’s perfectly sized for little hands to grip and little faces to nuzzle into. It’s part stuffed animal, part security blanket, and entirely charming.
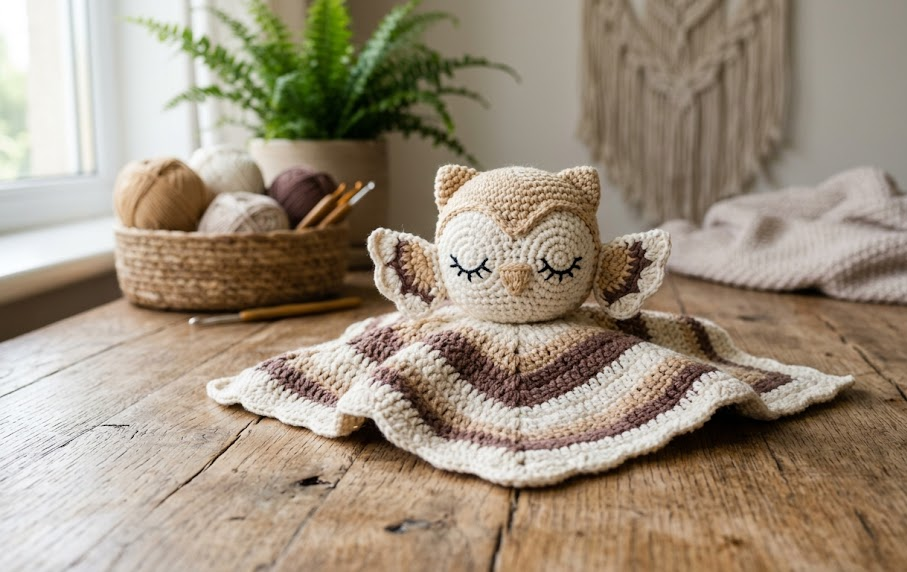
This pattern combines two crochet skills you may already know separately — amigurumi shaping for the owl’s face and wings, and granny-square construction for the blanket corner — and merges them into one heirloom-quality piece. The finished lovey has a plush, dimensional owl head sitting proudly at the top of a soft, textured blanket square, finished with a scalloped shell-stitch border that gives it that boutique, “where did you buy this” look.
It’s an ideal baby shower gift, a newborn photo prop, or a beginner-to-intermediate project for anyone ready to level up from simple amigurumi into something with more texture and construction. Grab your hook, pick your favorite warm neutral palette, and let’s make a lovey worth keeping forever.
|
Difficulty
Intermediate
|
Time
~9 Hours
|
Hook Size
4.0mm (G/6)
|
Yarn Weight
Worsted (#4)
|
Finished Size
30cm x 30cm
|
Gauge
16 sts x 18 rows = 10cm x 10cm (4in x 4in) in single crochet, using a 4.0mm (US G/6) hook and worsted weight (medium, #4) yarn.
Gauge is not critical for this pattern since it’s a soft toy rather than a garment, but working a quick swatch helps you match the finished size listed and confirms your stitches are tight enough to prevent stuffing from showing through.
Materials List
- Worsted weight yarn (medium, #4) in Cream/Ivory (Color A) — approx. 150g
- Worsted weight yarn in Light Tan/Camel (Color B) — approx. 100g
- Worsted weight yarn in Cocoa Brown (Color C) — approx. 50g
- Small amount of Rust/Orange yarn (Color D) for the beak
- Small amount of Black yarn (Color E) for embroidering the eyes (no plastic safety eyes — this is a baby item, so all facial features are crocheted or embroidered for safety)
- 4.0mm (US G/6) crochet hook
- Yarn needle (tapestry needle) for weaving in ends and embroidery
- Polyester fiberfill stuffing
- Stitch markers
- Scissors
Abbreviations
| Abbreviation | Meaning |
|---|---|
| ch | chain |
| sc | single crochet |
| hdc | half double crochet |
| dc | double crochet |
| tr | treble crochet |
| sl st | slip stitch |
| st(s) | stitch(es) |
| rep | repeat |
| sk | skip |
| inc | increase (2 sts in same st) |
| dec | decrease (single crochet 2 sts together) |
| BLO | back loop only |
| MR | magic ring |
| RS | right side |
| sp | space |
| rnd | round |
| yo | yarn over |
Pattern Instructions
Part 1: Owl Head (Color A, cream)
Work in a continuous spiral; use a stitch marker to track the start of each round.
- Rnd 1: MR (magic ring — a technique note for beginners: form a loop with your yarn, chain 1, work your stitches into the loop, then pull the tail to close it, leaving no hole at the center), 6 sc into ring (6)
- Rnd 2: inc in each st around (12)
- Rnd 3: *sc, inc; rep from * around (18)
- Rnd 4: *sc 2, inc; rep from * around (24)
- Rnd 5: *sc 3, inc; rep from * around (30)
- Rnd 6: *sc 4, inc; rep from * around (36)
- Rnd 7-13 (7 rnds): sc in each st around (36)
- Rnd 14: *sc 4, dec; rep from * around (30)
- Rnd 15: *sc 3, dec; rep from * around (24)
- Rnd 16: Begin stuffing firmly now, adding more as you close up. *sc 2, dec; rep from * around (18)
- Rnd 17: *sc, dec; rep from * around (12)
- Rnd 18: dec around, finish stuffing (6)
Fasten off, leaving a long tail. Cinch the remaining 6 sts closed and weave in the tail.
Part 2: Wings (make 2, Color B, tan)
- Rnd 1: MR, 6 sc into ring (6)
- Rnd 2: inc in each st around (12)
- Rnd 3: *sc, inc; rep from * around (18)
- Rnd 4-6 (3 rnds): sc around (18)
- Rnd 7: sc 8, hdc 2, sl st in next st. Fasten off leaving a long tail for sewing.
Do not stuff wings — leave them flat for a soft, appliqué-style finish when sewn on.
Part 3: Ears (make 2, Color C, cocoa)
- Rnd 1: MR, 5 sc into ring (5)
- Rnd 2: sc around (5)
- Rnd 3: dec, sc 3 (4)
Fasten off, leaving a tail. Ears are worked flat and folded slightly when sewn to give a pointed, tufted look.
Part 4: Beak (Color D, rust)
- Rnd 1: MR, 5 sc into ring (5)
- Rnd 2: dec, sc 3 (4)
Fasten off, leaving a tail. Stuff lightly.
Part 5: Blanket Square (starts Color C, changes to B then A)
The blanket is worked as a traditional granny square from the center out, with color changes at the end of each round.
- Rnd 1 (Color C): ch 4, join with sl st to form a ring. Ch 3 (counts as first dc), 2 dc into ring, ch 2, *3 dc into ring, ch 2; rep from * two more times, join with sl st to top of ch-3 (4 corner groups)
- Rnd 2 (Color C): join Color B in any ch-2 corner sp. Ch 3, (2 dc, ch 2, 3 dc) in same sp — this is your first corner. *Ch 1, (3 dc, ch 2, 3 dc) in next corner sp; rep from * around, ch 1, join with sl st (4 corners, 4 side groups)
- Rnd 3 (Color B): Continue in Color B. Ch 3, (2 dc, ch 2, 3 dc) in first corner sp. *Ch 1, 3 dc in next ch-1 sp, ch 1, (3 dc, ch 2, 3 dc) in next corner; rep from * around, join (4 corners, 8 side groups)
- Rnd 4 (Color A): join Color A in any corner sp. Ch 3, (2 dc, ch 2, 3 dc) in same sp. *Ch 1, 3 dc in each ch-1 sp across side, ch 1, (3 dc, ch 2, 3 dc) in next corner; rep from * around, join
- Rnds 5-8: continue in Color A, repeating Rnd 4’s pattern (working 3-dc groups into every ch-1 sp along each side, with corner increases) until the square measures approximately 28cm x 28cm
Part 6: Shell Edging (Color C)
- Rnd 1: join Color C in any corner sp. *Sk 1 st, 5 dc in next st, sk 1 st, sl st in next st; rep from * evenly around all four sides, working (5 dc, sl st) into each corner st for a fuller corner scallop. Join with sl st and fasten off.
Assembly Steps
- Weave in all loose ends on the head, wings, ears, and beak before assembly.
- Position the owl head at the center-top edge of the blanket square, about 2cm below the top corner point, and pin in place.
- Using a yarn needle and matching Color A, whip-stitch the head to the blanket around its entire base, sewing through both the back loops of the head and the top strand of the blanket edging for a secure but flexible join.
- Sew the two ears to the top of the head, spaced 4cm apart, angled slightly outward.
- Sew the beak to the center of the face, positioned 1cm below the eye area.
- Embroider two sleepy, closed “eyelash” eyes in Color E using a simple curved backstitch, spaced 3cm apart above the beak — this reads as “sleeping” and keeps the piece 100% safe for babies with no small parts.
- Sew the wings to either side of the blanket, about 6cm below the head, angled slightly downward like they’re resting.
- Give the whole piece a final steam or light block by smoothing the blanket flat and letting it rest overnight so the edges lie evenly.
Beginner/Intermediate Tips
- When switching colors on the granny square, always finish the last stitch of the old color with the new color’s yarn already looped through — this keeps color transitions clean and avoids a visible knot line.
- If your granny square starts to cup or ruffle, you’re increasing too much on the sides; skip a ch-1 side repeat every other round to flatten it back out.
- Stuff the owl head firmly in the last few rounds only — over-stuffing early rounds distorts the roundness of the face.
- Use a stitch marker on rnd 1 of every amigurumi piece; it’s easy to lose your spiral start when working in cream-on-cream yarn.
- Block the finished blanket square before attaching the head — it’s much easier to shape flat pieces than a fully assembled lovey.

Variations
- Woodland Fox Lovey: Swap the color palette to rust orange and white, and reshape the ears into pointed triangles for a fox version.
- Mini Travel Size: Reduce the blanket to 4 rounds instead of 8 for a stroller-clip-sized lovey, perfect for diaper bags.
- Pastel Nursery Set: Work the same pattern in soft lavender, sage, and blush for a gender-neutral nursery gift set with a matching hat.
- Night Sky Theme: Use a navy blanket square with gold star embroidery scattered across the corners, paired with the cream owl for a celestial nursery look.
Save This Pattern
Loved this cozy owl lovey? Save this pin now so you don’t lose it, and tag your finished project — I’d love to see your color choices! #FoodiePlumCrochet



