
The Best Fluffy Pancakes recipe you will fall in love with. Full of tips and tricks to help you make the best pancakes.

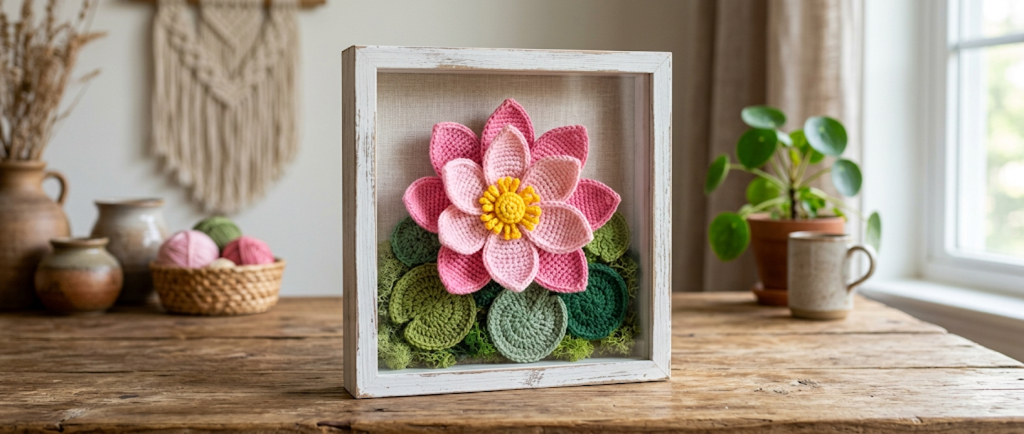
There’s something quietly magical about a lotus flower that never wilts. This crochet lotus flower wall art brings the serene, layered beauty of a pond in full bloom into a piece you can hang on your wall for years to come. Three full lotus blossoms in soft pink ombré yarn rise above a bed of rounded lily-pad leaves and a mossy base, all tucked inside a distressed white wood shadow-box frame for a dimensional, almost sculptural effect. Several smaller buds nestle between the open blooms, adding realism and visual rhythm to the arrangement.
This project is best suited to advanced crocheters who are comfortable working with fine yarn, shaping small pieces, and assembling multiple components into a cohesive final design. If you love botanical crochet, 3D floral art, or simply want a meaningful handmade piece for a living room, hallway, or nursery wall, this pattern is for you. It also makes a gorgeous personalized gift — lotus flowers symbolize rebirth, resilience, and purity, making this piece especially meaningful for new beginnings, graduations, or housewarmings.
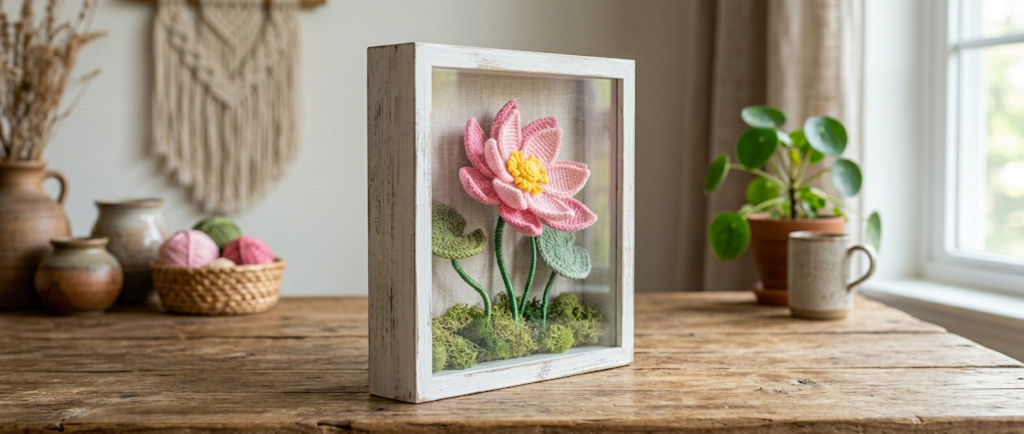
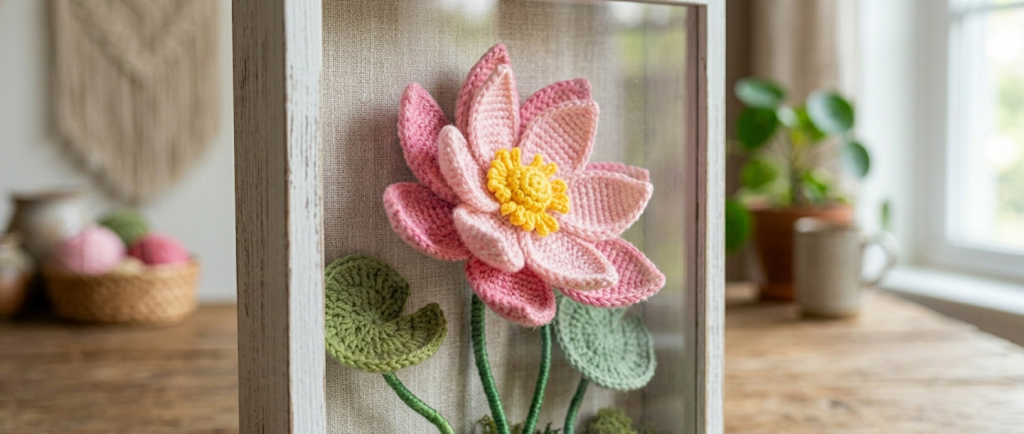
Unlike a flat crochet picture, every element here — petals, stamens, leaves, stems, and moss — is worked as its own small piece and then assembled into a three-dimensional arrangement. The wire-core stems let you bend and pose each flower exactly how you like before securing it permanently into the frame. The result is a piece that catches light and shadow differently throughout the day, just like a real lotus pond.
|
Difficulty
Advanced
|
Time
15–18 Hours
|
Hook Size
3.0mm
|
Yarn Weight
DK (#3)
|
Finished Size
25cm x 30cm
|
Gauge
16 sc x 18 rows = 10cm x 10cm square, worked in DK weight yarn with a 3.0mm hook. Because every piece in this pattern (petals, leaves, stamens) is a small shaped component rather than a garment, exact gauge is not critical — what matters most is keeping your tension consistent across all repeated pieces (all 18 petals, for example) so the finished flowers are uniform in size. Work a quick swatch to check that your stitches are firm and tight enough that stuffing and wire don’t show through.
Materials List
- DK weight (#3) yarn in Light Pink (60g)
- DK weight (#3) yarn in Medium Rose Pink (40g)
- DK weight (#3) yarn in Deep Pink (30g)
- DK weight (#3) yarn in Yellow (10g)
- DK weight (#3) yarn in Leaf Green (40g)
- DK weight (#3) yarn in Moss/Olive Green (30g)
- 3.0mm (US D/3) crochet hook
- Tapestry needle
- Stitch markers
- Small amount of polyester fiberfill (for flower centers)
- 18-gauge floral stem wire, cut into 9 lengths ranging from 10cm–20cm
- Wire cutters
- Hot glue gun and glue sticks
- A piece of craft foam or thick cardboard, cut to fit inside your frame’s recess (for anchoring stems)
- Sheet/craft moss (a small handful, for finishing the base)
- 8x10in (or similar) deep-set shadow box frame
Abbreviations Table
| Abbreviation | Meaning |
|---|---|
| ch | chain |
| sc | single crochet |
| hdc | half double crochet |
| dc | double crochet |
| sl st | slip stitch |
| st(s) | stitch(es) |
| rnd(s) | round(s) |
| MR | magic ring |
| sc2tog | single crochet 2 together (decrease) |
| sc3tog | single crochet 3 together (decrease) |
| inc | increase (2 sc worked into same stitch) |
| rep | repeat |
| sk | skip |
| RS | right side |
Pattern Instructions
Part 1: Small Petals (make 5, Light Pink) — for the innermost layer of each flower (15 total for 3 flowers)
Row 1: Ch 8, sc in 2nd ch from hook and each ch across, ch 1, turn (7 sts)
Row 2: 2 sc in first st, sc across to last st, 2 sc in last st, ch 1, turn (9 sts)
Row 3: Sc in each st across, ch 1, turn (9 sts)
Row 4: Sc2tog, sc across to last 2 sts, sc2tog, ch 1, turn (7 sts)
Row 5: Sc2tog, sc across to last 2 sts, sc2tog, ch 1, turn (5 sts)
Row 6: Sc2tog twice, sc 1 (3 sts)
Row 7: Sc3tog, fasten off leaving a 15cm tail for sewing (1 st)
Part 2: Medium Petals (make 6, Medium Rose Pink) — middle layer, 18 total
Row 1: Ch 10, sc in 2nd ch from hook and each ch across, ch 1, turn (9 sts)
Row 2: 2 sc in first st, sc across to last st, 2 sc in last st, ch 1, turn (11 sts)
Rows 3–4: Sc in each st across, ch 1, turn (11 sts, both rows)
Row 5: Sc2tog, sc across to last 2 sts, sc2tog, ch 1, turn (9 sts)
Row 6: Sc2tog, sc across to last 2 sts, sc2tog, ch 1, turn (7 sts)
Row 7: Sc2tog, sc across to last 2 sts, sc2tog, ch 1, turn (5 sts)
Row 8: Sc2tog twice, sc 1 (3 sts)
Row 9: Sc3tog, fasten off leaving a 15cm tail (1 st)
Part 3: Large Petals (make 7, Deep Pink for first 3 rows then change to Medium Rose Pink) — outer layer, 21 total
Work the first 3 rows in Deep Pink, then switch colors to create an ombré base-to-tip effect (change colors by working the last stitch of the row with the old color until 2 loops remain, then finishing the stitch with the new color).
Row 1: Ch 12, sc in 2nd ch from hook and each ch across, ch 1, turn (11 sts)
Row 2: 2 sc in first st, sc across to last st, 2 sc in last st, ch 1, turn (13 sts)
Rows 3–5: Sc in each st across, ch 1, turn (13 sts, all 3 rows; change to Medium Rose Pink after row 3)
Row 6: Sc2tog, sc across to last 2 sts, sc2tog, ch 1, turn (11 sts)
Row 7: Sc2tog, sc across to last 2 sts, sc2tog, ch 1, turn (9 sts)
Row 8: Sc2tog, sc across to last 2 sts, sc2tog, ch 1, turn (7 sts)
Row 9: Sc2tog, sc across to last 2 sts, sc2tog, ch 1, turn (5 sts)
Row 10: Sc2tog twice, sc 1 (3 sts)
Row 11: Sc3tog, fasten off leaving a 15cm tail (1 st)
Technique note: Don’t slip stitch to close these rows — leave the live tail and use the back of the petal to whip-stitch all petal bases together later. The natural curl of single crochet rows worked flat will make the petal edges cup slightly, which is exactly the effect you want.
Part 4: Flower Center / Stamen (make 3, Yellow)
Rnd 1: MR (magic ring: wrap yarn around your finger to form a loop, work stitches into the loop, then pull the tail to close the center hole tightly), 12 sc into ring, do not join — pull starting tail to close (12 sts)
Rnd 2: Ch 2, sl st back into the same stitch you just came from, sk next st — rep around to make 6 small loop “stamens” (6 loop sts)
Stuff lightly with a pinch of fiberfill, then fasten off and sew flat to close the back.
Part 5: Calyx Base (make 8 total — 3 for flowers, 5 for buds, Moss Green)
Rnd 1: MR, 5 sc into ring, pull tail to close (5 sts)
Rnd 2: Ch 4, sl st in next st around — 5 pointed sepals (5 sepal loops)
Fasten off, leaving a tail for attaching to the stem.
Part 6: Lotus Bud (make 5, Deep Pink, using the Small Petal pattern above)
Make 5 Small Petals per bud (25 total). Instead of laying them flat, curl each petal lengthwise so the edges meet, and whip-stitch the side edges of each petal closed to form a pointed cone shape. Overlap and stitch 5 cones together side by side around a central point to form a closed, unopened bud. Attach a Calyx Base (Part 5) to the bottom of the bud.
Part 7: Lily Pad Leaf (make 6: 3 large, 3 small, Leaf Green)
Small Leaf (make 3):
Rnd 1: MR, ch 1, 6 sc into ring (6 sts)
Rnd 2: 2 sc in each st around (12 sts)
Rnd 3: Sc 1, 2 sc in next st rep around (18 sts)
Rnd 4: Sc 2, 2 sc in next st rep around (24 sts)
Sl st to close, fasten off.
Large Leaf (make 3):
Work Rnds 1–4 as above, then continue:
Rnd 5: Sc 3, 2 sc in next st rep around (30 sts)
Sl st to close, fasten off.
Technique note: Once each disc is finished, use scissors to snip a single straight slit from the outer edge to about 1cm from the center. Overlap the two cut edges by about 1cm and stitch them together — this pulls the flat circle into the classic notched lily pad shape and gives the leaf a gentle natural cup.
Part 8: Stems (make 9: 3 long at 18cm, 3 medium at 14cm, 3 short at 10cm, Leaf Green)
Cut floral wire 2cm longer than your desired finished stem length (so you have a bit to anchor in the base later).
Rnd 1: MR, 6 sc into ring (6 sts)
Rnd 2 onward: Work in continuous spiral (do not join rounds — just keep crocheting around and around), sc in each st around (6 sts). Insert the wire down through the tube as you crochet, feeding it in a couple of centimeters at a time so it stays centered. Continue until the tube reaches your desired stem length.
Closing the tip: Sc2tog around (3 sts), pull yarn tail through remaining stitches and cinch tightly closed around the tip of the wire so no wire is exposed at the top.
Leave the extra 2cm of bare wire exposed at the base of each stem — this is what will anchor into your foam base.
Part 9: Moss Base (make 1, Moss/Olive Green)
Rnd 1: Ch 12, sc in 2nd ch from hook and next 9 ch (10 sts), 3 sc in last ch, sc in next 9 ch along the opposite side of the foundation chain (9 sts), 2 sc in last st, sl st to join to first sc (24 sts)
Rnd 2: Ch 1, work a loop stitch in each st around (loop stitch: wrap the working yarn twice around two fingers before inserting your hook into the next stitch, then pull through and secure with a sc — this creates a small fuzzy loop that mimics moss texture), sl st to join, fasten off (24 loop sts)
Assembly Steps
- Cut your craft foam or thick cardboard into an oval or rectangle that fits snugly inside the recessed area of your shadow box frame (most 8x10in shadow boxes have a recess of roughly 15cm x 20cm).
- Insert each wired stem’s exposed wire tip about 2cm deep into the foam base, spacing stems roughly 2–3cm apart and arranging them in a loose fan/cluster shape rather than a straight row. Secure each insertion point with a small dab of hot glue.
- Vary your stem heights for a natural look: place the 3 long stems (18cm) toward the back and center, the 3 medium stems (14cm) just in front of those, and the 3 short stems (10cm) toward the front edge.
- Glue 1 yellow Stamen Center (Part 4) into the middle of each set of petal layers to build your 3 full blooms: start with the 5 Small Petals overlapped around the stamen, then the 6 Medium Petals layered slightly behind and between the small ones, then the 7 Large Petals as the outermost ring. Whip-stitch the petal bases together as you layer, then glue the completed flower head to the top of a long or medium stem (insert the stem tip about 1.5cm into the base of the flower before gluing for stability).
- Glue a finished Calyx Base (Part 5) just beneath each flower head and bud, covering the join between the petals and the stem.
- Glue your 5 lotus buds to the remaining stems and tuck them between and beside the open blooms, at varying heights and angles for realism.
- Glue the Lily Pad Leaves around the base of the arrangement, angling them outward from the stems. Place the 3 large leaves toward the front and sides, and the 3 small leaves tucked further back, overlapping edges slightly so no foam shows through.
- Glue your finished Moss Base piece flat at the very front-bottom of the arrangement, then scatter and glue small tufts of sheet/craft moss across any remaining visible foam to finish covering the base.
- Once your glue is fully set (about 30 minutes), gently bend the wire stems into your preferred pose — slight curves and tilts read as far more natural than perfectly straight stems.
- Secure the finished foam base into the frame’s recess with hot glue or small screws from the back, then close up your frame backing and hang.
Beginner/Intermediate Tips
- When working the petal decrease rows, keep your tension slightly looser than usual — overly tight decreases will pucker the petal tip instead of tapering it smoothly to a point.
- Steam-block each petal (hold over a pot of simmering water for a few seconds, do not touch the fabric to the pot) before assembly. This relaxes the curl just enough to make layering and stitching far easier.
- Feed the wire into your stem tube every 2–3 rounds rather than all at once — this keeps the wire centered and prevents it poking through the side of the tube.
- Use stitch markers on your last stitch of each round when working the lily pad leaves in continuous rounds — it’s easy to lose track of where a round starts when there’s no slip-stitch join.
- Sew petals onto the stamen base from the back, working from the smallest inner petals outward, and don’t pull your sewing stitches too tight or the flower will cup inward instead of opening flat.
Variations
- Color swap: Try a white-and-yellow lotus for a serene, monochrome pond look, or a sunset orange-to-red ombré for a bold statement piece.
- Mini desktop version: Scale the petal chains down by 2–3 stitches and use a 2.5mm hook with fingering weight yarn to make a small-format piece for a 5x7in frame or shelf display.
- Vase arrangement: Skip the frame entirely and gather your finished stems into a small ceramic vase or jar for a freestanding floral display instead of wall art.
- Seasonal twist: Swap the leaf green for warm amber and rust tones, and add a few crocheted dried-leaf accents for an autumn pond version.
- Add detail accents: Crochet a tiny dragonfly or butterfly in coordinating yarn and glue it onto one of the leaves for extra charm and visual interest.
Save this pattern now so you don’t lose it in your feed — and tag your finished piece with #FoodiePlumCrochet so we can see your beautiful lotus bloom!



