
The Best Fluffy Pancakes recipe you will fall in love with. Full of tips and tricks to help you make the best pancakes.

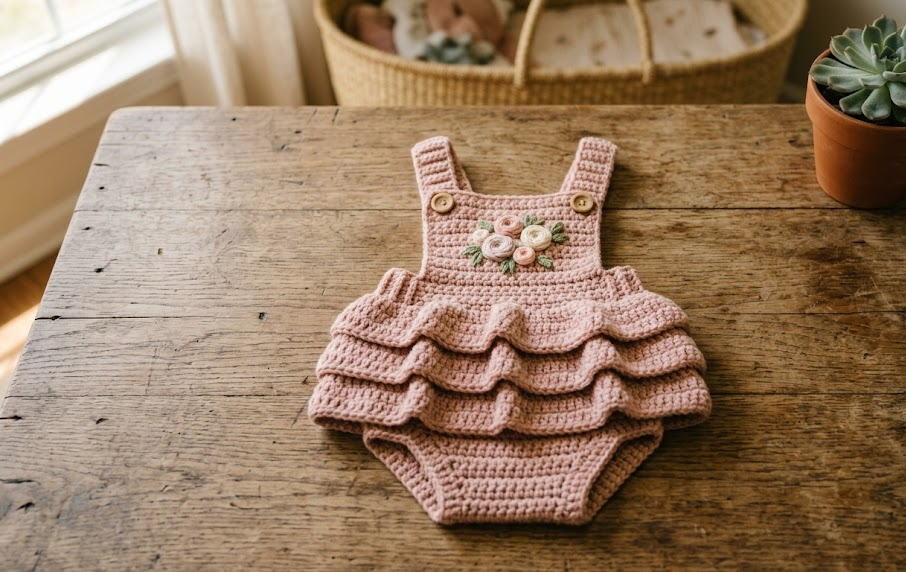
There’s something about a handmade baby romper that a store-bought outfit just can’t match. This Ruffled Rosette Baby Romper combines a snug ribbed bodice, adjustable button straps, and a cascading tiered ruffle skirt finished with delicate hand-embroidered rosettes. It’s the kind of piece that turns into a keepsake — perfect for newborn photos, baby showers, warm-weather outings, or a first birthday outfit that grandma will ask you to make again in every size.
This romper works up in a soft DK weight cotton yarn, which keeps it breathable and gentle against baby’s skin while still holding its shape through the ribbing and ruffle rows. The dusty pink colorway shown here has a vintage, boho feel, but the pattern is easily adapted to any color palette — see the variations section below for ideas. Whether you’re making this as a gift or for your own little one, the finished romper is soft, stretchy at the leg openings for easy diaper changes, and sized for a 0–3 month baby with room to size up.
This pattern is rated intermediate because of the ruffle shaping and embroidery work, but every stitch is standard and clearly explained, so a confident beginner who has mastered single crochet, half double crochet, and basic increases can absolutely complete it.
|
Difficulty
Intermediate
|
Time
7–9 Hours
|
Hook Size
3mm (D/3)
|
Yarn Weight
DK (Light Worsted)
|
Finished Size
0–3 Months
|
Gauge
- 20 sts x 22 rows = 10cm x 10cm (4in x 4in) in single crochet
- Hook used: 3mm (US D/3)
- Yarn used: DK weight (light worsted, category 3) cotton or cotton-blend yarn
- Always crochet a gauge swatch before starting. If your swatch is smaller than 10cm, go up a hook size. If it’s larger, go down a hook size. Getting gauge right ensures your romper fits true to the finished measurements listed below.
Finished Measurements
- Chest: approximately 40cm (16in), unstretched
- Total length (strap to leg opening): approximately 30cm (12in)
- Fits: 0–3 months (adjustable by adding rounds — see Variations)
Materials List
- DK weight cotton yarn, approximately 250g (about 500m/546yd) in Dusty Pink (main color)
- Small amount of cream/ivory DK yarn for rosette embroidery
- Small amount of sage green DK yarn for embroidered leaves
- Small amount of soft yellow DK yarn for flower centers
- 3mm (US D/3) crochet hook
- 6 wooden buttons, approximately 1.5cm diameter
- Yarn needle (blunt tip, for embroidery and weaving ends)
- Stitch markers (at least 4)
- Sewing needle and matching thread (to secure buttons, optional reinforcement)
- Scissors
Abbreviations Table
| Abbreviation | Meaning |
|---|---|
| ch | chain |
| sl st | slip stitch |
| sc | single crochet |
| hdc | half double crochet |
| dc | double crochet |
| inc | increase (2 sc in same stitch) |
| dec | decrease (invisible decrease) |
| BLO | back loop only |
| FLO | front loop only |
| st(s) | stitch(es) |
| rnd(s) | round(s) |
| row(s) | row(s) |
| sp | space |
| rep | repeat |
| MR | magic ring |
| RS | right side |
| WS | wrong side |
| yo | yarn over |
Technique notes for first-time use:
- Magic ring (MR): Wrap yarn around your fingers to form a loop, insert hook, and pull yarn through to work the first round of stitches into the loop before pulling the tail tight to close the center hole.
- Invisible decrease (dec): Insert your hook into the front loop only of the next two stitches, yarn over, and pull through both front loops, then complete as a normal single crochet — this keeps the decrease nearly invisible.
- Back loop only (BLO): Insert your hook under only the back loop of the stitch (the loop farthest from you) instead of both loops, which creates a visible ridge and adds stretch, ideal for the ribbed straps.
Pattern Instructions
Part 1: Bodice (worked flat, top-down)
Ch 41.
Row 1 (RS): Sc in 2nd ch from hook and each ch across (40 sc). Ch 1, turn. Row 2: Sc in each st across (40 sc). Ch 1, turn. Row 3: Sc 8, ch 2, skip 4 (armhole), sc 16, ch 2, skip 4 (armhole), sc 8 (32 sc + 4 ch worked as sts). Ch 1, turn. Row 4: Sc in each st and ch-sp across (36 sc). Ch 1, turn. Rows 5–8: Sc in each st across (36 sc). Ch 1, turn. Repeat for 4 rows total.
Fasten off. This forms the front and back bodice panel joined at the sides below the armholes.
Part 2: Straps (make 2)
With RS facing, join yarn at top corner of bodice.
Row 1: Ch 8, sc in 2nd ch from hook and across (7 sc). Ch 1, turn. Rows 2–14: Working in BLO, sc across (7 sc). Ch 1, turn. Repeat for 14 rows total (creates ribbed texture and stretch).
Fasten off, leaving a 20cm tail for attaching the strap to the back bodice later.
Part 3: Lower Body (worked in the round from bodice bottom edge)
Rnd 1: Join yarn at bottom edge of bodice, sc evenly around (44 sc), join with sl st to first st. Place marker in first st of each round going forward. Rnd 2: Ch 1, sc in each st around (44 sc). Rnd 3: Ch 1, *sc 10, inc; rep from * around (48 sc). Rnd 4: Sc in each st around (48 sc). Rnd 5: *Sc 11, inc; rep from * around (52 sc). Rnd 6: Sc in each st around (52 sc). Rnd 7: *Sc 12, inc; rep from * around (56 sc). Rnd 8: Sc in each st around (56 sc).
Fasten off.
Part 4: Leg Openings (make 2, worked after splitting for legs)
Rnd 1: Divide the 56 sts in half (28 sts for each leg). Join yarn at inner leg point, ch 2 (counts as underarm gap), sc around 28 sts of one leg, join with sl st (28 sc). Rnd 2: Ch 1, working in BLO for stretch, sc around (28 sc). Rnd 3: Ch 1, sc around (28 sc).
Fasten off. Repeat for second leg.
Part 5: Ruffle Tiers (make 3, worked directly onto lower body rounds 4, 6, and 8)
Ruffles are worked as an additional round of stitches into the front loops only (FLO) of the specified round, leaving the back loops free so the base fabric stays intact.
Ruffle Row (worked into FLO of anchor round): Ch 1, *2 hdc, 1 dc, 2 hdc in same st (shell); skip 1 st; rep from * around. Fasten off after each tier.
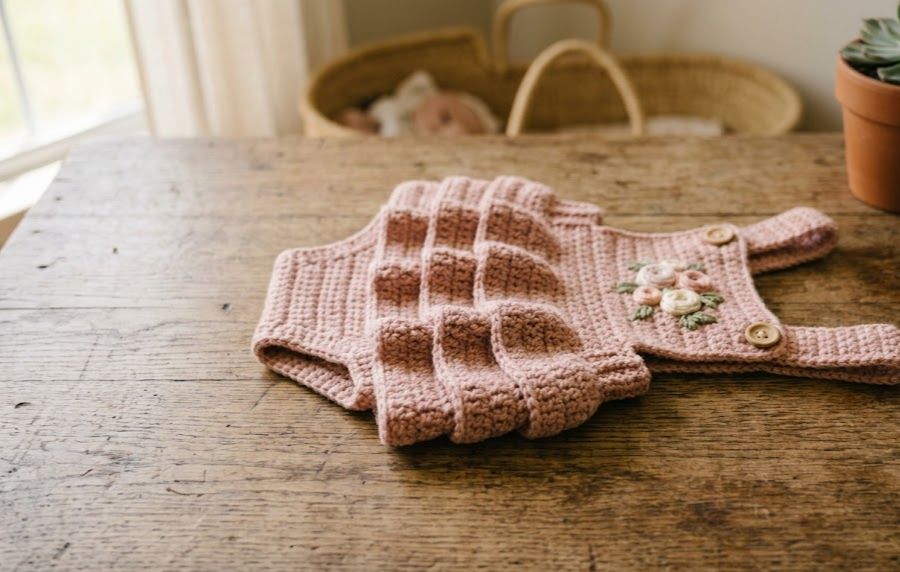
Attach one ruffle tier into the FLO of Rnd 4, one into the FLO of Rnd 6, and one into the FLO of Rnd 8, so the ruffles cascade down the lower body in three overlapping layers.
Part 6: Rosette Embroidery (make 8 clusters of 3 flowers each)
Using cream yarn and a yarn needle, work small lazy-daisy or French knot clusters (5–6 knots arranged in a circle) to form each rosette, about 1cm in diameter. Add a single yellow French knot in the center of each rosette. Using sage green yarn, embroider 2 small lazy-daisy leaf stitches beside each rosette cluster.
Placement: scatter rosette clusters across the bodice front (2 clusters) and across each ruffle tier (2 clusters per tier), spacing them roughly 4–5cm apart for a natural, scattered floral look, matching the reference photo.
Assembly Steps
- Lay the bodice flat and pin the two straps to the top back edge, spaced 8cm apart, so they can cross or sit straight over the shoulders.
- Sew straps securely using the yarn tail, weaving through both layers 3–4 times for durability, since this is a stress point on baby garments.
- Attach 2 wooden buttons to the top front bodice, 8cm apart, aligned with where the straps will fasten. Work a small ch-2 button loop at the strap ends to fasten over the buttons.
- Sew the side seams of the bodice from the underarm ribbon-gap down to where the lower body begins, using mattress stitch for a nearly invisible seam.
- Attach the 3 ruffle tiers as described in Part 5, working directly into the FLO of Rnds 4, 6, and 8. Each ruffle should hang approximately 2–3cm below the next, creating a cascading tiered effect.
- Attach the remaining 4 wooden buttons along the front bodice/lower body seam, spaced 3cm apart, for the decorative closure look shown in the reference photo.
- Complete the rosette embroidery as described in Part 6, before or after seaming — many crocheters find it easier to embroider before the leg seams are closed, while the fabric lies flat.
- Weave in all ends securely using a yarn needle, running each tail through at least 5cm of stitches to prevent unraveling with wash and wear.
- Block the finished romper by lightly steaming or wet-blocking to even out the ruffle tiers and stitch definition.

Beginner/Intermediate Tips
- When working the BLO rows on the straps, count your stitches at the end of every row — it’s easy to accidentally work into the wrong loop and lose stitch count.
- Use stitch markers on Rnd 1 of the lower body and move them up each round; the increase pattern is much easier to track when you can see where the round starts.
- Work your ruffle tiers with the base fabric folded slightly forward so you can clearly see the front loops you’re supposed to be working into.
- If your ruffles look too tight or curl inward, try going up half a hook size just for the ruffle rounds — this loosens the shell stitches so they lie flatter.
- Pin your rosette placement with locking stitch markers before embroidering so you can step back and check the spacing looks balanced.
Variations
- Sage Green Garden Romper: Swap the main color for sage green and use blush pink for the embroidered rosettes for a reversed, garden-inspired palette.
- Newborn Mini Size: Reduce the starting chain to 34 and work one fewer increase round in the lower body for a newborn (0–1 month) fit.
- Solid Ruffle, No Embroidery: Skip the rosette embroidery entirely for a faster, cleaner solid-color romper — great for a quicker weekend make.
- Two-Tier Ruffle Version: Omit the third ruffle tier and space the remaining two tiers evenly for a simpler silhouette that still keeps the boho charm.
- Sunshine Yellow with Daisies: Work the romper in soft yellow yarn and embroider white daisy-style rosettes with yellow centers for a cheerful summer version.
Save this pattern so you can come back to it anytime you’re ready to crochet your own Ruffled Rosette Baby Romper — tag your finished piece with #FoodiePlumCrochet so we can see your version!



