
The Best Fluffy Pancakes recipe you will fall in love with. Full of tips and tricks to help you make the best pancakes.

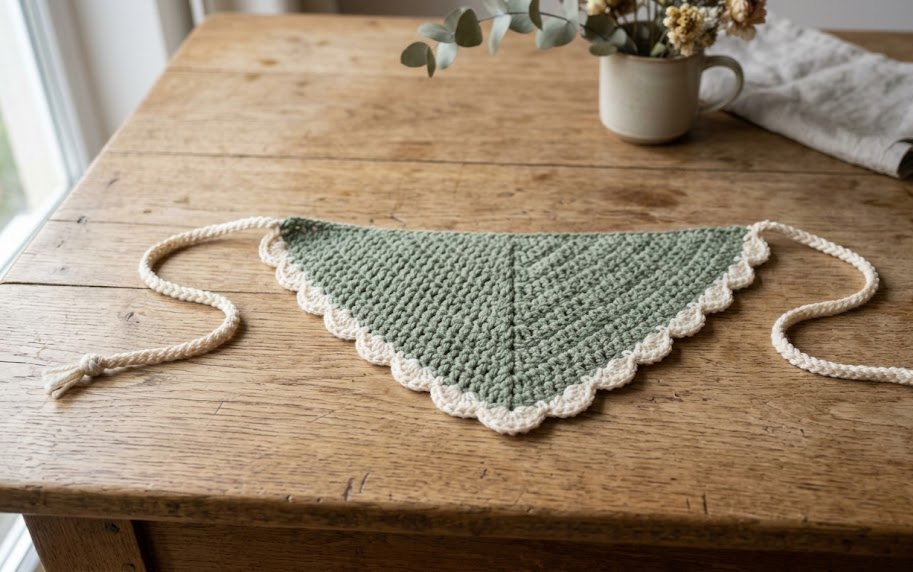
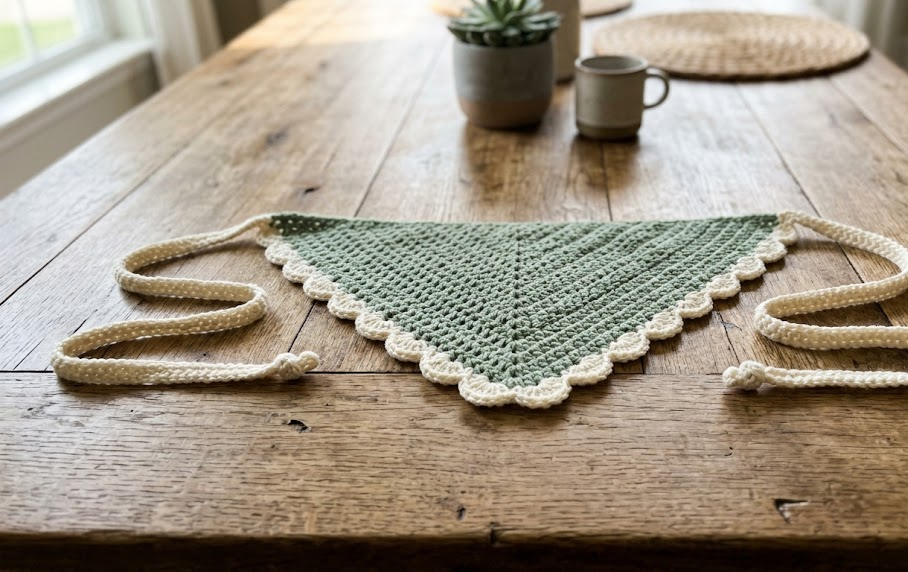
There’s something about a hand-crocheted bandana that instantly makes an outfit feel a little more intentional — a little more you. The Sage Meadow Bandana is a soft, textured triangle scarf worked in a rich sage green with a delicate cream scalloped edge and long ties that knot easily at the nape of the neck or under a low ponytail. It’s the kind of accessory that looks equally at home at a farmers market, a summer picnic, or layered under a wide-brim hat on a hike.
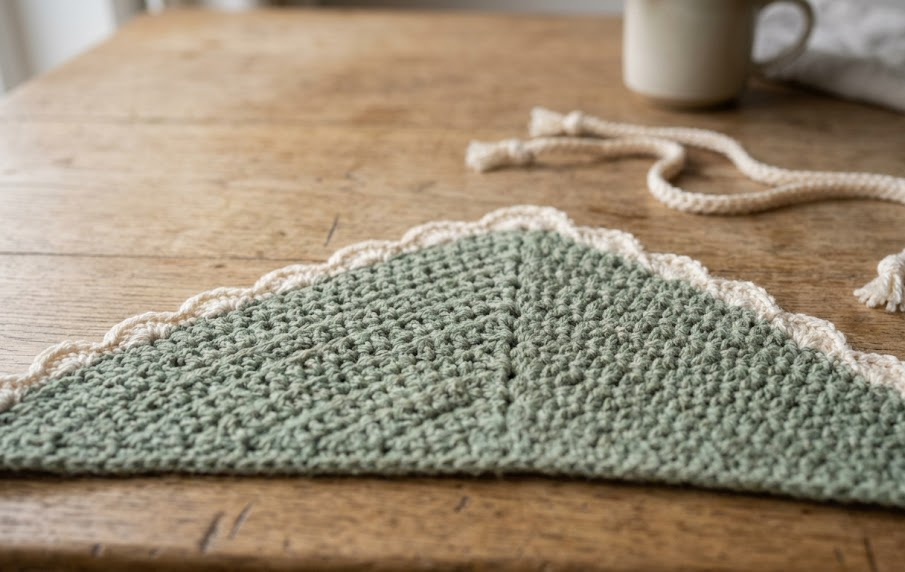
This pattern is written for both adults and kids, so you can make a matching set — one for you, one for your little one — using the same stitch pattern and just a shorter finished length for the child-size version. The body is worked in a simple, repeatable shell-and-chain increase that builds a soft, drapey triangle from the tip up, and the whole thing is finished off with a scalloped shell edge that gives it that lettuce-like, feminine border you see in the photos.
If you’re comfortable with basic double crochet, chain stitches, and slip stitches, you can make this in an evening or two. It’s a great confidence-building project if you’ve never worked a triangle shape before, since the increases happen in exactly the same spot every single row.
|
Difficulty
Intermediate
|
Time
3–4 hours
|
Hook Size
4mm (US G/6)
|
Yarn Weight
DK (Weight 3)
|
Finished Size
Adult: 58 x 33cm
Kid: 43 x 24cm |
Gauge
- 18 sts x 10 rows = 10cm x 10cm (4in x 4in) in shell/dc pattern, using a 4mm (US G/6) hook
- Gauge swatch: chain 20, work 10 rows in the main body pattern below, measure a 10cm square in the center of the swatch
- Exact gauge is not critical for this project, but if your triangle is coming out noticeably smaller or larger than expected, adjust your hook size up or down by 0.5mm
Materials List
- Sage green yarn — DK weight (Weight 3), approximately 250g (2 skeins) for adult size, 160g for kid size
- Cream yarn — DK weight (Weight 3), approximately 100g (1 skein) for adult size, 70g for kid size
- 4mm (US G/6) crochet hook
- Yarn needle (for weaving in ends)
- Scissors
- Stitch marker (optional, helpful for marking the corner space)
Abbreviations
| Abbreviation | Meaning |
|---|---|
| ch | chain |
| sl st | slip stitch |
| sc | single crochet |
| dc | double crochet |
| sp | space |
| st(s) | stitch(es) |
| rep | repeat |
| RS | right side |
| WS | wrong side |
| YO | yarn over |
| approx | approximately |
Pattern Instructions
Part 1: Main Triangle Body (Sage Green)
The body starts at the bottom point of the triangle and grows upward toward the neckline edge. Every row increases in exactly three places: the beginning, the center corner space, and the end.
Technique note — magic ring: A magic ring is an adjustable loop you crochet your first stitches into, then pull closed like a drawstring once your stitches are worked. It gives a tighter, neater center than chaining and joining, which matters here since this point will hang at the bottom of the finished bandana.
Row 1 (RS): Into magic ring, work 3 dc, ch 2, 3 dc. Do not join. Pull ring closed. Ch 3, turn. (6 dc)
Row 2: Ch 3 (counts as first dc here and throughout), dc in next 2 sts, (3 dc, ch 2, 3 dc) in the ch-2 corner sp, dc in last 3 sts, turn. (12 dc)
Row 3: Ch 3, dc in each dc to the corner ch-2 sp, (3 dc, ch 2, 3 dc) in sp, dc in each remaining dc, turn. (18 dc)
Rows 4 onward: Continue in this same pattern — ch 3, dc across to the ch-2 corner space, work (3 dc, ch 2, 3 dc) into that space, dc across to the end, turn. Every row adds exactly 6 sts to your total count.
- For the Adult size: work through Row 30. (180 dc)
- For the Kid size: work through Row 20. (120 dc)
Fasten off after your final row. This last row of stitches becomes the straight top/neckline edge.
Part 2: Neckline Finishing Row (Sage Green)
Row 31 (Adult) / Row 21 (Kid): Rejoin sage green at the first stitch of the top edge. Ch 1, sc in each dc across the top edge, turn. (180 sc for Adult / 120 sc for Kid)
Fasten off.
Part 3: Ties (Cream)
Technique note — chain tie: Working a plain chain and then reinforcing it with a row of slip stitches gives you a tie that’s sturdy enough to tie in a knot without stretching or splitting.
At each top corner of the neckline row:
- Join cream yarn with a slip stitch into the corner stitch.
- Ch 60 (Adult) or ch 45 (Kid).
- Sl st in the 2nd ch from hook and in each ch back across to the bandana corner. (59 sl st for Adult / 44 sl st for Kid)
- Sl st into the corner stitch to anchor. Fasten off, leaving a 10cm tail to weave in.
Repeat for the second corner.
Part 4: Scalloped Shell Edging (Cream)
This is worked along both diagonal side edges of the triangle (the row-end edges from the magic ring tip up to each top corner) plus the tip itself.
Round 1 (sc base row): Join cream at one top corner (next to where the tie is anchored). Sc evenly down the diagonal edge to the tip, working sc in a multiple of 3 sts so your scallop row divides evenly (approx 45 sc for Adult / approx 33 sc for Kid per side). Work 3 sc into the very tip stitch (the magic ring point) to turn the corner smoothly. Continue sc evenly back up the second diagonal edge to the other top corner. Do not fasten off. (approx 93 sc total for Adult / approx 69 sc total for Kid)
Technique note — “sc evenly spaced”: since row-ends aren’t uniform stitches like a straight row, you place sc slightly closer together or farther apart as needed so the edge lies flat rather than ruffling or puckering. Check every few sts that the edge isn’t cupping (too few sc) or wavy (too many sc).
Round 2 (scallop row): Ch 1, turn. *Skip 2 sc, work 5 dc in next sc (this is your shell/scallop), skip 2 sc, sl st in next sc; rep from * evenly all the way around, ending with a sl st into the first sc to close. (approx 15 scallops for Adult / approx 11 scallops for Kid)
Fasten off and weave in all ends.
Assembly Steps
- Weave in every yarn tail from the magic ring, color changes, and edging using a yarn needle, running each tail through at least 5cm of stitches to secure it.
- Lay the bandana flat and lightly steam-block it (hover a steam iron 3–5cm above the surface, never touching the yarn directly) to help the shell stitches open up and the edges lie flat. Let it dry completely before moving it.
- Check both ties are even in length — for the Adult size they should measure approximately 55cm each from the corner to the tip; for the Kid size approximately 42cm each.
- Try the bandana on (or on the intended wearer) with the point centered at the back of the neck and the two ties crossed and knotted at the nape, or brought forward and tied at the front for a headband-style look.
- Optional: add a small knot or tassel to the end of each tie by folding three 15cm strands of cream yarn in half and looping them through the last chain stitch of the tie.
Beginner/Intermediate Tips
- If you lose track of where your corner ch-2 space is, place a stitch marker directly in it before you finish each row — it makes the next row’s increase point instantly visible.
- Keep your chain-3 turning chain consistent in tension throughout, since this chain forms the entire diagonal edge of the triangle — loose turning chains will make one side visibly longer than the other.
- When working the scallop edging, count your base sc row before starting the shell row so you know it divides evenly by 3; if it doesn’t, add or remove 1–2 sc at the tip point (inside the 3-sc turn) to fix the count.
- DK weight yarn can vary a lot between brands — if your triangle is growing faster or slower than expected by row 10, measure your work against the finished measurements above and swap hook sizes if needed.
- Block your swatch, not just your finished piece, if you’re unsure about gauge — blocking changes how open the shell stitches sit.
Variations
- Ombre bandana — work the main triangle body in three shades of one color family, changing color every 8–10 rows for a gradient effect from dark at the tip to light at the neckline.
- Mini market bag topper — stop the body at Row 10 and skip the ties entirely; use the small triangle as a decorative flap sewn onto a market tote.
- Reversible two-tone — swap which color is the body and which is the trim (cream body, sage trim) to get a completely different look from the same pattern.
- Chunky weekend version — rework in a bulky weight yarn with a 6mm hook for a faster, cozier version perfect as a neck scarf in cooler weather.
- Beaded tie ends — thread 2–3 wooden or ceramic beads onto each tie before knotting the end, for a boho detail that catches the eye.
Save This for Later
If you’re planning to make this one, save this pin now so you don’t lose it in your feed — future-you will thank you the next time you need a quick, pretty handmade gift. Tag your finished bandana #FoodiePlumCrochet so we can see it!



