
The Best Fluffy Pancakes recipe you will fall in love with. Full of tips and tricks to help you make the best pancakes.

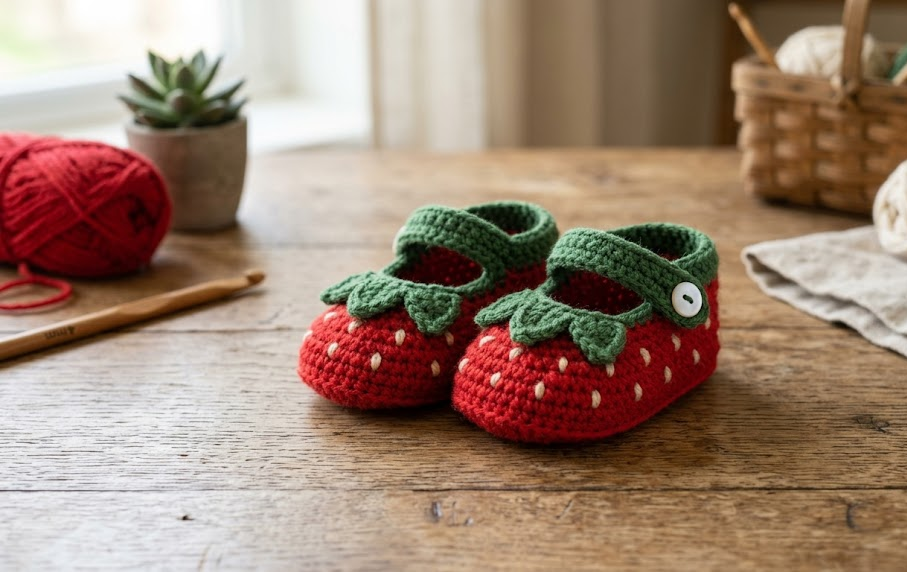
There’s something irresistible about tiny shoes, and when those tiny shoes look like ripe little strawberries, the cuteness factor multiplies tenfold. These Strawberry Mary Jane Baby Booties combine a classic Mary Jane silhouette with playful strawberry styling — a deep red body, a leafy green strap, and delicate cream dots scattered across the toe like strawberry seeds. Finished off with a dainty pearl button, these booties are as much a piece of wearable art as they are a practical baby accessory.
This pattern is perfect for spring and summer babies, strawberry-themed birthday parties, baby showers, or as a heartfelt handmade gift for a new parent. They work up in a soft fingering weight yarn, so they’re gentle against delicate newborn skin, and the compact size means each bootie is a satisfying weekend project rather than a multi-week commitment.
Because this pattern involves shaping a rounded toe, working a fitted heel, and adding a separate strap with button closure, it’s best suited to someone who already has basic crochet skills under their belt. If you can single crochet, increase, decrease, and follow a stitch count, you’re ready to tackle these. Let’s get into the details.
|
Difficulty
Intermediate
|
Time
3–4 hrs/bootie
|
Hook Size
2.75mm
|
Yarn Weight
Fingering/Sport
|
Finished Size
9cm x 5cm
|
Gauge
- 7 sts x 8 rows = 10cm x 10cm in single crochet (sc)
- Hook used for gauge: 2.75mm (C-2)
- Yarn used for gauge: Fingering/sport weight (light 2-3), 100% cotton or cotton-acrylic blend
Gauge matters more than usual here because these booties are sized to fit a real baby’s foot. Before starting, crochet a small swatch and measure it. If your swatch comes out smaller than 10cm, size up your hook. If it comes out bigger, size down. A snug, even fabric is what gives these booties their structured shoe-like shape rather than a floppy sock look.
Materials List
- Yarn: Fingering/sport weight cotton or cotton-blend yarn
- Red — approx. 25g (main bootie color)
- Moss/olive green — approx. 8g (trim and strap)
- Cream or off-white — small amount, less than 5g (seed dot accents)
- Hook: 2.75mm (C-2) crochet hook
- Notions:
- 2 small pearl or button-style beads (approx. 8mm) for closures
- Yarn needle for weaving in ends and embroidering seed dots
- Sewing needle and matching thread (for securing the button/pearl closure)
- Stitch markers (2–3)
- Small amount of fiberfill or scrap yarn (optional, for lightly shaping the toe while photographing or storing)
- Scissors
Abbreviations Table
| Abbreviation | Meaning |
|---|---|
| ch | chain |
| sc | single crochet |
| sc2tog | single crochet 2 together (decrease) |
| inc | increase (2 sc in same stitch) |
| st(s) | stitch(es) |
| rnd(s) | round(s) |
| sl st | slip stitch |
| BLO | back loop only |
| FLO | front loop only |
| MR | magic ring |
| rep | repeat |
| ( ) | stitch count at end of round/row |
Pattern Instructions
Part 1: Bootie Sole & Toe (make 2)
Note on Magic Ring: A magic ring (MR) lets you crochet into an adjustable loop and pull it tight afterward, closing any small hole at the center — this keeps the very tip of the toe neat.
Using red yarn:
- Rnd 1: MR, 6 sc into ring. Pull tight to close. (6)
- Rnd 2: Inc in each st around. (12)
- Rnd 3: Sc 1, inc in next st rep around. (18)
- Rnd 4: Sc 2, inc in next st rep around. (24)
- Rnd 5: Sc 3, inc in next st rep around. (30)
- Rnd 6: Sc in each st around. (30)
- Rnd 7: Sc in each st around, working in BLO (back loop only) for this round only. (30)
Technique Note — BLO: Working in the back loop only means you insert your hook under just the back strand of each stitch instead of both loops. This creates a visible ridge that marks the transition from the flat sole to the upright sides of the shoe, mimicking a shoe’s sole seam.
- Rnd 8–11 (sides of bootie): Sc in each st around, working in both loops as normal. Repeat this round 4 times total. (30 each round)
- Rnd 12 (heel shaping): Sc 15 sts (this covers the toe half, left un-shaped), then over the remaining 15 sts (heel half): sc2tog rep 7 times, sc 1. (23 total: 15 toe + 8 heel)
- Rnd 13: Sc in each st around. (23)
- Fasten off, leaving a long tail for seaming if needed. Weave in starting tail.
Part 2: Strawberry Seed Dots (Embroidery)
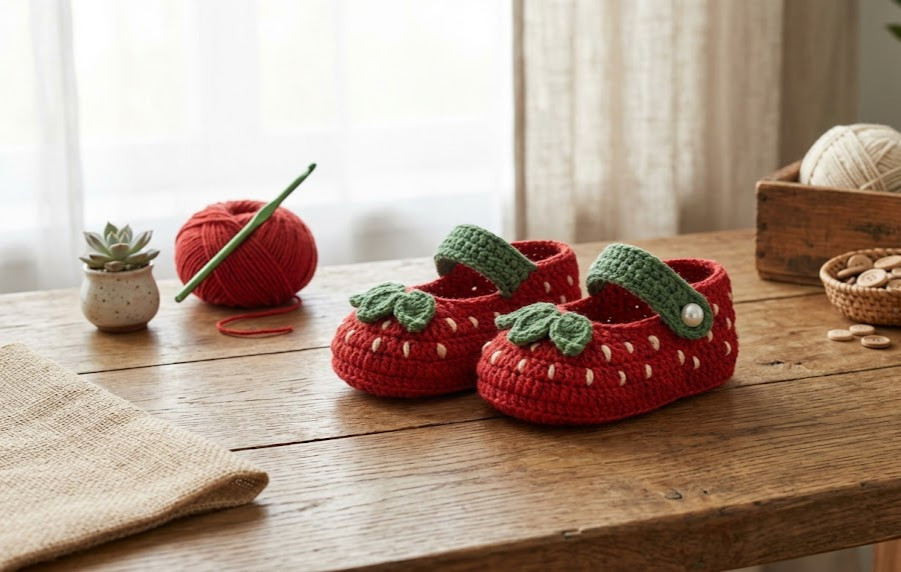
Using cream yarn and a yarn needle, embroider small straight stitches (about 0.5cm long) scattered across the toe and side panels of the bootie in a random, natural pattern — mimicking strawberry seeds. Space them roughly 1–1.5cm apart. Aim for 12–16 dots per bootie. Secure ends by weaving through nearby stitches on the inside of the work.
Part 3: Green Trim (Top Edge)
With the bootie still right-side out, join moss green yarn at the back of the heel in the last worked round (Rnd 13).
- Rnd 1: Sl st around the entire top opening of the bootie, working 1 sl st in each st. (23)
- Fasten off and weave in ends.
This trim defines the “shoe opening” line, just like the green calyx of a strawberry sitting atop the fruit.
Part 4: Mary Jane Strap
With moss green yarn:
- Row 1: Ch 14. (14 ch)
- Row 2: Starting in 2nd ch from hook, sc in each ch across. (13)
- Fasten off, leaving a 15cm tail on each end for attaching.
Technique Note — Second Side of Chain: Since this strap is worked flat in a single row rather than joined in a round, you only need to work into the top loops of your foundation chain — there is no “second side” to work back into for this piece, which keeps the strap thin and delicate.
Assembly Steps
- Weave in all loose ends on both booties except the strap tails.
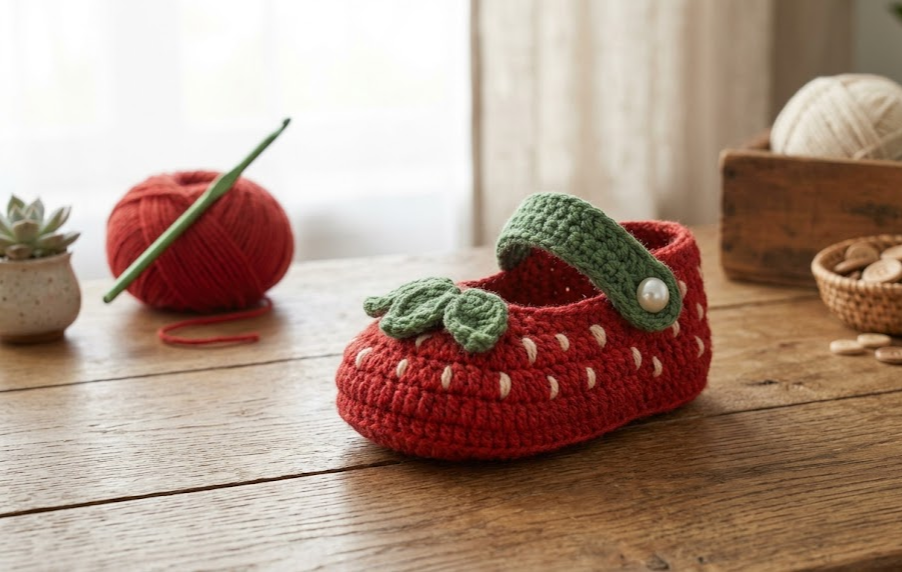
- Position the strap so it crosses diagonally over the top of the foot opening, starting from the inner side of the heel (near the green trim) and angling toward the outer side of the toe opening, similar to a real Mary Jane shoe.
- Using the strap’s tail yarn, stitch the straight end of the strap securely to the inner heel-side edge of the bootie opening, about 1cm down from the green trim.
- Bring the strap across the top of the foot opening and mark where it naturally overlaps on the outer side — this is your button placement point, typically 1.5–2cm from the outer edge of the opening.
- Sew a pearl bead or button securely at this marked point using sewing thread, stitching through both the strap and the bootie body for a firm hold.
- If your pearl doesn’t have a natural buttonhole loop in the strap, crochet a tiny loop (ch 4, sl st to close into a ring) at the strap’s end before attaching, then slip this loop over the pearl to fasten.
- Repeat strap and closure assembly on the second bootie, mirroring the strap direction so the pair matches (one strap angling left-to-right, the other right-to-left).
- Steam block lightly if the booties look uneven, gently shaping the toe rounded and the heel snug. Avoid direct heat on the pearls.
Beginner/Intermediate Tips
- When working the toe increases in Rounds 2–5, use a stitch marker on the first stitch of every round so you don’t lose track of where each round starts — this pattern shifts easily if you drift.
- The heel decrease round (Rnd 12) is the trickiest part. Count your first 15 stitches carefully before starting the sc2tog sequence, since this is what shapes the actual heel cup.
- If your seed-stitch embroidery looks too uniform, step back and look at the piece from a distance — real strawberry seeds cluster more toward the middle and thin out near the edges.
- Keep tension consistent in Rounds 6–11; loose sides make the bootie collapse instead of standing upright like a shoe.
- Attach the pearl button only after trying the strap position on the actual bootie opening — foot openings can vary slightly with tension, so don’t pre-measure the button spot in Row 4.
Variations
- Blueberry Version: Swap red for deep navy or blue-purple yarn, use the same green trim, and embroider dots in a darker charcoal for a blueberry-inspired bootie.
- Newborn Mini Size: Reduce all increase rounds by one repeat and shorten the side rounds (Rnds 8–11) to 2 repeats instead of 4 for a preemie or newborn fit.
- No-Strap Slipper Style: Skip the Mary Jane strap and button entirely, and instead add a simple ribbed cuff at the top opening using front-loop-only single crochets for a cozy slip-on strawberry slipper.
- Display Pair on a Mini Shelf: Stuff each bootie lightly with fiberfill through the opening and display them as a nursery decor set on a small floating shelf rather than as wearable items.
Save This Pattern
Loved these Strawberry Mary Jane Baby Booties? Save this pin now so you don’t lose it, and come back anytime you’re ready to crochet your own pair! #FoodiePlumCrochet



