The Best Fluffy Pancakes recipe you will fall in love with. Full of tips and tricks to help you make the best pancakes.
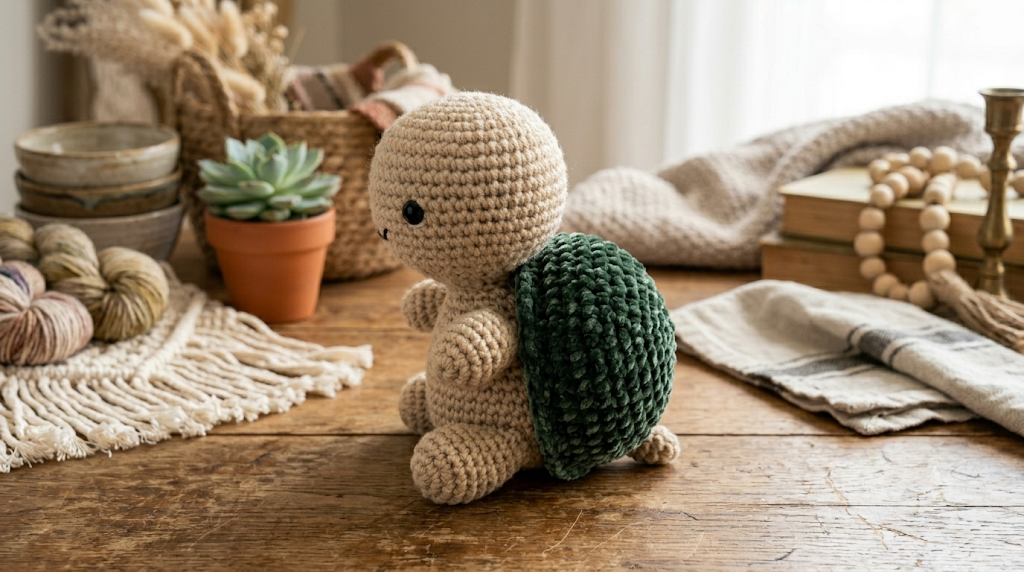
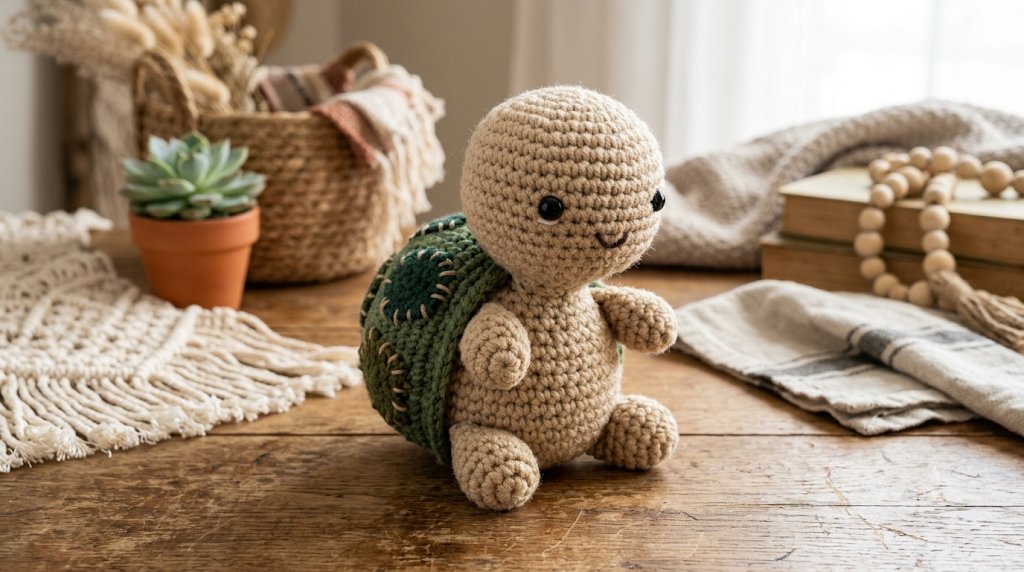
There is something irresistibly sweet about a chubby little crochet turtle that fits right in the palm of your hand. This baby turtle amigurumi is worked in soft, velvety chenille yarn, giving it that irresistible plush texture you’ve seen everywhere on crafting social media. With a round, oversized head, a domed shell dotted with green patches, and the tiniest pair of sleepy embroidered eyes, this little creature is equal parts adorable and achievable. Whether you are crocheting for a baby shower gift, a toddler’s toy box, a desk companion, or simply for the joy of making something cute, this pattern will not disappoint.
This pattern is genuinely beginner-friendly. If you can crochet in a magic ring, work single crochet stitches, and do basic increases and decreases, you have everything you need. The finished turtle stands approximately 12 centimetres tall when sitting upright and takes most crafters between three and five hours to complete from start to finish. The chenille yarn used here creates that satisfying bumpy texture without any complicated stitch work — the yarn does all the heavy lifting.
Read on for everything you need: materials, a full abbreviations table, the complete pattern broken into every individual part, assembly instructions, and tips to help you finish with a professional-looking result.
| Difficulty Beginner | Time 3–5 Hours | Hook Size 5.0 mm | Yarn Weight Bulky (#5–6) | Finished Size ~12 cm tall |
Gauge
Before beginning, crochet a small gauge swatch to ensure your finished turtle matches the intended size.
Work 11 single crochets across and 12 rows in single crochet using a 5.0 mm hook and bulky chenille yarn. Your swatch should measure approximately 10 cm x 10 cm. If your swatch is larger, try a 4.5 mm hook. If it is smaller, move up to a 5.5 mm hook.
Hook used: 5.0 mm
Yarn weight: Bulky / Super Bulky chenille (weight #5–#6)
Gauge is especially important in amigurumi because slightly loose tension creates floppy pieces that are difficult to stuff and assemble neatly.
Materials
Yarn:
- Colour A (Body/Head/Limbs): Tan or warm beige bulky chenille yarn — approximately 80–100 g
- Colour B (Shell): Dark forest green bulky chenille yarn — approximately 30–40 g
- Colour C (Shell patches): Medium green chenille or smooth DK yarn (for surface stitching or sewn patches) — small amount, approximately 10 g
Hook: 5.0 mm crochet hook
Notions:
- Two 10 mm black safety eyes (or two 12 mm if you prefer larger eyes)
- Polyester fiberfill stuffing
- Black embroidery floss or black yarn (for smile and eyelash detail)
- Yarn needle / tapestry needle
- Stitch markers (at least 2)
- Scissors
Abbreviations Table
| Abbreviation | Meaning |
|---|---|
| MR | Magic ring (adjustable ring): wrap yarn around two fingers, insert hook, pull up a loop and chain 1 to secure. This creates a tight, closeable centre for working rounds. |
| ch | Chain |
| sl st | Slip stitch |
| sc | Single crochet |
| inc | Increase: work 2 sc in the same stitch (adds 1 stitch) |
| dec | Invisible decrease: insert hook through front loop only of next stitch, then front loop only of the stitch after, pull up a loop, yarn over and pull through all loops. Creates a neater, less visible decrease than a standard sc2tog. |
| BLO | Back loop only: insert hook into the back loop of the stitch only rather than both loops. Creates a visible ridge on the surface. |
| FLO | Front loop only: insert hook into the front loop of the stitch only. |
| R | Round |
| st(s) | Stitch(es) |
| rep | Repeat |
| pm | Place marker |
| () | Stitch count at end of round |
Pattern Instructions
Part 1: Head
Using Colour A and a 5.0 mm hook.
R1: MR, 6 sc into ring, pull ring closed. (6)
R2: inc in each st around. (12)
R3: sc 1, inc rep 6 times. (18)
R4: sc 2, inc rep 6 times. (24)
R5: sc 3, inc rep 6 times. (30)
R6: sc 4, inc rep 6 times. (36)
R7–R10: sc in each st around. (36) [4 rounds even]
R11: sc 4, dec rep 6 times. (30)
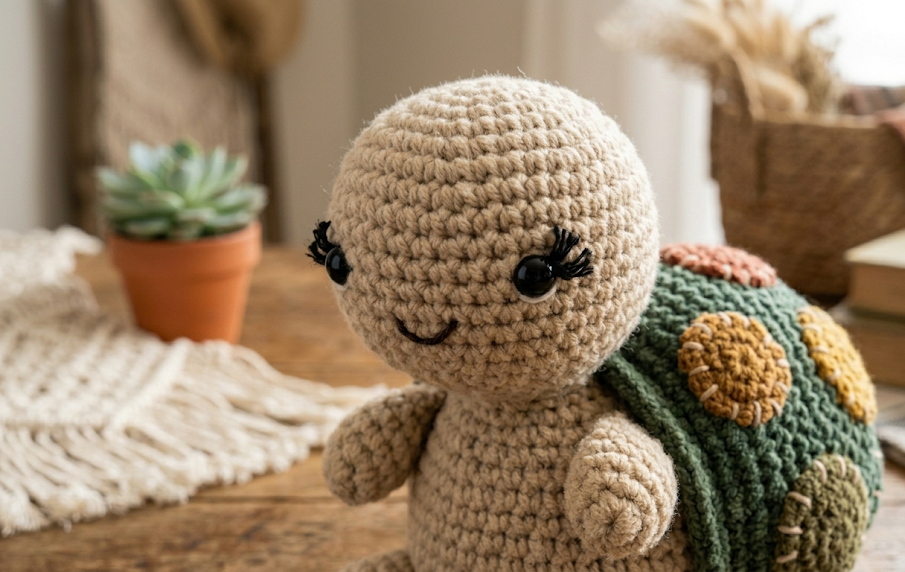
At this point, insert safety eyes between R7 and R8, spaced approximately 8–10 stitches apart (roughly 3–4 stitches from the centre front of the face). Secure backings firmly.
Using black embroidery floss, embroider a small curved smile just below and between the eyes. Use 2–3 satin stitches curved into a gentle U shape. Optionally, add 2–3 tiny straight stitches above each eye for eyelash detail, angling slightly outward.
R12: sc 3, dec rep 6 times. (24)
R13: sc 2, dec rep 6 times. (18)
Begin stuffing the head firmly with polyester fiberfill. Continue adding stuffing as you close.
R14: sc 1, dec rep 6 times. (12)
R15: dec 6 times. (6)
Cut yarn, leaving a long tail. Using yarn needle, weave through the front loops of remaining 6 stitches, pull tight to close, and fasten off. Weave in end.
Part 2: Body
Using Colour A and a 5.0 mm hook.
R1: MR, 6 sc into ring, pull ring closed. (6)
R2: inc in each st around. (12)
R3: sc 1, inc rep 6 times. (18)
R4: sc 2, inc rep 6 times. (24)
R5: sc 3, inc rep 6 times. (30)
R6–R10: sc in each st around. (30) [5 rounds even]
R11: sc 3, dec rep 6 times. (24)
R12: sc 2, dec rep 6 times. (18)
Stuff body firmly before closing.
R13: sc 1, dec rep 6 times. (12)
R14: dec 6 times. (6)
Close same as head. Fasten off, leaving a long tail for sewing.
Part 3: Shell (worked flat, then seamed)
The shell is worked in the round but shaped to create a slightly domed, flattened disc.
Using Colour B and a 5.0 mm hook.
R1: MR, 6 sc into ring, pull ring closed. (6)
R2: inc in each st around. (12)
R3: sc 1, inc rep 6 times. (18)
R4: sc 2, inc rep 6 times. (24)
R5: sc 3, inc rep 6 times. (30)
R6: sc 4, inc rep 6 times. (36)
R7: sc in each st around. (36)
R8: sc in BLO of each st around. Working in BLO here creates a visible ridge that defines the edge of the shell and gives it a slightly raised, domed effect.
R9–R10: sc in each st around. (36) [2 rounds even]
Do not stuff the shell. Leave a long tail for attaching to the body. The shell will be sewn flat against the top and back of the body.
Shell Patches (surface embellishment)
Using Colour C and a yarn needle, embroider or sew approximately 4–6 oval or irregular patches across the top surface of the shell. These should be scattered across R3 through R6. Each patch is approximately 1.5–2 cm in diameter. Work with loose satin stitches or chain stitch loops using Colour C directly onto the shell surface before assembly, as it is easier to embroider before the shell is attached.
Part 4: Front Legs (make 2)
Using Colour A and a 5.0 mm hook.
R1: MR, 6 sc into ring, pull ring closed. (6)
R2: inc in each st around. (12)
R3–R5: sc in each st around. (12) [3 rounds even]
R6: dec 6 times. (6)
Lightly stuff. Cut yarn, leaving a long tail. Weave through front loops of remaining 6 sts to close. Do not fasten off — leave tail for sewing.
Part 5: Back Legs (make 2)
Using Colour A and a 5.0 mm hook.
R1: MR, 6 sc into ring, pull ring closed. (6)
R2: inc in each st around. (12)
R3–R4: sc in each st around. (12) [2 rounds even]
R5: dec 6 times. (6)
Close and leave tail as for front legs. Back legs are slightly shorter and rounder than front legs.
Part 6: Tail (optional but recommended)
Using Colour A and a 5.0 mm hook.
R1: MR, 4 sc into ring, pull ring closed. (4)
R2: sc 1, inc rep 2 times. (6)
R3: sc in each st around. (6)
Do not stuff. Close and leave tail for sewing.
Assembly Steps
- Attach head to body. Place the head on the top front of the body, with the flat closed bottoms of each piece touching. The head should sit at a slight forward tilt — angle it so the face looks slightly upward (approximately 15–20 degrees from vertical). Pin in place. Using the long tail from the head, sew around the perimeter, going through the stitches of both pieces. Stitch at least twice around for security. The neck joint should be approximately 2–2.5 cm in diameter.
- Attach shell. Centre the shell on the back of the body, covering approximately two-thirds of the body’s surface. The ridge created by R8 (BLO round) should face outward. Pin the shell in place. Sew down using the long tail, stitching through the outer edge of the shell (approximately every other stitch) and into the body beneath. Do not pull so tight that the shell puckers.
- Attach front legs. Position one front leg on each side of the body, just below where the head attaches (approximately 1.5–2 cm below the neck seam). The open tops of the legs should be flush against the body. Sew each leg on firmly using its yarn tail, stitching around the full circumference. The front legs should point slightly outward and slightly forward.
- Attach back legs. Position one back leg on each lower side of the body, approximately 2–2.5 cm above the bottom seam. Sew on in the same manner as front legs. Back legs should angle slightly outward and slightly downward so the turtle can sit stably.
- Attach tail. Sew the tail to the centre back bottom of the body, just above the base. It should protrude approximately 1.5 cm.
- Final check. Gently tug all limbs to ensure secure attachment. If any pieces feel loose, reinforce with additional stitching. Weave in all remaining yarn tails securely inside the body.
Beginner and Intermediate Tips
Magic ring tension: Pull the magic ring tight before joining. A loose magic ring leaves a hole at the centre of the head and body that stuffing will poke through. After completing R2, tug the yarn tail to fully close the ring.
Stuffing density: Overstuffing the head and body creates a rounder, more polished result. Push stuffing into the piece in small amounts and use the blunt end of a crochet hook or pencil to push stuffing into the far edges before you close.
Invisible decrease: Always use the invisible decrease (both front loops) rather than a standard sc2tog. The standard decrease creates a visible ridge that shows through chenille yarn. The invisible decrease disappears completely.
Chenille and stitch visibility: Chenille yarn makes it harder to see individual stitches. Use stitch markers at the beginning of every round without exception, as it is easy to lose count. Count stitches at the end of every round against the number given in parentheses.
Safety eyes in chenille: Push safety eyes through firmly and make sure the backing is fully snapped. Chenille fibres can cushion the backing and prevent it from locking — press hard until you hear a distinct click.
Embroidering the face: Stretch the head over your hand or a round object (like a small ball) while embroidering. This keeps the fabric taut and helps you place the smile symmetrically.
Sewing the shell: Thread your needle with a matching Colour B yarn. Sew in a circular motion around the shell edge, taking one stitch in the shell edge and one stitch in the body beneath. This creates an invisible seam that looks like the shell grew in place.
Variations
1. Tiny Newborn Turtle: Use fingering weight yarn and a 2.5 mm hook to create a miniature version approximately 5–6 cm tall. Works beautifully as a keychain charm or a jewellery tag.
2. Ocean Colour Palette: Swap Colour A to a dusty blue-grey and Colour B to a deep teal for a sea turtle inspired by the ocean floor. Add Colour C patches in turquoise for a tropical reef look.
3. Shell Accessory Turtle: Before closing the shell, insert a small dried flower, a tiny crystal, or a folded note before sewing it closed, creating a secret treasure shell. Works beautifully as a mindfulness gift.
4. Turtle Family Set: Make the standard pattern for a mama turtle, reduce each round count by one increment for a baby turtle (body stops at R4 instead of R5), and make a tiny hatchling stopping at R3 on all parts. Style as a nesting trio for a shelf display.
5. Seasonal Turtle: Use autumn-toned yarn in burnt orange and rust for a Halloween tortoise, or white and silver chenille with a sparkle yarn shell for a winter edition.
6. Weighted Comfort Turtle: Fill the body with a small drawstring bag of poly pellets before closing (keeping fibrefill around it for shape). The gentle weight makes it a soothing sensory object for children or adults.
Save this pattern for later! Pin it to your crochet boards and tag your finished turtle with #FoodiePlumCrochet — we would love to see your little shelled friend. 🐢