
The Best Fluffy Pancakes recipe you will fall in love with. Full of tips and tricks to help you make the best pancakes.

Intro
There is nothing more heartwarming than dressing a little one in something made entirely by hand. If you love timeless, bohemian children’s wear, these Crochet Granny Square Baby Overalls are about to become your favorite project. Combining vintage charm with a modern, earthy color palette of sage green, cream, and soft beige, this heirloom-quality piece is both stylish and comfortable for active babies.
Designed for a 6–12 month size, these overalls utilize classic granny squares stitched together strategically to form adorable pants, a sturdy bib, and functional cross-back shoulder straps. Because it’s made from lightweight, breathable yarn, it is perfect for layering over bodysuits in autumn or wearing solo during mild spring days. This comprehensive pattern provides everything you need to craft this gorgeous outfit smoothly from start to finish.
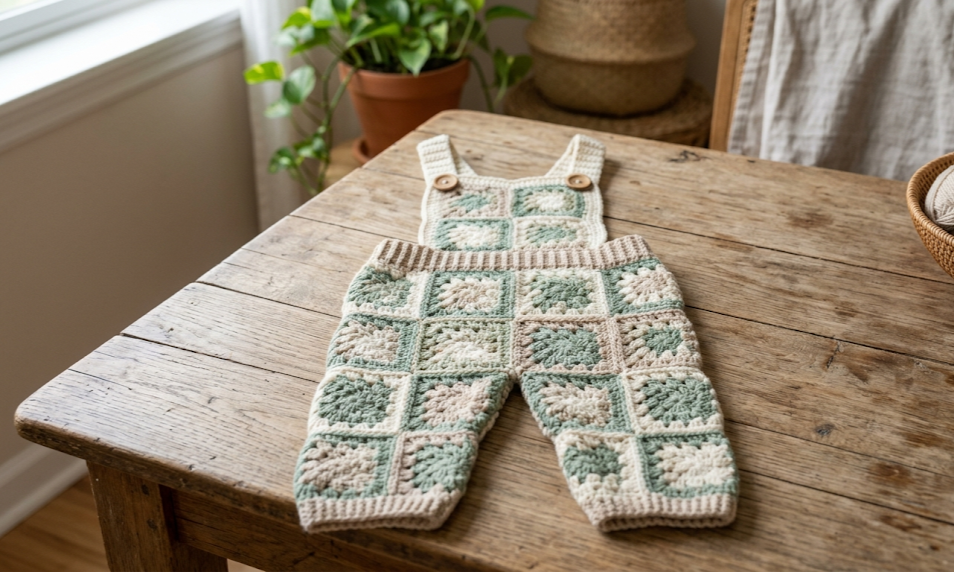
| Difficulty Intermediate | Time 10-12 Hours | Hook Size 4.0 mm | Yarn Weight DK (Weight 3) | Finished Size 6-12 Months |
Gauge
To ensure your overalls fit a 6–12 month baby perfectly, matching gauge is essential.
- Yarn Weight: DK (Weight 3)
- Hook Size: 4.0 mm (US G/6)
- Swatch Dimensions: A completed 4-round granny square must measure exactly 9 cm x 9 cm (3.5 in x 3.5 in).
- Standard Stitch Gauge: 16 double crochets and 9 rows = 10 cm x 10 cm square.
Materials List
- Yarn: DK / Light Worsted Weight (100% Cotton or Premium Acrylic blend; approx. 120m per 50g ball)
- Color A: Sage Green (3 balls / 150g)
- Color B: Cream (2 balls / 100g)
- Color C: Tan/Beige (2 balls / 100g)
- Crochet Hook: 4.0 mm (US G/6) or size needed to obtain gauge
- Notions:
- Yarn needle for weaving ends and sewing squares
- 4 Wooden Buttons (1.5 cm diameter)
- 4 Stitch markers
- Scissors
- Measuring tape
Abbreviations Table
| Abbreviation | Stitch Name / Meaning |
| ch | Chain |
| sl st | Slip Stitch |
| sc | Single Crochet |
| hdc | Half Double Crochet |
| dc | Double Crochet |
| MR | Magic Ring |
| sp | Space |
| ch-sp | Chain Space |
| st(s) | Stitch(es) |
| rnd | Round |
| row | Row |
| BLO | Back Loop Only |
Pattern Instructions
1. The Classic Granny Square (Make 22 Total)
Make 8 squares starting with Sage Green, 7 starting with Cream, and 7 starting with Tan. Alternate colors every round according to your preference to achieve a balanced patchwork design.
Technique Note (Magic Ring): Wrap the yarn around your fingers to create a loop, cross the working yarn over, insert your hook under the first strand, pull up a loop of the working yarn, and chain 1 to secure the ring before working stitches into it.
Rnd 1: Begin with a MR. Ch 3 (counts as first dc here and throughout), 2 dc into ring, ch 2. [3 dc into ring, ch 2] 3 times. Join with sl st to top of starting ch-3. Pull MR tight to close. Fasten off. (12 dc, 4 ch-2 corner spaces)
Rnd 2: Attach next color in any ch-2 corner sp. Ch 3, (2 dc, ch 2, 3 dc) in same corner sp. *Ch 1, skip next 3 dc, (3 dc, ch 2, 3 dc) in next corner ch-sp; repeat from * twice more. Ch 1, join with sl st to top of starting ch-3. Fasten off. (24 dc, 4 ch-2 corner spaces, 4 ch-1 spaces)
Rnd 3: Attach next color in any ch-2 corner sp. Ch 3, (2 dc, ch 2, 3 dc) in same corner sp. *Ch 1, skip next 3 dc, 3 dc in next ch-1 sp, ch 1, (3 dc, ch 2, 3 dc) in next corner ch-sp; repeat from * twice more. Ch 1, skip next 3 dc, 3 dc in next ch-1 sp, ch 1, join with sl st to top of starting ch-3. Fasten off. (36 dc, 4 ch-2 corner spaces, 8 ch-1 spaces)
Rnd 4: Attach next color in any ch-2 corner sp. Ch 3, (2 dc, ch 2, 3 dc) in same corner sp. *(Ch 1, skip next 3 dc, 3 dc in next ch-1 sp) twice. Ch 1, (3 dc, ch 2, 3 dc) in next corner ch-sp; repeat from * twice more. (Ch 1, skip next 3 dc, 3 dc in next ch-1 sp) twice, ch 1, join with sl st to top of starting ch-3. Fasten off and weave in all ends securely. (48 dc, 4 ch-2 corner spaces, 12 ch-1 spaces)
2. The Bib
The bib is worked flat in rows directly onto two joined squares from the front waist.
Row 1: Attach Sage Green to the top right corner of the front waistband squares. Ch 3 (counts as dc), dc in each st across the top edge of the two front squares. Turn. (36 dc)
Row 2: Ch 3, dc in each st across. Turn. (36 dc)
Row 3–6: Repeat Row 2. Fasten off at the end of Row 6. (36 dc)
Row 7 (Edging): Attach Cream to the bottom side corner of the bib. Sc evenly up the side of the bib rows, 3 sc in the corner st, sc in each st across the top edge of Row 6, 3 sc in the opposite corner st, and sc evenly down the left side of the bib rows. Fasten off. (Stitch count varies, approx. 72 sc)
3. Straps (Make 2)
Straps are worked flat in rows using Sage Green.
Technique Note (BLO): Insert your hook only into the back loop of the stitch (the loop furthest away from you) to create a ribbed, stretchy texture.
Row 1: Ch 7. Sc in 2nd ch from hook and in each ch across. Turn. (6 sc)
Row 2: Ch 1, sc in BLO of each st across. Turn. (6 sc)
Row 3–40: Repeat Row 2 until strap measures 25 cm from the beginning. Do not fasten off. (6 sc)
Row 41 (Buttonhole Row): Ch 1, sc in BLO of first 2 sts, ch 2, skip 2 sts, sc in BLO of last 2 sts. Turn. (4 sc, 1 ch-2 space)
Row 42: Ch 1, sc in BLO of first 2 sts, 2 sc inside the ch-2 space, sc in BLO of last 2 sts. Turn. (6 sc)
Row 43–45: Repeat Row 2. Fasten off, leaving a long tail for sewing. (6 sc)
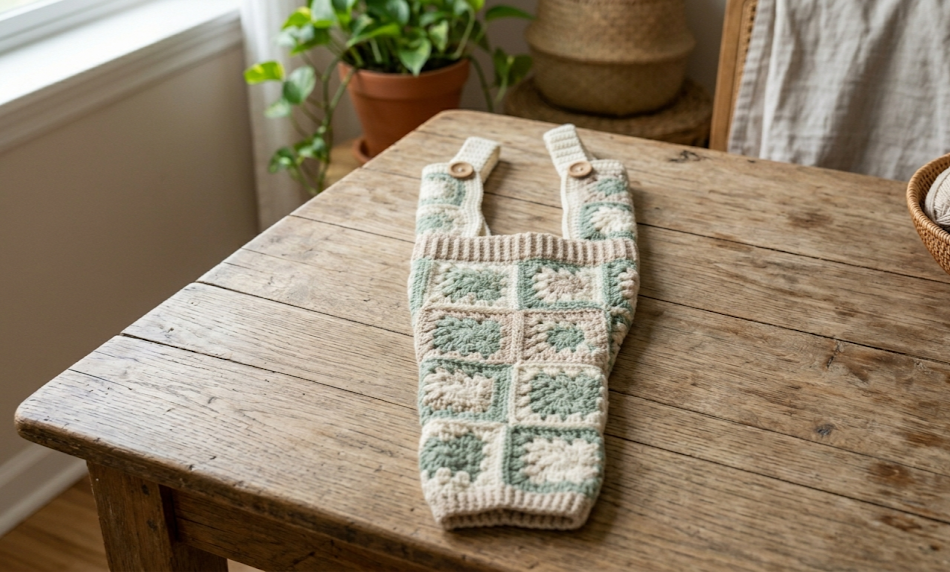
4. Leg Cuffs (Make 2)
Cuffs are worked in rounds at the base of the legs after assembly.
Rnd 1: With Sage Green, attach yarn to the bottom inseam of the assembled leg. Ch 2 (does not count as st), hdc evenly around the bottom openings of the joined squares. Join with sl st to first hdc. (36 hdc)
Rnd 2: Ch 2, *fpdc (front post double crochet) around next st, bpdc (back post double crochet) around next st; repeat from * around. Join with sl st to first st. (36 sts)
Rnd 3–5: Repeat Rnd 2 to establish a sturdy ribbed cuff. Fasten off. (36 sts)
Assembly Steps
- Layout the Patchwork: Lay out your squares to form the body and legs. Each leg consists of a cylinder made from 8 squares arranged in a 2×4 grid. The torso uses 6 remaining squares (3 for the front waist below the bib, 3 for the back).
- Join the Body Squares: Working with a yarn needle and Sage Green yarn, hold two squares with right sides facing together. Whipstitch through the back loops only to create a completely flat, flexible seam. Repeat this process until all panels are joined into a trouser shape.
- Attach the Bib: Align the bottom edge of the bib to the top center of the front two waistband squares. Use a flat slip-stitch join across the waistline to attach it seamlessly.
- Position and Sew Straps: Pin the raw edge (the end without the buttonhole) of the straps to the back waistband squares, spacing them exactly 12 cm apart. Sew securely using a mattress stitch over a depth of 3 cm for reinforcement. Cross the straps at the back before pinning.
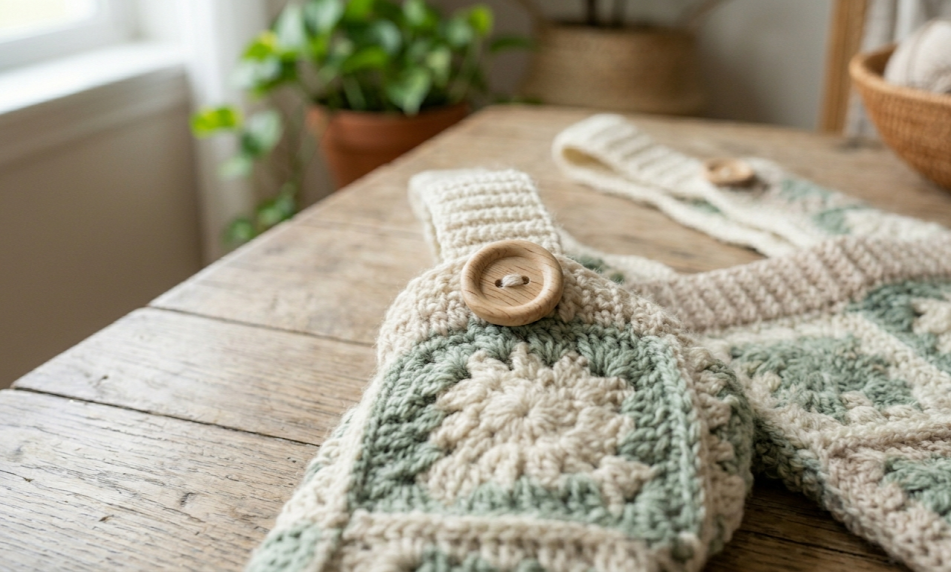
- Attach Buttons: Position two wooden buttons at the top outer corners of the front bib, and two additional buttons on the front waistband corners to securely close the overall sides. Sew firmly with a yarn needle.
Beginner/Intermediate Tips
- Consistent Tension: Because this garment relies entirely on geometric squares joining perfectly, keep your tension uniform across all 22 granny squares. A tight square mixed with a loose square will warp the shape of the pants.
- Weave Ends as You Go: Patchwork projects leave dozens of loose yarn tails. Weave them into the stitches after completing each square to save hours of finishing work at the end.
- Blocking is Your Friend: Before whipstitching your squares together, lay them out and steam-block them gently. This straightens the edges, corrects minor sizing differences, and makes sewing infinitely easier.
Variations
- The Monochrome Palette: Swap out the patchwork look for a modern, solid pastel pink or dusty blue with cream borders for a classic baby shower gift look.
- Shortalls Option: Perfect for summer! Simply omit the lower rows of squares on the legs, stopping after a 2×2 square layout, and add the ribbing directly to create a shortall silhouette.
- Matching Cardigan Add-on: Use your leftover Sage Green yarn to work simple double crochet rows into a classic hexagonal baby cardigan to match the overalls beautifully.
- Brimmed Sunhat Set: Use the exact granny square pattern to make 5 extra squares, join them in a crown pattern, and add a wide double crochet brim for a coordinated boho outdoor set.
Pinterest CTA
Love this design? Pin it to your favorite crochet board so you can craft it later! Don’t forget to share your finished overalls on Instagram and tag your work with #FoodiePlumCrochet so we can feature your gorgeous stitches!



